インストール・動作環境設定XAMPPのインストール
- XAMPPをWindows7にインストール
- PHPのphp.iniの設定〔PHPファイルの文字コードの設定〕
- PHPのphp.iniの設定〔XAMPPでcURLとopenSSLを使えるようにする〕
- Apacheのhttp.confの設定〔バーチャルホスト〕
XAMPPをWindows7にインストール
2013/2/3
ここではWindows 7に、「XAMPP for Windows」をインストールする方法を解説します。
2013年2月3日時点の最新版は「1.8.1」です。
「XAMPP」は、Apacheサーバー、PHP、phpMyAdmin、MySQLなどをパソコンに一括インストールすることができるソフトウェア。 個別にインストールすると手間がかかりますが、XAMPPなら15分もあれば環境が構築できてしまいます。
cURLやopenSSLの設定もphp.iniのエクステンションを有効にするだけなので、変に苦労しないですみます。
XAMPPの入手
- インストーラを入手
XAMPPの公式サイトから、「XAMPP Windows版 1.8.1」の「インストーラ」リンクをクリックし、
 をダウンロードします。

- インストーラを起動
ダウンロードしたEXEファイルをクリックします。
インストーラが起動したら【NEXT】ボタンをクリックします。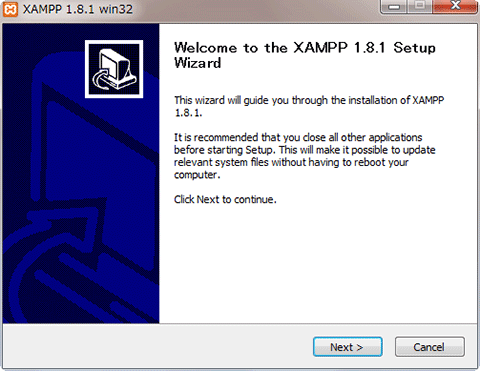
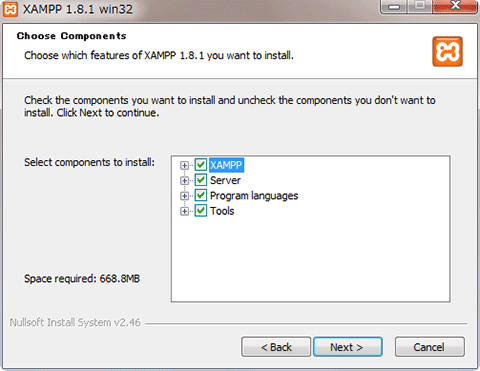
- インストールするコンポーネントの選択
デフォルトのままでよければそのまま【Install】ボタンをクリック。
- インストール先を選択
デフォルトのままでよければそのまま【NEXT】ボタンをクリック。
※インストール先を変更する場合は【Browser】ボタンをクリックしてディレクトリを選択。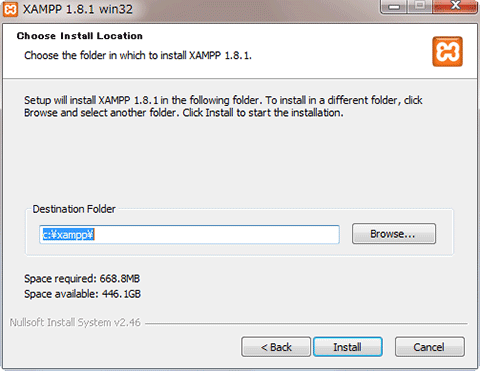
- インストール選択
インストールが完了したら、【Finish】ボタンをクリック。以上で、インストールは完了です。
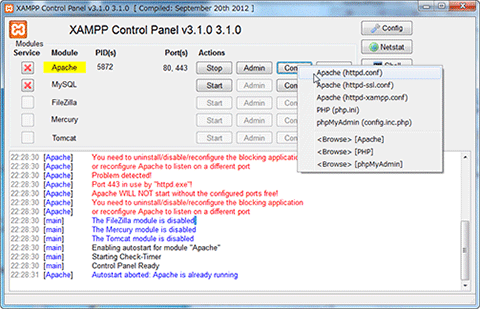
- コントロールパネルを開始
XAMPPのインストールディレクトリにある「xampp-control.exe」をクリックすると、下図のようなコントロールパネルが表示されます。 コントロールパネルでは、各種サービスの状態を確認したり、起動・停止、設定ファイルの編集などが行えます。
「http://127.0.0.1」、または「http://localhost」 にアクセスし、XAMPP for Windowsページが表示されればインストール成功です。
⇒ 必要に応じてphp.iniの設定を行ってください。
PHPのphp.iniの設定
PHPファイルの文字コードの設定
2013/2/3
XAMPPのインストールが完了したら、必要に応じてphp.iniの設定を行います。
php.iniは、デフォルトで「C:\xampp\php\php.ini」にあります。
PHPファイルの短縮に設定する
デフォルトではOffになっています。
Offの場合は、<? ?>で記述されいるものはPHPコードとして認識されません(<?php ?>としないといけない)。<? ?>でPHPコードを認識させたい場合は「On」にしてください。
php.iniファイルの214行目あたり
; This directive determines whether or not PHP will recognize code between
;  tags as PHP source which should be processed as such. It's been
; recommended for several years that you not use the short tag "short cut" and
; instead to use the full  tag combination. With the wide spread use
; of XML and use of these tags by other languages, the server can become easily
; confused and end up parsing the wrong code in the wrong context. But because
; this short cut has been a feature for such a long time, it's currently still
; supported for backwards compatibility, but we recommend you don't use them.
; Default Value: On
; Development Value: Off
; Production Value: Off
; http://php.net/short-open-tag
short_open_tag = On
PHPファイルの文字コード、出力をutf-8に設定する
php_mbstring.dllはデフォルトで有効になっていますが、以下の設定部分がコメントアウトされているので、適宜、環境に合わせて変更します。
php.iniファイルの1767行目あたり
[mbstring]
; language for internal character representation.
; http://php.net/mbstring.language
mbstring.language = Japanese

; internal/script encoding.
; Some encoding cannot work as internal encoding.
; (e.g. SJIS, BIG5, ISO-2022-*)
; http://php.net/mbstring.internal-encoding
mbstring.internal_encoding = utf-8

; http input encoding.
; http://php.net/mbstring.http-input
mbstring.http_input = auto

; http output encoding. mb_output_handler must be
; registered as output buffer to function
; http://php.net/mbstring.http-output
mbstring.http_output = utf-8

; enable automatic encoding translation according to
; mbstring.internal_encoding setting. Input chars are
; converted to internal encoding by setting this to On.
; Note: Do _not_ use automatic encoding translation for
;       portable libs/applications.
; http://php.net/mbstring.encoding-translation
mbstring.encoding_translation = On

; automatic encoding detection order.
; auto means
; http://php.net/mbstring.detect-order
mbstring.detect_order = auto

; substitute_character used when character cannot be converted
; one from another
; http://php.net/mbstring.substitute-character
mbstring.substitute_character = none;
PHPのphp.iniの設定
XAMPPでcURLとopenSSLを使えるようにする
2013/2/3
cURLとopenSSLを使えるようにするには、php.iniファイル内の「php_curl.dll」、「php_openssl.dll」を有効にします(先頭の「;」を外す)。 php.iniは、デフォルトで「C:\xampp\php\php.ini」にあります。
php.iniファイルの990行目あたり
[mbstring]
extension=php_curl.dll
extension=php_openssl.dll
Apacheのhttp.confの設定
バーチャルホスト
2013/2/3
hostファイルを書き換えて、バーチャルホストでアクセスできるようにするには、Apacheの「httpd.conf」ファイルで設定します。 「httpd.conf」は、「C:\xampp\apache\conf\httpd.conf」にあります。
メモ帳などのテキストエディタで開いたら、下記のコード部分を追加・修正し、上書き保存します。
httpd.confファイルの末尾あたりに追加します。
オレンジ色の部分はxamppフォルダ内に置いたフォルダ名を指定します。
NameVirtualHost *:80

<VirtualHost *:80>
DocumentRoot "C:/xampp/htdocs"
ServerName localhost
<Directory "C:/xampp/htdocs">
Options Indexes FollowSymLinks MultiViews Includes ExecCGI
AddType text/html .shtml
AddHandler server-parsed .shtml
AddHandler cgi-script .cgi .pl
AllowOverride All
Order allow,deny
Allow from all
</Directory>
</VirtualHost>

<VirtualHost *:80>
ServerAdmin hoge@domain.com
DocumentRoot "C:/xampp/htdocs/xampp/www.test.com/"
ServerName www.test.com
</VirtualHost>
hostファイルに下記を追加します
hostファイルは「C:\Windows\System32\drivers\etc\host」にあります。
127.0.0.1 www.test.com
変更を反映させるため、XAMPPのコントロールパネルからApacheを再起動させます。
ブラウザで「http://www.test.com/」にアクセスすると直下のindexページが表示されます。