jQuery pluginŃüØŃü«õ╗¢Ńü«ŃāŚŃā®Ńé░ŃéżŃā│
- cropŃĆöńö╗ÕāÅŃü«ÕłćŃéŖÕć║ŃüŚŃĆĢ
- Displaying source code with AjaxŃĆöÕż¢ķā©ŃāĢŃéĪŃéżŃā½Ńü«ÕåģÕ«╣ŃéÆĶ¬ŁŃü┐ĶŠ╝ŃéōŃü¦ĶĪīńĢ¬ÕÅĘõ╗śŃüŹĶĪ©ńż║ŃĆĢ
- Drag to SharesŃĆöńÅŠÕ£©ķ¢▓Ķ”¦õĖŁŃü«ŃāÜŃā╝ŃéĖŃéÆńö╗ÕāÅŃü«ŃāēŃā®ŃāāŃé░’╝åŃāēŃāŁŃāāŃāŚŃü¦Õģ▒µ£ēŃéĄŃéżŃāłŃüĖµŖĢń©┐ŃĆĢ
- equalHeights.jsŃĆöĶ”üń┤ĀŃü«ķ½śŃüĢŃéƵÅāŃüłŃéŗŃā®ŃéżŃā¢Ńā®Ńā¬ŃĆĢ
- Exactly Twitter like Follow and Remove buttons with jQuery and Ajax ŃĆöTwitterķó©Ńü«ŃāĢŃé®ŃāŁŃā╝’╝åÕēŖķÖżŃā£Ńé┐Ńā│ŃĆĢ
- Flip! A jQuery pluginŃĆöŃā¢ŃāŁŃāāŃé»Ķ”üń┤ĀŃéÆõĖŖõĖŗÕĘ”ÕÅ│µ¢╣ÕÉæŃü½Õø×Ķ╗óŃüŚŃü”ÕłćŃéŖµø┐ŃüłŃéŗŃā®ŃéżŃā¢Ńā®Ńā¬ŃĆĢ
- highlight: JavaScript text higlighting jQuery pluginŃĆöµīćÕ«ÜŃüŚŃü¤ŃāåŃéŁŃé╣ŃāłŃéÆŃāÅŃéżŃā®ŃéżŃāłĶĪ©ńż║ŃĆĢ
- hoverIntent jQuery Plug-inŃĆöŃāøŃāÉŃā╝Õć”ńÉåŃĆĢ
- Internal Links with Favicon using jQueryŃĆöÕåģķā©Ńā¬Ńā│Ńé»Ńü½ŃāĢŃéĪŃāōŃé│Ńā│ĶĪ©ńż║ŃĆĢ
- jFootnotesŃĆöŃéżŃā│Ńā®ŃéżŃā│Ńé│Ńā│ŃāåŃā│ŃāäŃü½Õ¤║ŃüźŃüäŃü”Ķäܵ│©ŃéÆńö¤µłÉŃĆĢ
- jqPuzzle - Cusomizable Sliding Puzzles with jQueryŃĆö1µ×ÜŃü«ńö╗ÕāÅŃüŗŃéēŃāæŃé║Ńā½ŃéÆõĮ£µłÉŃĆĢ
- jQuery jTagging plugin ŃĆöŃé┐Ńé░Ńü«ÕģźÕŖøŃéÆń░ĪÕŹśŃü½ŃüÖŃéŗ ŃĆĢ
- jQuery KeypadŃĆöŃāØŃāāŃāŚŃéóŃāāŃāŚŃüÖŃéŗŃéŁŃā╝Ńā£Ńā╝ŃāēŃĆĢ
- jQuery PhotoShoot PluginŃĆöÕåÖń£¤µÆ«ÕĮ▒ŃéÆŃüŚŃü”ŃüäŃéŗŃéłŃüåŃü½µīćÕ«Üń»äÕø▓Ńü«ńö╗ÕāÅŃéÆÕłćŃéŖÕć║ŃüŚŃĆĢ
- jQuery Plugin FlyDOMŃĆöÕŗĢńÜäŃé│Ńā│ŃāåŃā│ŃāäŃéÆŃüÖŃü░ŃéäŃüÅń░ĪÕŹśŃü½õĮ£µłÉŃĆĢ
- jQuery Spoilers pluginŃĆöŃā×ŃāāŃāüŃüŚŃü¤Ķ”üń┤ĀŃü«ÕåģÕ«╣ŃéÆŃéƵīćÕ«ÜŃüŚŃü¤Ķ”üń┤ĀŃü¦Ńā®ŃāāŃāŚ ŃĆĢ
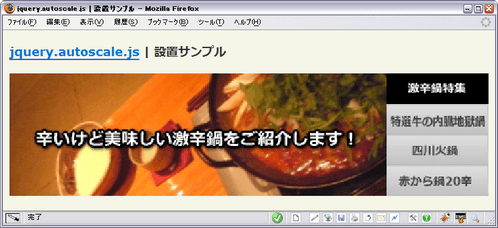
- jquery.autoscale.jsŃĆöŃé”ŃéŻŃā│ŃāēŃé”ŃéĄŃéżŃé║Ńü½ÕÉłŃéÅŃüøŃü”ńö╗ÕāÅŃéÆŃā¬ŃéĄŃéżŃé║ŃĆĢ
- jquery.biggerlinkŃĆöµīćÕ«ÜŃüŚŃü¤Ķ”üń┤ĀÕģ©õĮōŃéÆŃā¬Ńā│Ńé»ÕÅ»ĶāĮŃü¬ķĀśÕ¤¤Ńü½ŃüÖŃéŗŃĆĢ
- Link Wrapper - jQuery plugin for long URLŃĆöķĢĘŃüäURLŃéƵŖśŃéŖĶ┐öŃüÖŃĆĢ
- Making an Expanding Code BoxŃĆöŃé│Ńā╝ŃāēŃā£ŃāāŃé»Ńé╣ŃüŗŃéēŃāåŃéŁŃé╣ŃāłŃüīŃüéŃüĄŃéīŃéŗÕĀ┤ÕÉłŃü½Õ║āŃüÆŃü”ĶĪ©ńż║ŃĆĢ
- Smart Columns w/ CSS & jQueryŃĆöŃé”ŃéŻŃā│ŃāēŃé”ŃéĄŃéżŃé║Ńü½ÕÉłŃéÅŃüøŃü”Ńé½Ńā®ŃāĀŃéƵĢ┤ÕłŚŃĆĢ
- Text Resizing With jQueryŃĆöŃāåŃéŁŃé╣ŃāłŃü«Ńā¬ŃéĄŃéżŃé║ŃĆĢ
- The jQuery Feed MenuŃĆöŃāÜŃā╝ŃéĖŃü«ŃāĪŃé┐µāģÕĀ▒ŃüŗŃéēŃāĢŃéŻŃā╝ŃāēµāģÕĀ▒ŃéÆÕÅ¢ÕŠŚŃüŚŃü”ŃāĢŃéŻŃā╝ŃāēõĖĆŃāĪŃāŗŃāźŃā╝ŃéÆŃéóŃéżŃé│Ńā│ĶĪ©ńż║ŃĆĢ
- Unobtrusive IFrame with jQueryŃĆöŃā¬Ńā│Ńé»ŃéÆŃéżŃā│Ńā®ŃéżŃā│ŃāĢŃā¼Ńā╝ŃāĀŃü½ÕżēµÅøŃĆĢ
- ŃāŁŃā╝Ńā½Ńé¬Ńā╝ŃāÉŃā╝ŃĆöŃāŁŃā╝Ńā½Ńé¬Ńā╝ŃāÉŃā╝ŃĆĢ
- µīćÕ«ÜŃüŚŃü¤Ķ”üń┤ĀŃüĀŃüæŃéÆÕŹ░ÕłĘ
crop
ńö╗ÕāÅŃü«ÕłćŃéŖÕć║ŃüŚ
unknown
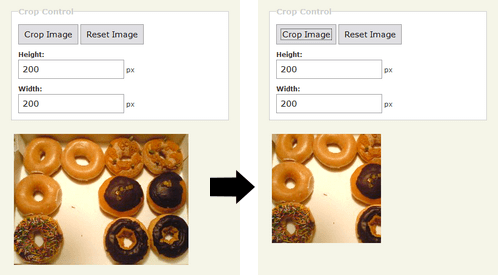
jQuery plugin: Crop
ńö╗ÕāÅŃéƵīćÕ«ÜŃüŚŃü¤ŃéĄŃéżŃé║Ńü½ÕłćŃéŖÕÅ¢ŃéŗjQueryŃāŚŃā®Ńé░ŃéżŃā│ŃĆé
 Ķ©ŁńĮ«ŃéżŃāĪŃā╝ŃéĖ
<!DOCTYPE html PUBLIC "-//W3C//DTD XHTML 1.0 Transitional//EN" "http://www.w3.org/TR/xhtml1/DTD/xhtml1-transitional.dtd">
<html xmlns="http://www.w3.org/1999/xhtml" xml:lang="ja" lang="ja">
<head>
<meta http-equiv="Content-Type" content="text/html; charset=utf-8" />
<meta http-equiv="Content-Language" content="ja" />
<meta http-equiv="Content-Script-Type" content="text/javascript" />
<meta http-equiv="Content-Style-Type" content="text/css" />
<meta http-equiv="imagetoolbar" content="no" />
<title>jQuery plugin : Crop | Ķ©ŁńĮ«ŃéĄŃā│ŃāŚŃā½</title>
<link rel="stylesheet" type="text/css" href="/content/lib/global.css" />
<!-- JS -->
<script src="https://ajax.googleapis.com/ajax/libs/jquery/1.2.6/jquery.min.js"></script>
<script type="text/javascript" src="/content/lib/jquery/jquery.crop.js"></script>
<script type="text/javascript">
$(function() {
$('#crop').submit(function() {
var t = this;
$(this).trigger('reset'); // fiddle to reset the image for the demo
var img = $('img');
img.crop({ height: t.height.value, width: t.width.value })
return false;
}).bind('reset', function() {
var img = $('img');
var resetImg = document.createElement('img');
resetImg.src = 'http://farm4.static.flickr.com/3141/2973155055_385036c286_o.png';
resetImg.height = '240';
resetImg.width = '320';
resetImg.alt = resetImg.title = "Ńé»Ńā¬Ńé╣ŃāöŃā╝Ńā╗Ńé»Ńā¬Ńā╝ŃāĀŃā╗ŃāēŃā╝ŃāŖŃāä";
img[0].parentNode.replaceChild(resetImg, img[0]);
});
});
</script>
<!-- CSS -->
<style type="text/css">
textarea { width:80%;}
fieldset { border:1px solid #ccc; padding:1em; margin:0 0 20px 0; }
legend { color:#ccc; font-size:120%; }
input, textarea { font-size:125%; padding:7px; border:1px solid #999; }
label { font-weight:bold; display:block; margin-top:10px; }
img { margin:5px; }
</style>
</head>
<body>
<div id="wrap">
<h1><a href='http://remysharp.com/2007/03/19/a-few-more-jquery-plugins-crop-labelover-and-pluck/'>jQuery plugin: Crop</a> | Ķ©ŁńĮ«ŃéĄŃā│ŃāŚŃā½</h1>
<!-- CODE -->
<form action="" id="crop">
<fieldset>
<legend>Crop Control</legend>
<input type="submit" name="crop" value="Crop Image" />
<input type="reset" name="reset" value="Reset Image" id="reset" />
<label for="height">Height: </label><input type="text" name="height" value="200" id="height" /> px
<label for="width">Width: </label><input type="text" name="width" value="200" id="width" /> px
</fieldset>
<div class="clear"></div>
</form>
<a href="http://www.flickr.com/photos/22559849@N06/2973155055/" title="Ńé»Ńā¬Ńé╣ŃāöŃā╝Ńā╗Ńé»Ńā¬Ńā╝ŃāĀŃā╗ŃāēŃā╝ŃāŖŃāä by php_javascript_room, on Flickr"><img src="http://farm4.static.flickr.com/3141/2973155055_385036c286_o.png" width="320" height="240" alt="Ńé»Ńā¬Ńé╣ŃāöŃā╝Ńā╗Ńé»Ńā¬Ńā╝ŃāĀŃā╗ŃāēŃā╝ŃāŖŃāä" /></a>
<!-- / CODE -->
</div>
</body>
</html>
Displaying source code with Ajax
Õż¢ķā©ŃāĢŃéĪŃéżŃā½Ńü«ÕåģÕ«╣ŃéÆĶ¬ŁŃü┐ĶŠ╝ŃéōŃü¦ĶĪīńĢ¬ÕÅĘõ╗śŃüŹĶĪ©ńż║
2009/4/11
Displaying source code with Ajax
Õż¢ķā©ŃāĢŃéĪŃéżŃā½Ńü«ÕåģÕ«╣ŃéÆĶ¬ŁŃü┐ĶŠ╝ŃéōŃü¦ĶĪīńĢ¬ÕÅĘõ╗śŃüŹĶĪ©ńż║ŃüÖŃéŗjQueryŃāŚŃā®Ńé░ŃéżŃā│ŃĆé
õĖŗĶ©śŃü«ŃéłŃüåŃü½ŃĆüaĶ”üń┤ĀŃü«Ńé»Ńā®Ńé╣ÕÉŹŃü½codeexampleŃéƵīćÕ«ÜŃüÖŃéŗŃü©ŃĆüaĶ”üń┤ĀŃü«hrefÕ▒׵ƦŃü½µīćÕ«ÜŃüŚŃü¤ŃāĢŃéĪŃéżŃā½Ńü«ÕåģÕ«╣ŃéÆĶ¬ŁŃü┐ĶŠ╝ŃéōŃü¦ĶĪ©ńż║ŃüŚŃüŠŃüÖŃĆé ŃéĮŃā╝Ńé╣Ńé│Ńā╝ŃāēŃü«ĶĪ©ńż║Ńü¬Ńü®Ńü½õŠ┐Õł®Ńü¦ŃüÖŃĆé
<a href='ordered.html'
class='codeexample'>
ordered.html</a>
µīćÕ«ÜŃüŚŃü¤ĶĪīńĢ¬ÕÅĘŃü«ÕåģÕ«╣ŃüĀŃüæŃéÆĶĪ©ńż║ŃüÖŃéŗŃü½Ńü»ŃĆüõĖŗĶ©śŃü«ŃéłŃüåŃü½linesŃé»Ńā®Ńé╣Ńü½ĶĪ©ńż║ŃüÖŃéŗĶĪīńĢ¬ÕÅĘŃü«ń»äÕø▓ŃéƵīćÕ«ÜŃüŚŃüŠŃüÖŃĆé
<a href='ordered.html'
class='codeexample lines[1,5,9-14,18-19]'>
ordered.html</a>
µīćÕ«ÜŃüŚŃü¤ĶĪīŃéÆŃāÅŃéżŃā®ŃéżŃāłĶĪ©ńż║ŃüÖŃéŗŃü½Ńü»ŃĆüõĖŗĶ©śŃü«ŃéłŃüåŃü½highlightŃé»Ńā®Ńé╣Ńü½Ńü»õŠØķĀ╝Ńü©ĶĪ©ńż║ŃüÖŃéŗĶĪīńĢ¬ÕÅĘŃü«ń»äÕø▓ŃéƵīćÕ«ÜŃüŚŃüŠŃüÖŃĆé
<a href='ordered.html' class='codeexample lines[10-15] highlight[10,12,14-15]'> ordered.html (lines 10 to 15)<dodisplayŃé»Ńā®Ńé╣ŃéƵīćÕ«ÜŃüÖŃéŗŃü©ŃĆüŃā¬Ńā│Ńé»ŃéÆŃé»Ńā¬ŃāāŃé»ŃüŚŃü¤µÖéŃü½ŃĆüŃéżŃā│Ńā®ŃéżŃā│ŃāĢŃā¼Ńā╝ŃāĀ’╝łiframe’╝ēŃéÆńö¤µłÉŃüŚŃü”ŃāŚŃā¼ŃāōŃāźŃā╝ĶĪ©ńż║ŃüÖŃéŗŃüōŃü©ŃééŃü¦ŃüŹŃüŠŃüÖŃĆé
ordered.html<!DOCTYPE HTML PUBLIC "-//W3C//DTD HTML 4.0 1//EN" "http://www.w3.org/TR/html4/strict.dtd"> <html> <head> <meta http-equiv="content-type" content="text/html; charset=utf-8"> <title>Example of an ordered menu</title> </head> <body> <ol id="mainmenu"> <li><a href="index.html">Introduction</a></li> <li><a href="setup.html">Setting up your workspace</a></li> <li><a href="software.html">Software</a></li> <li><a href="files.html">File Resources</a></li> <li><a href="printers.html">Printers</a></li> <li><a href="methodology.html">Work Methodology</a></li> </ol> </body> </html>Ķ©ŁńĮ«ŃéżŃāĪŃā╝ŃéĖ
Ķ©ŁńĮ«ŃéĄŃā│ŃāŚŃā½ŃéĄŃā│ŃāŚŃā½ŃéÆĶ”ŗŃéŗ<!DOCTYPE html PUBLIC "-//W3C//DTD XHTML 1.0 Transitional//EN" "http://www.w3.org/TR/xhtml1/DTD/xhtml1-transitional.dtd"> <html xmlns="http://www.w3.org/1999/xhtml" xml:lang="ja" lang="ja"> <head> <meta http-equiv="Content-Type" content="text/html; charset=utf-8" /> <meta http-equiv="Content-Language" content="ja" /> <meta http-equiv="Content-Script-Type" content="text/javascript" /> <meta http-equiv="Content-Style-Type" content="text/css" /> <meta http-equiv="imagetoolbar" content="no" /> <title>Displaying source code with Ajax | Ķ©ŁńĮ«ŃéĄŃā│ŃāŚŃā½</title> <link rel="stylesheet" type="text/css" href="/content/lib/global.css" /> <!-- JS --> <script type="text/javascript" src="http://ajax.googleapis.com/ajax/libs/jquery/1.3.2/jquery.min.js"></script> <script type="text/javascript" src="/content/lib/jquery/ajaxcodedisplay-src-commented.js"></script> <script type="text/javascript"> $(function() { }); </script> </head> <body> <div id="wrap"> <h1><a href='http://icant.co.uk/sandbox/ajax-code-display/'>Displaying source code with Ajax</a> | Ķ©ŁńĮ«ŃéĄŃā│ŃāŚŃā½</h1> <!-- CODE --> <h2>ŃāćŃāĢŃé®Ńā½Ńāł</h2> <p><a href="include/ajax/jquery_plugin_other/ordered.html" class="codeexample">ordered.html</a></p> <h2>µīćÕ«ÜŃüŚŃü¤ĶĪīńĢ¬ÕÅĘŃü«ń»äÕø▓ŃüĀŃüæĶĪ©ńż║</h2> <p><a href="include/ajax/jquery_plugin_other/ordered.html" class="codeexample lines[1,5,9-14,18-19]">ordered.html (lines 1, 5, 9 to 14 and 18 to 19)</a></p> <p><a href="include/ajax/jquery_plugin_other/ordered.html" class="codeexample lines[10-15]">ordered.html (lines 10 to 15)</a></p> <p><a href="include/ajax/jquery_plugin_other/ordered.html" class="codeexample lines[5,8,9]">ordered.html (lines 5, 8 and 9)</a></p> <h2>µīćÕ«ÜŃüŚŃü¤ĶĪīńĢ¬ÕÅĘŃü«ń»äÕø▓ŃéÆŃāÅŃéżŃā®ŃéżŃāłĶĪ©ńż║</h2> <p><a href="include/ajax/jquery_plugin_other/ordered.html" class="codeexample lines[10-15] highlight[10,12,14-15]">ordered.html (lines 10 to 15)</a></p> <h2>Ńā¬Ńā│Ńé»ŃéÆŃé»Ńā¬ŃāāŃé»ŃüÖŃéŗŃü©ŃĆüiframeÕåģŃü½ŃāĢŃéĪŃéżŃā½Ńü«ÕåģÕ«╣ŃéÆŃāŚŃā¼ŃāōŃāźŃā╝ĶĪ©ńż║</h2> <p><a href="include/ajax/jquery_plugin_other/ordered.html" class="codeexample dodisplay highlight[10,12,14-15]">ordered.html (click to show output)</a></p> <!-- / CODE --> </div> </body> </html>
Drag to Shares
ńÅŠÕ£©ķ¢▓Ķ”¦õĖŁŃü«ŃāÜŃā╝ŃéĖŃéÆńö╗ÕāÅŃü«ŃāēŃā®ŃāāŃé░’╝åŃāēŃāŁŃāāŃāŚŃü¦Õģ▒µ£ēŃéĄŃéżŃāłŃüĖµŖĢń©┐
2009/12/13
Drag to Share - Nettuts+
ńÅŠÕ£©ķ¢▓Ķ”¦õĖŁŃü«WebŃāÜŃā╝ŃéĖŃéÆŃĆüTwitterŃĆüDeliciousŃĆüFacebookŃü¬Ńü®Ńü«Õģ▒µ£ēŃéĄŃéżŃāłŃü½ŃĆüńö╗ÕāÅŃü«ŃāēŃā®ŃāāŃé░’╝åŃāēŃāŁŃāāŃāŚŃü¦µŖĢń©┐ÕÅ»ĶāĮŃü¬jQueryŃāŚŃā®Ńé░ŃéżŃā│ŃĆé ńö╗ÕāÅŃü«ŃāēŃā®ŃāāŃé░’╝åŃāēŃāŁŃāāŃāŚŃéÆÕ«¤ĶŻģŃüÖŃéŗŃü«Ńü½ŃĆüjQuery UIŃüīõĮ┐ńö©ŃüĢŃéīŃü”ŃüäŃüŠŃüÖŃĆé
 Ķ©ŁńĮ«ŃéżŃāĪŃā╝ŃéĖ
<!DOCTYPE html PUBLIC "-//W3C//DTD XHTML 1.0 Transitional//EN" "http://www.w3.org/TR/xhtml1/DTD/xhtml1-transitional.dtd">
<html xmlns="http://www.w3.org/1999/xhtml" xml:lang="ja" lang="ja">
<head>
<meta http-equiv="Content-Type" content="text/html; charset=utf-8" />
<meta http-equiv="Content-Language" content="ja" />
<meta http-equiv="Content-Script-Type" content="text/javascript" />
<meta http-equiv="Content-Style-Type" content="text/css" />
<meta http-equiv="imagetoolbar" content="no" />
<title>Ķ©ŁńĮ«ŃéĄŃā│ŃāŚŃā½</title>
<link rel="stylesheet" type="text/css" href="/content/lib/global.css" />
<!-- JS -->
<script type="text/javascript" src="http://ajax.googleapis.com/ajax/libs/jquery/1.3.2/jquery.min.js"></script>
<script type="text/javascript" src="/content/lib/jquery/drag-to-share/js/jquery-ui-1.7.2.custom.min.js"></script>
<!-- CSS -->
<link rel="stylesheet" type="text/css" href="/content/lib/jquery/drag-to-share/ui-lightness/jquery-ui-1.7.2.custom.css" />
<style type="text/css">
#content { width:440px; }
#content img { float:right; margin-left:20px; }
.ui-draggable { cursor:move; }
#tip { position:absolute; display:none; height:25px; padding:9px 9px 0px; color:#fff; font-family:Verdana, Arial, Helvetica, sans-serif; font-size:11px; font-weight:bold; border-radius:4px; -moz-border-radius:4px; -webkit-border-radius:4px; background:#000; background:rgba(0,0,0,.5); }
#tip .arrow { width:0; height:0; line-height:0; border-right:8px solid #000; border-right:8px solid rgba(0,0,0,.5); border-top:8px solid transparent; border-bottom:8px solid transparent; position:absolute; left:-8px; top:9px; }
#targets { display:none; list-style-type:none; position:absolute; top:10px; z-index:99999; }
#targets li { float:left; margin-right:20px; display:block; width:60px; height:60px; background:url("/content/lib/jquery/drag-to-share/iconSprite.png") no-repeat 0 0; position:relative; }
#targets li#delicious { background-position:0 -60px; }
#targets li#facebook { background-position:0 -120px; }
#targets li span { display:block; position:absolute; bottom:-40px; white-space:pre; color:#fff; }
#overlay { background-color:#000; position:absolute; top:0; left:0; width:100%; height:100%; z-index:99997; }
#helper { background-color:#c2c2c2; position:absolute; height:35px; padding:15px 70px 0 20px; color:#fff; font-family:Verdana; font-weight:bold; font-size:18px; border-radius:8px; -moz-border-radius:8px; -webkit-border-radius:8px; border:3px solid #7d7d7d; }
#thumb { width:50px; height:50px; position:absolute; right:0; top:0; border-left:3px solid #7d7d7d; }
.share { font-weight:bold; position:absolute; font-size:14px; font-family:Verdana; margin-left:-38px; }
</style>
</head>
<body>
<div id="wrap">
<h1>Ķ©ŁńĮ«ŃéĄŃā│ŃāŚŃā½</h1>
<p>ÕÅéńģ¦’╝Ü<a href='http://net.tutsplus.com/tutorials/javascript-ajax/drag-to-share/'>Drag to Share - Nettuts+</a></p>
<!-- CODE -->
<div id="content">
<p>ńö╗ÕāÅŃéÆŃāēŃā®ŃāāŃé░ŃüÖŃéŗŃü©ŃĆüÕģ▒µ£ēŃā£Ńé┐Ńā│ŃüīĶĪ©ńż║ŃüĢŃéīŃüŠŃüÖŃĆéõŠŗŃüłŃü░ŃĆüTweetŃā£Ńé┐Ńā│Ńü½ŃāēŃāŁŃāāŃāŚŃüÖŃéŗŃü©ŃĆüTwitterŃü½ńÅŠÕ£©Ńü«ŃāÜŃā╝ŃéĖŃéƵŖĢń©┐Ńü¦ŃüŹŃüŠŃüÖŃĆé</p>
<img src="/content/lib/jquery/drag-to-share/pjr.jpg" alt="PHP & JavaScript Room">
<p>ŃĆīPHP & JavaScript RoomŃĆŹŃü»ŃĆüPHPŃĆüJavaScriptŃĆüAjaxŃĆüHTML/XHTMLŃĆüCSSŃĆüWebŃāÜŃā╝ŃéĖÕ¤ŗŃéüĶŠ╝Ńü┐Ńü½ŃéłŃéŗķ¤│ÕŻ░Ńā╗ÕŗĢńö╗Ńü«Ńé╣ŃāłŃā¬Ńā╝ŃāĀķģŹõ┐Īµ¢╣µ│ĢŃü¬Ńü®ŃĆüWebŃéĄŃéżŃāłÕłČõĮ£Ńü½ÕĮ╣ń½ŗŃüżÕ«¤ńö©ńÜäŃü¬ŃāŚŃāŁŃé░Ńā®Ńā¤Ńā│Ńé░Ńā╗ŃāåŃé»ŃāŗŃāāŃé»ŃéÆĶ¦ŻĶ¬¼ŃüŚŃü”ŃüäŃüŠŃüÖŃĆé</p>
</div>
<ul id="targets">
<li id="twitter"><a href="http://twitter.com"><!-- --></a></li>
<li id="delicious"><a href="http://delicious.com"><!-- --></a></li>
<li id="facebook"><a href="http://www.facebook.com"><!-- --></a></li>
</ul>
<div style="clear:both;"></div>
<script type="text/javascript">
$(function() {
//cache selector
var images = $("#content img"),
title = $("title").text() || document.title;
//make images draggable
images.draggable({
//create draggable helper
helper: function() {
return $("<div>").attr("id", "helper").html("<span>" + title + "</span><img id='thumb' src='" + $(this).attr("src") + "'>").appendTo("body");
},
cursor: "pointer",
cursorAt: { left: -10, top: 20 },
zIndex: 99999,
//show overlay and targets
start: function() {
$("<div>").attr("id", "overlay").css("opacity", 0.7).appendTo("body");
$("#tip").remove();
$(this).unbind("mouseenter");
$("#targets").css("left", ($("body").width() / 2) - $("#targets").width() / 2).slideDown();
},
//remove targets and overlay
stop: function() {
$("#targets").slideUp();
$(".share", "#targets").remove();
$("#overlay").remove();
$(this).bind("mouseenter", createTip);
}
});
//make targets droppable
$("#targets li").droppable({
tolerance: "pointer",
//show info when over target
over: function() {
$(".share", "#targets").remove();
$("<span>").addClass("share").text("Share on " + $(this).attr("id")).addClass("active").appendTo($(this)).fadeIn();
},
drop: function() {
var id = $(this).attr("id"),
currentUrl = window.location.href,
baseUrl = $(this).find("a").attr("href");
if (id.indexOf("twitter") != -1) {
window.location.href = baseUrl + "/home?status=" + title + ": " + currentUrl;
} else if (id.indexOf("delicious") != -1) {
window.location.href = baseUrl + "/save?url=" + currentUrl + "&title=" + title;
} else if (id.indexOf("facebook") != -1) {
window.location.href = baseUrl + "/sharer.php?u=" + currentUrl + "&t=" + title;
}
}
});
var createTip = function(e) {
//create tool tip if it doesn't exist
($("#tip").length === 0) ? $("<div>").html("<span>Drag this image to share the page<\/span><span class='arrow'><\/span>").attr("id", "tip").css({ left:e.pageX + 30, top:e.pageY - 16 }).appendTo("body").fadeIn(2000) : null;
};
images.bind("mouseenter", createTip);
images.mousemove(function(e) {
//move tooltip
$("#tip").css({ left:e.pageX + 30, top:e.pageY - 16 });
});
images.mouseleave(function() {
//remove tooltip
$("#tip").remove();
});
});
</script>
<!-- / CODE -->
</div>
</body>
</html>
equalHeights.js
Ķ”üń┤ĀŃü«ķ½śŃüĢŃéƵÅāŃüłŃéŗŃā®ŃéżŃā¢Ńā®Ńā¬
unknown
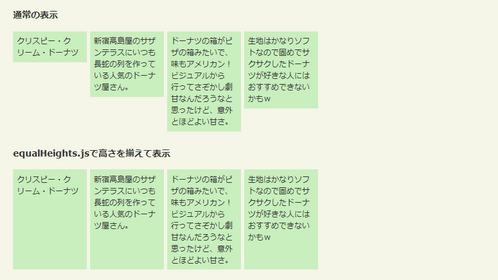
Setting Equal Heights with jQuery
jquery.js’╝ÅjQuery.equalHeights.js
µ░┤Õ╣│µ¢╣ÕÉæŃü½õĖ”ŃéōŃüĀŃā¢ŃāŁŃāāŃé»Ķ”üń┤ĀŃéÆŃĆüõĖĆńĢ¬ķ½śŃüĢŃü«ķ½śŃüäĶ”üń┤ĀŃü«ķ½śŃüĢŃü½ÕÉłŃéÅŃüøŃü”ĶĪ©ńż║ŃüÖŃéŗJSŃā®ŃéżŃā¢Ńā®Ńā¬Ńü¦ŃüÖŃĆé Ķ”üń┤ĀŃü«ķ½śŃüĢŃü»ŃĆüĶ”üń┤ĀŃü«ÕåģÕ«╣ķćÅŃü½ŃéłŃüŻŃü”ÕĘ”ÕÅ│ŃüĢŃéīŃüŠŃüÖŃüīŃĆüŃüōŃü«Ńā®ŃéżŃā¢Ńā®Ńā¬ŃéÆõĮ┐ŃüłŃü░ŃĆüÕåģÕ«╣ķćÅŃéƵ░ŚŃü½ŃüøŃüÜŃü½ŃüŹŃéīŃüäŃü½ĶĪ©ńż║ŃüĢŃüøŃéŗŃüōŃü©ŃüīÕć║µØźŃüŠŃüÖŃĆé
 Ķ©ŁńĮ«ŃéżŃāĪŃā╝ŃéĖ
<!DOCTYPE html PUBLIC "-//W3C//DTD XHTML 1.0 Transitional//EN" "http://www.w3.org/TR/xhtml1/DTD/xhtml1-transitional.dtd">
<html xmlns="http://www.w3.org/1999/xhtml" xml:lang="ja" lang="ja">
<head>
<meta http-equiv="Content-Type" content="text/html; charset=utf-8" />
<meta http-equiv="Content-Language" content="ja" />
<meta http-equiv="Content-Script-Type" content="text/javascript" />
<meta http-equiv="Content-Style-Type" content="text/css" />
<meta http-equiv="imagetoolbar" content="no" />
<title>Setting Equal Heights with jQuery | Ķ©ŁńĮ«ŃéĄŃā│ŃāŚŃā½</title>
<link rel="stylesheet" type="text/css" href="/content/lib/global.css" />
<!-- JS -->
<script src="https://ajax.googleapis.com/ajax/libs/jquery/1.2.3/jquery.min.js"></script>
<script type="text/javascript" src="/content/lib/jquery/jQuery.equalHeights.js"></script>
<script type="text/javascript">
$(function(){ $('#equalize').equalHeights(); });
</script>
<!-- CSS -->
<style type="text/css">
body{ margin:20px; padding:0; font:12px/1.5 verdana,sans-seif; }
h1 { font-size:150%; }
h2 { font-size:120%; }
/* equalHeights */
.container { width:100%; padding:0 0 2em; }
.box { float:left; width:24%; margin-right:1%; background-color:#c9efbe; }
.box p { margin:.5em; padding:0; }
.containWidth {width: 480px;}
</style>
</head>
<body>
<div id="wrap">
<h1><a href='http://www.filamentgroup.com/examples/equalHeights/'>Setting Equal Heights with jQuery</a> | Ķ©ŁńĮ«ŃéĄŃā│ŃāŚŃā½</h1>
<!-- CODE -->
<div class="containWidth">
<h2>ķĆÜÕĖĖŃü«ĶĪ©ńż║</h2>
<div class="cf">
<div class="container">
<div class="box"><p>Ńé»Ńā¬Ńé╣ŃāöŃā╝Ńā╗Ńé»Ńā¬Ńā╝ŃāĀŃā╗ŃāēŃā╝ŃāŖŃāä</p></div>
<div class="box"><p>µ¢░Õ«┐ķ½śÕ│ČÕ▒ŗŃü«ŃéĄŃéČŃā│ŃāåŃā®Ńé╣Ńü½ŃüäŃüżŃééķĢĘĶøćŃü«ÕłŚŃéÆõĮ£ŃüŻŃü”ŃüäŃéŗõ║║µ░ŚŃü«ŃāēŃā╝ŃāŖŃāäÕ▒ŗŃüĢŃéōŃĆé</p></div>
<div class="box"><p>ŃāēŃā╝ŃāŖŃāäŃü«ń«▒ŃüīŃāöŃéČŃü«ń«▒Ńü┐Ńü¤ŃüäŃü¦ŃĆüÕæ│ŃééŃéóŃāĪŃā¬Ńé½Ńā│’╝üŃāōŃéĖŃāźŃéóŃā½ŃüŗŃéēĶĪīŃüŻŃü”ŃüĢŃü×ŃüŗŃüŚÕŖćńöśŃü¬ŃéōŃüĀŃéŹŃüåŃü¬Ńü©µĆØŃüŻŃü¤ŃüæŃü®ŃĆüµäÅÕż¢Ńü©Ńü╗Ńü®ŃéłŃüäńöśŃüĢŃĆé</p></div>
<div class="box"><p>ńö¤Õ£░Ńü»ŃüŗŃü¬ŃéŖŃéĮŃāĢŃāłŃü¬Ńü«Ńü¦Õø║ŃéüŃü¦ŃéĄŃé»ŃéĄŃé»ŃüŚŃü¤ŃāēŃā╝ŃāŖŃāäŃüīÕźĮŃüŹŃü¬õ║║Ńü½Ńü»ŃüŖŃüÖŃüÖŃéüŃü¦ŃüŹŃü¬ŃüäŃüŗŃéé’ĮŚ</p></div>
</div>
</div>
<h2>equalHeights.jsŃü¦ķ½śŃüĢŃéƵÅāŃüłŃü”ĶĪ©ńż║</h2>
<div class="cf">
<div class="container" id="equalize">
<div class="box"><p>Ńé»Ńā¬Ńé╣ŃāöŃā╝Ńā╗Ńé»Ńā¬Ńā╝ŃāĀŃā╗ŃāēŃā╝ŃāŖŃāä</p></div>
<div class="box"><p>µ¢░Õ«┐ķ½śÕ│ČÕ▒ŗŃü«ŃéĄŃéČŃā│ŃāåŃā®Ńé╣Ńü½ŃüäŃüżŃééķĢĘĶøćŃü«ÕłŚŃéÆõĮ£ŃüŻŃü”ŃüäŃéŗõ║║µ░ŚŃü«ŃāēŃā╝ŃāŖŃāäÕ▒ŗŃüĢŃéōŃĆé</p></div>
<div class="box"><p>ŃāēŃā╝ŃāŖŃāäŃü«ń«▒ŃüīŃāöŃéČŃü«ń«▒Ńü┐Ńü¤ŃüäŃü¦ŃĆüÕæ│ŃééŃéóŃāĪŃā¬Ńé½Ńā│’╝üŃāōŃéĖŃāźŃéóŃā½ŃüŗŃéēĶĪīŃüŻŃü”ŃüĢŃü×ŃüŗŃüŚÕŖćńöśŃü¬ŃéōŃüĀŃéŹŃüåŃü¬Ńü©µĆØŃüŻŃü¤ŃüæŃü®ŃĆüµäÅÕż¢Ńü©Ńü╗Ńü®ŃéłŃüäńöśŃüĢŃĆé</p></div>
<div class="box"><p>ńö¤Õ£░Ńü»ŃüŗŃü¬ŃéŖŃéĮŃāĢŃāłŃü¬Ńü«Ńü¦Õø║ŃéüŃü¦ŃéĄŃé»ŃéĄŃé»ŃüŚŃü¤ŃāēŃā╝ŃāŖŃāäŃüīÕźĮŃüŹŃü¬õ║║Ńü½Ńü»ŃüŖŃüÖŃüÖŃéüŃü¦ŃüŹŃü¬ŃüäŃüŗŃéé’ĮŚ</p></div>
</div>
</div>
</div>
<!-- / CODE -->
</div>
</body>
</html>
Exactly Twitter like Follow and Remove buttons with jQuery and Ajax
Twitterķó©Ńü«ŃāĢŃé®ŃāŁŃā╝’╝åÕēŖķÖżŃā£Ńé┐Ńā│
2009/7/11
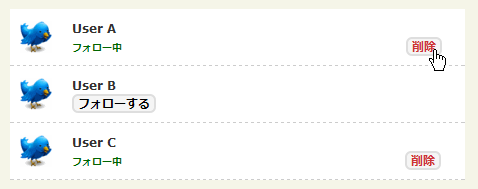
Exactly Twitter like Follow and Remove buttons with jQuery and Ajax
TwitterŃü«ŃéłŃüåŃü½ŃĆüÕÉäŃā¼Ńé│Ńā╝ŃāēŃü«Ńé╣ŃāåŃā╝Ńé┐Ńé╣’╝łŃāĢŃé®ŃāŁŃā╝’╝ÅÕēŖķÖż’╝ēŃéÆŃā£Ńé┐Ńā│Ńé»Ńā¬ŃāāŃé»’╝łŃāĢŃé¦Ńā╝ŃāēŃéżŃā│Ńā╗ŃāĢŃé¦Ńā╝ŃāēŃéóŃé”ŃāłÕŖ╣µ×£ŃüéŃéŖ’╝ēŃü¦Õżēµø┤ŃüÖŃéŗµ¢╣µ│ĢŃüīµÄ▓Ķ╝ēŃüĢŃéīŃü”ŃüäŃüŠŃüÖŃĆé
 Ķ©ŁńĮ«ŃéżŃāĪŃā╝ŃéĖ
<!DOCTYPE html PUBLIC "-//W3C//DTD XHTML 1.0 Transitional//EN" "http://www.w3.org/TR/xhtml1/DTD/xhtml1-transitional.dtd">
<html xmlns="http://www.w3.org/1999/xhtml" xml:lang="ja" lang="ja">
<head>
<meta http-equiv="Content-Type" content="text/html; charset=utf-8" />
<meta http-equiv="Content-Language" content="ja" />
<meta http-equiv="Content-Script-Type" content="text/javascript" />
<meta http-equiv="Content-Style-Type" content="text/css" />
<meta http-equiv="imagetoolbar" content="no" />
<title>Exactly Twitter like Follow and Remove buttons with jQuery and Ajax | Ķ©ŁńĮ«ŃéĄŃā│ŃāŚŃā½</title>
<link rel="stylesheet" type="text/css" href="/content/lib/global.css" />
<!-- JS -->
<script type="text/javascript" src="http://ajax.googleapis.com/ajax/libs/jquery/1.3.2/jquery.min.js"></script>
<script type="text/javascript">
$(function() {
$(".follow").click(
function(){
var element = $(this);
var I = element.attr("id");
var info = 'id=' + I;
$.ajax({
type: "POST",
url: "ajaxfollow.tix",
data: info,
success: function(){}
});
$("#follow"+I).fadeOut(200).hide();
$("#remove"+I).fadeIn(200).show();
return false;
});
$(".remove").click(function(){
var element = $(this);
var I = element.attr("id");
var info = 'id=' + I;
$.ajax({
type: "POST",
url: "ajaxfollow.tix",
data: info,
success: function(){}
});
$("#remove"+I).fadeOut(200).hide();
$("#follow"+I).fadeIn(200).show();
return false;
});
});
</script>
<!-- CSS -->
<style type="text/css">
a {
text-decoration:none;
}
table {
width:455px;
border:0;
border-collapse:collapse;
border-spacing:0;
background-color:#fff;
}
th,
td {
padding:10px;
}
td.icon {
width:32px;
border-bottom:1px dashed #ccc;
}
.content {
border-bottom:1px dashed #ccc;
background-color:#fff;
}
.follow_b {
border:#dedede solid 2px;
background-color:#f5f5f5;
color:#000;
font-size:12px;
font-weight:bold;
padding-left:4px ;
padding-right:4px ;
-moz-border-radius: 6px; -webkit-border-radius: 6px;
}
.youfollowing_b {
font-size:10px; color:#006600; font-weight:bold;
}
.remove_b {
border:#dedede solid 2px;
background-color:#f5f5f5;
color:#CC3333;
font-size:12px;
padding-left:4px ;
padding-right:4px ;
font-weight:bold;
margin-left:280px;
-moz-border-radius: 6px;
-webkit-border-radius: 6px;
}
</style>
</head>
<body>
<div id="wrap">
<h1><a href='http://9lessons.blogspot.com/2009/04/exactly-twitter-like-follow-and-remove.html'>Exactly Twitter like Follow and Remove buttons with jQuery and Ajax</a> | Ķ©ŁńĮ«ŃéĄŃā│ŃāŚŃā½</h1>
<!-- CODE -->
<table>
<tr class="record">
<td class="icon"><img src="/content/img/picon/twitter.png" width="32" height="32" /></td>
<td class="content">
<strong>User A</strong>
<div id="follow1"><a href="#" class="follow" id="1"><span class="follow_b">ŃāĢŃé®ŃāŁŃā╝ŃüÖŃéŗ</span></a></div>
<div id="remove1" style="display:none">
<span class="youfollowing_b">ŃāĢŃé®ŃāŁŃā╝õĖŁ</span>
<a href="" class="remove" id="1"><span class="remove_b">ÕēŖķÖż</span></a>
</div>
</td>
</tr>
<tr class="record">
<td class="icon"><img src="/content/img/picon/twitter.png" width="32" height="32" /></td>
<td class="content">
<strong>User B</strong>
<div id="follow2"><a href="#" class="follow" id="2"><span class="follow_b">ŃāĢŃé®ŃāŁŃā╝ŃüÖŃéŗ</span></a></div>
<div id="remove2" style="display:none">
<span class="youfollowing_b">ŃāĢŃé®ŃāŁŃā╝õĖŁ</span>
<a href="" class="remove" id="2"><span class="remove_b">ÕēŖķÖż</span></a>
</div>
</td>
</tr>
<tr class="record">
<td class="icon"><img src="/content/img/picon/twitter.png" width="32" height="32" /></td>
<td class="content">
<strong>User C</strong>
<div id="follow3"><a href="#" class="follow" id="3"><span class="follow_b"> ŃāĢŃé®ŃāŁŃā╝ŃüÖŃéŗ </span></a></div>
<div id="remove3" style="display:none">
<span class="youfollowing_b"> ŃāĢŃé®ŃāŁŃā╝õĖŁ </span>
<a href="" class="remove" id="3"><span class="remove_b">ÕēŖķÖż</span></a>
</div>
</td>
</tr>
</table>
<!-- / CODE -->
</div>
</body>
</html>
Flip! A jQuery plugin
Ńā¢ŃāŁŃāāŃé»Ķ”üń┤ĀŃéÆõĖŖõĖŗÕĘ”ÕÅ│µ¢╣ÕÉæŃü½Õø×Ķ╗óŃüŚŃü”ÕłćŃéŖµø┐ŃüłŃéŗŃā®ŃéżŃā¢Ńā®Ńā¬
unknown
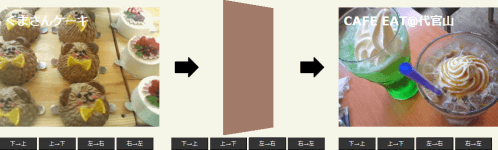
Flip!0.4 - A jQuery plugin
Ńā¢ŃāŁŃāāŃé»Ķ”üń┤ĀŃéÆŃāæŃāŹŃā½Ńü«ŃéłŃüåŃü½õĖŖõĖŗÕĘ”ÕÅ│µ¢╣ÕÉæŃü½Õø×Ķ╗óŃüĢŃüøŃü”ÕłćŃéŖµø┐ŃüłĶĪ©ńż║ŃüÖŃéŗjQueryŃāŚŃā®Ńé░ŃéżŃā│ŃĆé Ńā¢ŃāŁŃāāŃé»Ķ”üń┤ĀÕåģŃü½ĶĪ©ńż║ŃüÖŃéŗŃé│Ńā│ŃāåŃā│ŃāäŃĆüÕø×Ķ╗óķƤÕ║”Ńéäµ¢╣ÕÉæŃĆüĶāīµÖ»Ķē▓Ńü¬Ńü®Ńü»Ńé¬ŃāŚŃéĘŃā¦Ńā│Ńü¦µīćÕ«ÜÕÅ»ĶāĮŃü¦ŃüÖŃĆé
 Ķ©ŁńĮ«ŃéżŃāĪŃā╝ŃéĖ
<!DOCTYPE html PUBLIC "-//W3C//DTD XHTML 1.0 Transitional//EN" "http://www.w3.org/TR/xhtml1/DTD/xhtml1-transitional.dtd">
<html xmlns="http://www.w3.org/1999/xhtml" xml:lang="ja" lang="ja">
<head>
<meta http-equiv="Content-Type" content="text/html; charset=utf-8" />
<meta http-equiv="Content-Language" content="ja" />
<meta http-equiv="Content-Script-Type" content="text/javascript" />
<meta http-equiv="Content-Style-Type" content="text/css" />
<meta http-equiv="imagetoolbar" content="no" />
<title>Setting Equal Heights with jQuery | Ķ©ŁńĮ«ŃéĄŃā│ŃāŚŃā½</title>
<link rel="stylesheet" type="text/css" href="/content/lib/global.css" />
<!-- JS -->
<script src="https://ajax.googleapis.com/ajax/libs/jquery/1.2.6/jquery.min.js"></script>
<script type="text/javascript" src="/content/lib/jquery/jquery-ui-personalized-1.6rc2.packed.js"></script>
<script type="text/javascript" src="/content/lib/jquery/jquery.flip.js"></script>
<script type="text/javascript">
$(function(){
$("#flipBT").click(function(){
$("#flipBox").flip({
direction: 'bt',
color: '#D46419',
speed: 400,
content: "<div class='demo_one'>Krispy Kreme Doughnuts!!</div>"
});
});
$("#flipTB").click(function(){
$("#flipBox").flip({
direction: 'tb',
color: '#B34212',
speed: 600,
content: "<div class='demo_two'>ŃüÅŃüŠŃüĢŃéōŃé▒Ńā╝ŃéŁ</div>"
});
});
$("#flipLR").click(function(){
$("#flipBox").flip({
direction: 'lr',
color: '#341405',
content: "<div class='demo_three'>CAFE EAT@õ╗ŻÕ«śÕ▒▒</div>"
});
});
$("#flipRL").click(function(){
$("#flipBox").flip({
direction: 'rl',
color: '#166665',
speed: 550,
content: "<div class='demo_four'>ķŖĆÕ║¦GINTO<br>Birthday Cake!</div>"
});
});
});
</script>
<!-- CSS -->
<style type="text/css">
#flipBox {
width:320px;
height:240px;
margin:0 auto;
background-color:#000;
color:#fff;
font-weight:bold;
font-size:24px;
}
#flipBox > * {
padding:10px;
}
div#buttons {
width:320px;
margin:0 auto;
margin-top:25px;
}
#buttons a {
padding:5px 20px;
border-bottom:1px solid #000;
border-right:1px solid #000;
color:#fff;
background-color:#333;
text-decoration:none;
font-size:11px;
}
/* ** demo ** */
.demo_one {
background-image: url('http://farm4.static.flickr.com/3141/2973155055_385036c286_o.png');
background-repeat: no-repeat;
background-position:0 0;
width: 100%;
height: 100%;
}
.demo_two {
background-image: url('http://farm4.static.flickr.com/3222/2974008614_f4b59bf651_o.png');
background-repeat: no-repeat;
background-position:0 0;
width: 100%;
height: 100%;
}
.demo_three {
background-image: url('http://farm4.static.flickr.com/3174/2973352946_3814779ceb_o.jpg');
background-repeat: no-repeat;
background-position:0 0;
width: 100%;
height: 100%;
}
.demo_four {
background-image: url('http://farm4.static.flickr.com/3288/2970998187_50bee2de0c_o.jpg');
background-repeat: no-repeat;
background-position:0 0;
width: 100%;
height: 100%;
}
</style>
</head>
<body>
<div id="wrap">
<h1><a href='http://lab.smashup.it/flip/'>Flip!0.4 - A jQuery plugin</a> | Ķ©ŁńĮ«ŃéĄŃā│ŃāŚŃā½</h1>
<!-- CODE -->
<div id="flipBox">
<div class="demo_one">Krispy Kreme Doughnuts!!</div>
</div>
<div id="buttons">
<a id="flipBT" href="#">õĖŗŌåÆõĖŖ</a>
<a id="flipTB" href="#">õĖŖŌåÆõĖŗ</a>
<a id="flipLR" href="#">ÕĘ”ŌåÆÕÅ│</a>
<a id="flipRL" href="#">ÕÅ│ŌåÆÕĘ”</a>
</div>
<!-- / CODE -->
</div>
</body>
</html>
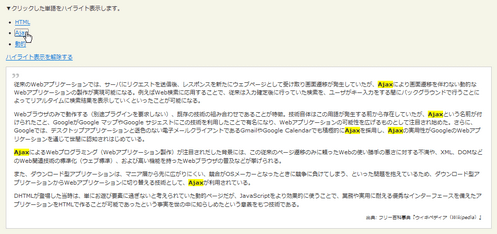
highlight: JavaScript text higlighting jQuery plugin
µīćÕ«ÜŃüŚŃü¤ŃāåŃéŁŃé╣ŃāłŃéÆŃāÅŃéżŃā®ŃéżŃāłĶĪ©ńż║
2009/2/15
highlight: JavaScript text higlighting jQuery plugin
µīćÕ«ÜŃüŚŃü¤ŃāåŃéŁŃé╣ŃāłŃéÆŃāÅŃéżŃā®ŃéżŃāłĶĪ©ńż║ŃüÖŃéŗjQueryŃāŚŃā®Ńé░ŃéżŃā│ŃĆé
ŃāÅŃéżŃā®ŃéżŃāłĶĪ©ńż║ŃéƵ£ēÕŖ╣Ńü½ŃüÖŃéŗĶ”üń┤ĀŃü«IDÕ▒׵ƦŃü½ŃĆīhighlight-pluginŃĆŹŃéƵīćÕ«ÜŃüŚŃüŠŃüÖŃĆé
µīćÕ«ÜŃüÖŃéŗŃāåŃéŁŃé╣ŃāłŃü½Ńü»ŃĆüµŚźµ£¼Ķ¬×ŃééõĮ┐ŃüłŃüŠŃüÖŃĆéŃéóŃā½ŃāĢŃéĪŃāÖŃāāŃāłŃéƵīćÕ«ÜŃüÖŃéŗÕĀ┤ÕÉłŃü»ŃĆüÕż¦µ¢ćÕŁŚŃü¦µīćÕ«ÜŃüŚŃüŠŃüÖŃĆé
ŃéóŃā½ŃāĢŃéĪŃāÖŃāāŃāłŃü«Õż¦µ¢ćÕŁŚÕ░ŵ¢ćÕŁŚŃéÆÕī║ÕłźŃüŚŃü¬ŃüäÕĀ┤ÕÉłŃü»ŃĆü$.highlight(this, 'BLA');Ńü«ŃéłŃüåŃü½ŃĆüń¼¼2Õ╝ĢµĢ░Ńü½ŃĆīBLAŃĆŹŃéƵīćÕ«ÜŃüŚŃüŠŃüÖŃĆé
 Ķ©ŁńĮ«ŃéżŃāĪŃā╝ŃéĖ
<!DOCTYPE html PUBLIC "-//W3C//DTD XHTML 1.0 Transitional//EN" "http://www.w3.org/TR/xhtml1/DTD/xhtml1-transitional.dtd">
<html xmlns="http://www.w3.org/1999/xhtml" xml:lang="ja" lang="ja">
<head>
<meta http-equiv="Content-Type" content="text/html; charset=utf-8" />
<meta http-equiv="Content-Language" content="ja" />
<meta http-equiv="Content-Script-Type" content="text/javascript" />
<meta http-equiv="Content-Style-Type" content="text/css" />
<meta http-equiv="imagetoolbar" content="no" />
<title>highlight: JavaScript text higlighting jQuery plugin | Ķ©ŁńĮ«ŃéĄŃā│ŃāŚŃā½</title>
<link rel="stylesheet" type="text/css" href="/content/lib/global.css" />
<!-- JS -->
<script type="text/javascript" src="http://ajax.googleapis.com/ajax/libs/jquery/1.3.2/jquery.min.js"></script>
<script type="text/javascript" src="/content/lib/jquery/jquery.highlight-2.js"></script>
<script type="text/javascript">
$(function() {
$('li').each(function() { $.highlight(this, 'BLA'); });
});
</script>
<!-- CSS -->
<style type="text/css">
.highlight { background-color:yellow; font-weight:bold; }
</style>
</head>
<body>
<div id="wrap">
<h1><a href='http://johannburkard.de/blog/programming/javascript/highlight-javascript-text-higlighting-jquery-plugin.html'>highlight: JavaScript text higlighting jQuery plugin</a> | Ķ©ŁńĮ«ŃéĄŃā│ŃāŚŃā½</h1>
<p>Ō¢╝Ńé»Ńā¬ŃāāŃé»ŃüŚŃü¤ÕŹśĶ¬×ŃéÆŃāÅŃéżŃā®ŃéżŃāłĶĪ©ńż║ŃüŚŃüŠŃüÖŃĆé</p>
<!-- CODE -->
<ul>
<li><a href="javascript:void($('#highlight-plugin').removeHighlight().each(function() { $.highlight(this, 'HTML')}))">HTML</a></li>
<li><a href="javascript:void($('#highlight-plugin').removeHighlight().each(function() { $.highlight(this, 'AJAX')}))">Ajax</a></li>
<li><a href="javascript:void($('#highlight-plugin').removeHighlight().each(function() { $.highlight(this, 'ÕŗĢńÜä')}))">ÕŗĢńÜä</a></li>
</ul>
<p>
<a href="javascript:void($('#highlight-plugin').removeHighlight());">ŃāÅŃéżŃā®ŃéżŃāłĶĪ©ńż║ŃéÆĶ¦ŻķÖżŃüÖŃéŗ</a>
</p>
<blockquote id="highlight-plugin">
<p>ÕŠōµØźŃü«WebŃéóŃāŚŃā¬Ńé▒Ńā╝ŃéĘŃā¦Ńā│Ńü¦Ńü»ŃĆüŃéĄŃā╝ŃāÉŃü½Ńā¬Ńé»Ńé©Ńé╣ŃāłŃéÆķĆüõ┐ĪÕŠīŃĆüŃā¼Ńé╣ŃāØŃā│Ńé╣ŃéƵ¢░Ńü¤Ńü½Ńé”Ńé¦Ńā¢ŃāÜŃā╝ŃéĖŃü©ŃüŚŃü”ÕÅŚŃüæÕÅ¢ŃéŖńö╗ķØóķüĘń¦╗ŃüīńÖ║ńö¤ŃüŚŃü”ŃüäŃü¤ŃüīŃĆüAjaxŃü½ŃéłŃéŖńö╗ķØóķüĘń¦╗ŃéÆõ╝┤ŃéÅŃü¬ŃüäÕŗĢńÜäŃü¬WebŃéóŃāŚŃā¬Ńé▒Ńā╝ŃéĘŃā¦Ńā│Ńü«ĶŻĮõĮ£ŃüīÕ«¤ńÅŠÕÅ»ĶāĮŃü½Ńü¬ŃéŗŃĆéõŠŗŃüłŃü░Webµż£ń┤óŃü½Õ┐£ńö©ŃüÖŃéŗŃüōŃü©Ńü¦ŃĆüÕŠōµØźŃü»ÕģźÕŖøńó║Õ«ÜÕŠīŃü½ĶĪīŃüŻŃü”ŃüäŃü¤µż£ń┤óŃéÆŃĆüŃā”Ńā╝ŃéČŃüīŃéŁŃā╝ÕģźÕŖøŃéÆŃüÖŃéŗķ¢ōŃü½ŃāÉŃāāŃé»Ńé░Ńā®Ńé”Ńā│ŃāēŃü¦ĶĪīŃüåŃüōŃü©Ńü½ŃéłŃüŻŃü”Ńā¬ŃéóŃā½Ńé┐ŃéżŃāĀŃü½µż£ń┤óńĄÉµ×£ŃéÆĶĪ©ńż║ŃüŚŃü”ŃüäŃüÅŃü©ŃüäŃüŻŃü¤ŃüōŃü©ŃüīÕÅ»ĶāĮŃü½Ńü¬ŃéŗŃĆé</p>
<p>WebŃā¢Ńā®Ńé”ŃéČŃü«Ńü┐Ńü¦ÕŗĢõĮ£ŃüÖŃéŗ’╝łÕłźķĆöŃāŚŃā®Ńé░ŃéżŃā│ŃéÆĶ”üµ▒éŃüŚŃü¬Ńüä’╝ēŃĆüµŚóÕŁśŃü«µŖĆĶĪōŃü«ńĄäŃü┐ÕÉłŃéÅŃüøŃü¦ŃüéŃéŗŃüōŃü©Ńüīńē╣ÕŠ┤ŃĆéµŖĆĶĪōĶć¬õĮōŃü»ŃüōŃü«ńö©Ķ¬×ŃüīńÖ║ńö¤ŃüÖŃéŗÕēŹŃüŗŃéēÕŁśÕ£©ŃüŚŃü”ŃüäŃü¤ŃüīŃĆüAjaxŃü©ŃüäŃüåÕÉŹÕēŹŃüīõ╗śŃüæŃéēŃéīŃü¤ŃüōŃü©ŃĆüGoogleŃüīGoogle Ńā×ŃāāŃāŚŃéäGoogle ŃéĄŃéĖŃé¦Ńé╣ŃāłŃü½ŃüōŃü«µŖĆĶĪōŃéÆÕł®ńö©ŃüŚŃü¤ŃüōŃü©Ńü¦µ£ēÕÉŹŃü½Ńü¬ŃéŖŃĆüWebŃéóŃāŚŃā¬Ńé▒Ńā╝ŃéĘŃā¦Ńā│Ńü«ÕÅ»ĶāĮµĆ¦ŃéÆÕ║āŃüÆŃéŗŃééŃü«Ńü©ŃüŚŃü”µ│©ńø«ŃüĢŃéīÕ¦ŗŃéüŃü¤ŃĆéŃüĢŃéēŃü½ŃĆüGoogleŃü¦Ńü»ŃĆüŃāćŃé╣Ńé»ŃāłŃāāŃāŚŃéóŃāŚŃā¬Ńé▒Ńā╝ŃéĘŃā¦Ńā│Ńü©ķü£Ķē▓Ńü«Ńü¬Ńüäķø╗ÕŁÉŃāĪŃā╝Ńā½Ńé»Ńā®ŃéżŃéóŃā│ŃāłŃü¦ŃüéŃéŗGmailŃéäGoogle CalendarŃü¦Ńééń®ŹµźĄńÜäŃü½AjaxŃéƵÄĪńö©ŃüŚŃĆüAjaxŃü«Õ«¤ńö©µĆ¦ŃüīGoogleŃü«WebŃéóŃāŚŃā¬Ńé▒Ńā╝ŃéĘŃā¦Ńā│ŃéÆķĆÜŃüśŃü”õĖ¢ķ¢ōŃü½Ķ¬Źń¤źŃüĢŃéīŃü»ŃüśŃéüŃü”ŃüäŃéŗŃĆé</p>
<p>AjaxŃü½ŃéłŃéŗWebŃāŚŃāŁŃé░Ńā®Ńā¤Ńā│Ńé░’╝łWebŃéóŃāŚŃā¬Ńé▒Ńā╝ŃéĘŃā¦Ńā│ĶŻĮõĮ£’╝ēŃüīµ│©ńø«ŃüĢŃéīŃüĀŃüŚŃü¤ĶāīµÖ»Ńü½Ńü»ŃĆüŃüōŃü«ÕŠōµØźŃü«ŃāÜŃā╝ŃéĖķüĘń¦╗Ńü«Ńü┐Ńü½ķĀ╝ŃüŻŃü¤WebŃü«õĮ┐ŃüäÕŗصēŗŃü«µé¬ŃüĢŃü½Õ»ŠŃüÖŃéŗõĖŹµ║ĆŃéäŃĆüXMLŃĆüDOMŃü¬Ńü®Ńü«Webķ¢óķĆŻµŖĆĶĪōŃü«µ©Öµ║¢Õī¢’╝łŃé”Ńé¦Ńā¢µ©Öµ║¢’╝ēŃĆüŃüŖŃéłŃü│ķ½śŃüäµ®¤ĶāĮŃéƵīüŃüŻŃü¤WebŃā¢Ńā®Ńé”ŃéČŃü«µÖ«ÕÅŖŃü¬Ńü®ŃüīµīÖŃüÆŃéēŃéīŃéŗŃĆé</p>
<p>ŃüŠŃü¤ŃĆüŃāĆŃé”Ńā│ŃāŁŃā╝ŃāēÕ×ŗŃéóŃāŚŃā¬Ńé▒Ńā╝ŃéĘŃā¦Ńā│Ńü»ŃĆüŃā×ŃāŗŃéóÕ▒żŃüŗŃéēÕģłŃü½Õ║āŃüīŃéŖŃü½ŃüÅŃüäŃĆüń½ČÕÉłŃüīOSŃāĪŃā╝Ńé½Ńā╝Ńü©Ńü¬ŃüŻŃü¤Ńü©ŃüŹŃü½ń½Čõ║ēŃü½Ķ▓ĀŃüæŃü”ŃüŚŃüŠŃüåŃĆüŃü©ŃüäŃüŻŃü¤ÕĢÅķĪīŃéƵŖ▒ŃüłŃü”ŃüäŃéŗŃü¤ŃéüŃĆüŃāĆŃé”Ńā│ŃāŁŃā╝ŃāēÕ×ŗŃéóŃāŚŃā¬Ńé▒Ńā╝ŃéĘŃā¦Ńā│ŃüŗŃéēWebŃéóŃāŚŃā¬Ńé▒Ńā╝ŃéĘŃā¦Ńā│Ńü½ÕłćŃéŖµø┐ŃüłŃéŗµŖĆĶĪōŃü©ŃüŚŃü”ŃĆüAjaxŃüīÕł®ńö©ŃüĢŃéīŃü”ŃüäŃéŗŃĆé</p>
<p>DHTMLŃüīńÖ╗ÕĀ┤ŃüŚŃü¤ÕĮōµÖéŃü»ŃĆüÕŹśŃü½ŃüŖķüŖŃü│Ķ”üń┤ĀŃü½ķüÄŃüÄŃü¬ŃüäŃü©ĶĆāŃüłŃéēŃéīŃü”ŃüäŃü¤ÕŗĢńÜäŃāÜŃā╝ŃéĖŃüĀŃüīŃĆüJavaScriptŃéÆŃéłŃéŖÕŖ╣µ×£ńÜäŃü½õĮ┐ŃüåŃüōŃü©Ńü¦ŃĆüµźŁÕŗÖŃéäÕ«¤ńö©Ńü½ĶĆÉŃüłŃéŗÕä¬ń¦ĆŃü¬ŃéżŃā│Ńé┐Ńā╝ŃāĢŃé¦Ńā╝Ńé╣ŃéÆÕéÖŃüłŃü¤ŃéóŃāŚŃā¬Ńé▒Ńā╝ŃéĘŃā¦Ńā│ŃéÆHTMLŃü¦õĮ£ŃéŗŃüōŃü©ŃüīÕÅ»ĶāĮŃü¦ŃüéŃüŻŃü¤Ńü©ŃüäŃüåõ║ŗÕ«¤ŃéÆõĖ¢Ńü«õĖŁŃü½ń¤źŃéēŃüŚŃéüŃü¤Ńü©ŃüäŃüåµäÅńŠ®ŃéÆŃééŃüżµŖĆĶĪōŃü¦ŃüéŃéŗŃĆé</p>
<cite>Õć║ÕģĖ: ŃāĢŃā¬Ńā╝ńÖŠń¦æõ║ŗÕģĖŃĆÄŃé”ŃéŻŃéŁŃāÜŃāćŃéŻŃéó’╝łWikipedia’╝ēŃĆÅ</cite>
</blockquote>
<!-- CODE / -->
</div>
</body>
</html>
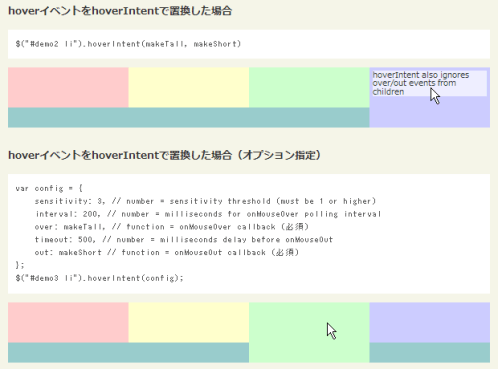
hoverIntent jQuery Plug-in
ŃāøŃāÉŃā╝Õć”ńÉå
2009/3/1
hoverIntent jQuery Plug-in
Ńā×Ńé”Ńé╣Ńü«ÕŗĢõĮ£ŃüĀŃüæŃü¦Ńé»Ńā¬Ńé╣Ńé┐Ńā½Ńā£Ńā╝Ńā½Ńü«ŃéłŃüåŃü½Ńā”Ńā╝ŃéČŃā╝Ńü«µäÅÕø│ŃéƵ▒║Õ«ÜŃü¦ŃüŹŃéŗjQueruŃāŚŃā®Ńé░ŃéżŃā│ŃĆé
jQueryŃü«hoverŃéżŃāÖŃā│ŃāłŃü«ŃéłŃüåŃü½ÕŗĢõĮ£ŃüŚŃüŠŃüÖŃüīŃĆüŃüÖŃüÉŃü½onMouseOverķ¢óµĢ░ŃéÆÕæ╝Ńü░ŃüÜŃü½ŃĆüŃā”Ńā╝ŃéČŃā╝Ńü«Ńā×Ńé”Ńé╣ŃüīÕŹüÕłåŃéƵĖøķƤŃüÖŃéŗŃü«ŃéÆÕŠģŃüŻŃü”ŃüŗŃéēonMouseOverŃéÆÕæ╝Ńü│Õć║ŃüŚŃüŠŃüÖŃĆé Ńé¬ŃāŚŃéĘŃā¦Ńā│Ńü¦Ńé┐ŃéżŃāĀŃéóŃé”ŃāłµÖéķ¢ōŃĆüŃāØŃā╝Ńā¬Ńā│Ńé░ķ¢ōķÜöŃü¬Ńü®ŃéÆŃé½Ńé╣Ńé┐Ńā×ŃéżŃé║ŃüÖŃéŗŃüōŃü©ŃüīŃü¦ŃüŹŃüŠŃüÖŃĆé
 Ķ©ŁńĮ«ŃéżŃāĪŃā╝ŃéĖ
<!DOCTYPE html PUBLIC "-//W3C//DTD XHTML 1.0 Transitional//EN" "http://www.w3.org/TR/xhtml1/DTD/xhtml1-transitional.dtd">
<html xmlns="http://www.w3.org/1999/xhtml" xml:lang="ja" lang="ja">
<head>
<meta http-equiv="Content-Type" content="text/html; charset=utf-8" />
<meta http-equiv="Content-Language" content="ja" />
<meta http-equiv="Content-Script-Type" content="text/javascript" />
<meta http-equiv="Content-Style-Type" content="text/css" />
<meta http-equiv="imagetoolbar" content="no" />
<title>jQuery Spoilers plugin | Ķ©ŁńĮ«ŃéĄŃā│ŃāŚŃā½</title>
<link rel="stylesheet" type="text/css" href="/content/lib/global.css" />
<!-- JS -->
<script type="text/javascript" src="http://ajax.googleapis.com/ajax/libs/jquery/1.3.2/jquery.min.js"></script>
<script type="text/javascript" src="/content/lib/jquery/jquery.hoverIntent.js"></script>
<script type="text/javascript">
$(function(){
$("#demo1 li").hover(makeTall,makeShort);
$("#demo2 li").hoverIntent(makeTall,makeShort);
$("#demo3 li").hoverIntent({
sensitivity: 3,
interval: 200,
over: makeTall,
timeout: 500,
out: makeShort
});
});
function makeTall(){ $(this).animate({"height":75},200);}
function makeShort(){ $(this).animate({"height":50},200);}
</script>
<!-- CSS -->
<style type="text/css">
#demo { width:600px; }
ul.demo {display:block; width:100%; height:75px; padding:0; margin:0; background:#9cc; list-style-type:none;}
ul.demo li {background:#fcc; display:block; width:25%; height:50px; padding:0; margin:0; float: left; position:relative; overflow:hidden; cursor:default; font-size:0.9em; line-height:1.1em; text-align:center;}
ul.demo li.p2 {background:#ffc;}
ul.demo li.p3 {background:#cfc;}
ul.demo li.p4 {background:#ccf;}
ul.demo li span { display:block; margin:4px; background:#eef; cursor:default;}
</style>
</head>
<body>
<div id="wrap">
<h1><a href='http://cherne.net/brian/resources/jquery.hoverIntent.html'>hoverIntent jQuery Plug-in</a> | Ķ©ŁńĮ«ŃéĄŃā│ŃāŚŃā½</h1>
<!-- CODE -->
<div id="demo">
<h2>jQueryŃü«hoverŃéżŃāÖŃā│ŃāłŃü«ÕĀ┤ÕÉł</h2>
<pre>$("#demo1 li").hover(makeTall, makeShort)</pre>
<ul class="demo" id="demo1">
<li class="p1">Ńā×Ńé”Ńé╣Ńé¬Ńā╝ŃāÉŃā╝ŃüŚŃü”ŃüÅŃüĀŃüĢŃüä</li>
<li class="p2">Ńā×Ńé”Ńé╣Ńé¬Ńā╝ŃāÉŃā╝ŃüŚŃü”ŃüÅŃüĀŃüĢŃüä</li>
<li class="p3">Ńā×Ńé”Ńé╣Ńé¬Ńā╝ŃāÉŃā╝ŃüŚŃü”ŃüÅŃüĀŃüĢŃüä</li>
<li class="p4"><span>hover ignores over/out events from children</span></li>
</ul>
<h2>hoverŃéżŃāÖŃā│ŃāłŃéÆhoverIntentŃü¦ńĮ«µÅøŃüŚŃü¤ÕĀ┤ÕÉł</h2>
<pre>$("#demo2 li").hoverIntent(makeTall, makeShort)</pre>
<ul class="demo" id="demo2">
<li class="p1">Ńā×Ńé”Ńé╣Ńé¬Ńā╝ŃāÉŃā╝ŃüŚŃü”ŃüÅŃüĀŃüĢŃüä</li>
<li class="p2">Ńā×Ńé”Ńé╣Ńé¬Ńā╝ŃāÉŃā╝ŃüŚŃü”ŃüÅŃüĀŃüĢŃüä</li>
<li class="p3">Ńā×Ńé”Ńé╣Ńé¬Ńā╝ŃāÉŃā╝ŃüŚŃü”ŃüÅŃüĀŃüĢŃüä</li>
<li class="p4"><span>hoverIntent also ignores over/out events from children</span></li>
</ul>
<h2>hoverŃéżŃāÖŃā│ŃāłŃéÆhoverIntentŃü¦ńĮ«µÅøŃüŚŃü¤ÕĀ┤ÕÉł’╝łŃé¬ŃāŚŃéĘŃā¦Ńā│µīćÕ«Ü’╝ē</h2>
<pre>var config = {
sensitivity: 3, <span class='green'>// number = sensitivity threshold (must be 1 or higher)</span>
interval: 200, <span class='green'>// number = milliseconds for onMouseOver polling interval</span>
over: makeTall, <span class='green'>// function = onMouseOver callback (Õ┐ģķĀł)</span>
timeout: 500, <span class='green'>// number = milliseconds delay before onMouseOut</span>
out: makeShort <span class='green'>// function = onMouseOut callback (Õ┐ģķĀł)</span>
};
$("#demo3 li").hoverIntent(config);</pre>
<ul class="demo" id="demo3">
<li class="p1">Ńā×Ńé”Ńé╣Ńé¬Ńā╝ŃāÉŃā╝ŃüŚŃü”ŃüÅŃüĀŃüĢŃüä</li>
<li class="p2">Ńā×Ńé”Ńé╣Ńé¬Ńā╝ŃāÉŃā╝ŃüŚŃü”ŃüÅŃüĀŃüĢŃüä</li>
<li class="p3">Ńā×Ńé”Ńé╣Ńé¬Ńā╝ŃāÉŃā╝ŃüŚŃü”ŃüÅŃüĀŃüĢŃüä</li>
<li class="p4">Ńā×Ńé”Ńé╣Ńé¬Ńā╝ŃāÉŃā╝ŃüŚŃü”ŃüÅŃüĀŃüĢŃüä</li>
</ul>
</div>
<!-- / CODE -->
</div>
</body>
</html>
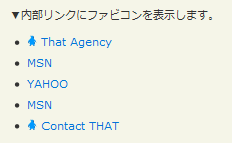
Internal Links with Favicon using jQuery
Õåģķā©Ńā¬Ńā│Ńé»Ńü½ŃāĢŃéĪŃāōŃé│Ńā│ĶĪ©ńż║
2009/3/28
Internal Links with Favicon using jQuery
ńÅŠÕ£©Ńü«URLŃüŗŃéēŃāøŃé╣ŃāłÕÉŹŃéÆÕÅ¢ÕŠŚŃüŚŃĆüaĶ”üń┤ĀŃü«hrefÕ▒׵ƦŃü«ÕĆżŃüīŃüØŃü«ŃĆīhttp://ŃĆŹ’╝ŗŃāøŃé╣ŃāłÕÉŹŃü¦Õ¦ŗŃüŠŃéŗŃā¬Ńā│Ńé»Ńü½ŃĆüŃüØŃü«ŃāēŃāĪŃéżŃā│ńø┤õĖŗŃü½ŃüéŃéŗŃāĢŃéĪŃāōŃé│Ńā│’╝łfavicon.ico’╝ēŃéÆĶĪ©ńż║ŃüÖŃéŗjQueryŃāŚŃā®Ńé░ŃéżŃā│ŃĆé
 Ķ©ŁńĮ«ŃéżŃāĪŃā╝ŃéĖ
<!DOCTYPE html PUBLIC "-//W3C//DTD XHTML 1.0 Transitional//EN" "http://www.w3.org/TR/xhtml1/DTD/xhtml1-transitional.dtd">
<html xmlns="http://www.w3.org/1999/xhtml" xml:lang="ja" lang="ja">
<head>
<meta http-equiv="Content-Type" content="text/html; charset=utf-8" />
<meta http-equiv="Content-Language" content="ja" />
<meta http-equiv="Content-Script-Type" content="text/javascript" />
<meta http-equiv="Content-Style-Type" content="text/css" />
<meta http-equiv="imagetoolbar" content="no" />
<title>Internal Links with Favicon using jQuery | Ķ©ŁńĮ«ŃéĄŃā│ŃāŚŃā½</title>
<link rel="stylesheet" type="text/css" href="/content/lib/global.css" />
<!-- JS -->
<script type="text/javascript" src="http://ajax.googleapis.com/ajax/libs/jquery/1.3.2/jquery.min.js"></script>
<script type="text/javascript" src="/content/lib/jquery/jquery.internalfavlinks.js"></script>
<script type="text/javascript">
$(function() {
$().internalFavLinks();
});
</script>
<!-- CSS -->
<style type="text/css">
ul li a { text-decoration:none; }
</style>
</head>
<body>
<div id="wrap">
<h1><a href='http://www.thatagency.com/design-studio-blog/2009/03/internal-links-with-favicon-using-jquery/'>Internal Links with Favicon using jQuery</a> | Ķ©ŁńĮ«ŃéĄŃā│ŃāŚŃā½</h1>
<p>Ō¢╝Õåģķā©Ńā¬Ńā│Ńé»Ńü½ŃāĢŃéĪŃāōŃé│Ńā│ŃéÆĶĪ©ńż║ŃüŚŃüŠŃüÖŃĆé</p>
<!-- CODE -->
<ul>
<li><a href="http://phpjavascriptroom.com/">That Agency</a></li>
<li><a href="http://www.msn.com">MSN</a></li>
<li><a href="http://www.Yahoo.com">YAHOO</a></li>
<li><a href="http://www.msn.com">MSN</a></li>
<li><a href="http://phpjavascriptroom.com/">Contact THAT</a></li>
</ul>
<!-- / CODE -->
</div>
</body>
</html>
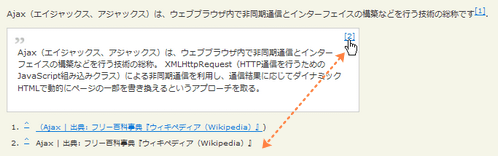
jFootnotes
ŃéżŃā│Ńā®ŃéżŃā│Ńé│Ńā│ŃāåŃā│ŃāäŃü½Õ¤║ŃüźŃüäŃü”Ķäܵ│©ŃéÆńö¤µłÉ
2009/3/10
jFootnotes
ŃéżŃā│Ńā®ŃéżŃā│Ńé│Ńā│ŃāåŃā│ŃāäŃü½Õ¤║ŃüźŃüäŃü”Ķäܵ│©ŃéÆõĮ£µłÉŃüŚŃü”ŃāĢŃé®Ńā╝Ńā×ŃāāŃāłŃüÖŃéŗjQueryŃāŚŃā®Ńé░ŃéżŃā│ŃĆé
ŃāćŃāĢŃé®Ńā½ŃāłŃü¦ŃĆüŃĆīfootnoteŃé»Ńā®Ńé╣ŃéƵīüŃüżspanĶ”üń┤ĀŃĆŹŃü©ŃĆīblockquoteĶ”üń┤ĀŃü«titleÕ▒׵ƦŃĆŹŃüīĶäܵ│©Ńü½ÕżēµÅøŃüĢŃéīŃüŠŃüÖŃĆé
$('.example').footnotes();Ńü«ŃéłŃüåŃü½ŃĆüĶäܵ│©ŃéÆõ╗śŃüæŃéŗĶ”üń┤ĀŃéƵīüŃüżĶ”¬Ķ”üń┤ĀŃü½Ńā×ŃāāŃāüŃüÖŃéŗµØĪõ╗ČŃéƵīćÕ«ÜŃüŚŃüŠŃüÖŃĆé
 Ķ©ŁńĮ«ŃéżŃāĪŃā╝ŃéĖ
<!DOCTYPE html PUBLIC "-//W3C//DTD XHTML 1.0 Transitional//EN" "http://www.w3.org/TR/xhtml1/DTD/xhtml1-transitional.dtd">
<html xmlns="http://www.w3.org/1999/xhtml" xml:lang="ja" lang="ja">
<head>
<meta http-equiv="Content-Type" content="text/html; charset=utf-8" />
<meta http-equiv="Content-Language" content="ja" />
<meta http-equiv="Content-Script-Type" content="text/javascript" />
<meta http-equiv="Content-Style-Type" content="text/css" />
<meta http-equiv="imagetoolbar" content="no" />
<title>jFootnotes | Ķ©ŁńĮ«ŃéĄŃā│ŃāŚŃā½</title>
<link rel="stylesheet" type="text/css" href="/content/lib/global.css" />
<!-- JS -->
<script type="text/javascript" src="http://ajax.googleapis.com/ajax/libs/jquery/1.3.2/jquery.min.js"></script>
<script type="text/javascript" src="/content/lib/jquery/jquery.footnotes.js"></script>
<script type="text/javascript">
$(function(){
$(".example").footnotes();
})
</script>
<!-- CSS -->
<style type="text/css">
blockquote { position:relative; width:500px; }
blockquote sup { position:absolute; right:5px; top:5px; }
ol.footnotesList li { font-size:11px; }
ol.footnotesList li sup { margin-right:10px; }
</style>
</head>
<body>
<div id="wrap">
<h1><a href='http://www.planetholt.com/articles/jQuery-Footnotes'>jFootnotes</a> | Ķ©ŁńĮ«ŃéĄŃā│ŃāŚŃā½</h1>
<!-- CODE -->
<div class="example">
<p>
Ajax’╝łŃé©ŃéżŃéĖŃāŻŃāāŃé»Ńé╣ŃĆüŃéóŃéĖŃāŻŃāāŃé»Ńé╣’╝ēŃü»ŃĆüŃé”Ńé¦Ńā¢Ńā¢Ńā®Ńé”ŃéČÕåģŃü¦ķØ×ÕÉīµ£¤ķĆÜõ┐ĪŃü©ŃéżŃā│Ńé┐Ńā╝ŃāĢŃé¦ŃéżŃé╣Ńü«µ¦ŗń»ēŃü¬Ńü®ŃéÆĶĪīŃüåµŖĆĶĪōŃü«ńĘÅń¦░Ńü¦ŃüÖ<span class="footnote"><a href="http://ja.wikipedia.org/wiki/Ajax">’╝łAjax | Õć║ÕģĖ: ŃāĢŃā¬Ńā╝ńÖŠń¦æõ║ŗÕģĖŃĆÄŃé”ŃéŻŃéŁŃāÜŃāćŃéŻŃéó’╝łWikipedia’╝ēŃĆÅ</a>)</span>.
</p>
<blockquote title="Ajax | Õć║ÕģĖ: ŃāĢŃā¬Ńā╝ńÖŠń¦æõ║ŗÕģĖŃĆÄŃé”ŃéŻŃéŁŃāÜŃāćŃéŻŃéó’╝łWikipedia’╝ēŃĆÅ">
<p>
Ajax’╝łŃé©ŃéżŃéĖŃāŻŃāāŃé»Ńé╣ŃĆüŃéóŃéĖŃāŻŃāāŃé»Ńé╣’╝ēŃü»ŃĆüŃé”Ńé¦Ńā¢Ńā¢Ńā®Ńé”ŃéČÕåģŃü¦ķØ×ÕÉīµ£¤ķĆÜõ┐ĪŃü©ŃéżŃā│Ńé┐Ńā╝ŃāĢŃé¦ŃéżŃé╣Ńü«µ¦ŗń»ēŃü¬Ńü®ŃéÆĶĪīŃüåµŖĆĶĪōŃü«ńĘÅń¦░ŃĆé
XMLHttpRequest’╝łHTTPķĆÜõ┐ĪŃéÆĶĪīŃüåŃü¤ŃéüŃü«JavaScriptńĄäŃü┐ĶŠ╝Ńü┐Ńé»Ńā®Ńé╣’╝ēŃü½ŃéłŃéŗķØ×ÕÉīµ£¤ķĆÜõ┐ĪŃéÆÕł®ńö©ŃüŚŃĆüķĆÜõ┐ĪńĄÉµ×£Ńü½Õ┐£ŃüśŃü”ŃāĆŃéżŃāŖŃā¤ŃāāŃé»HTMLŃü¦ÕŗĢńÜäŃü½ŃāÜŃā╝ŃéĖŃü«õĖĆķā©ŃéƵøĖŃüŹµÅøŃüłŃéŗŃü©ŃüäŃüåŃéóŃāŚŃāŁŃā╝ŃāüŃéÆÕÅ¢ŃéŗŃĆé
</p>
</blockquote>
<ol id="autoFootnotes0" class="footnotesList"></ol>
</div>
<!-- / CODE -->
</body>
</html>
jqPuzzle - Cusomizable Sliding Puzzles with jQuery
1µ×ÜŃü«ńö╗ÕāÅŃüŗŃéēŃāæŃé║Ńā½ŃéÆõĮ£µłÉ
unknown
jqPuzzle - Cusomizable Sliding Puzzles with jQuery
1µ×ÜŃü«ńö╗ÕāÅŃüŗŃéēŃāæŃé║Ńā½ŃéÆń░ĪÕŹśŃü½õĮ£µłÉŃü¦ŃüŹŃéŗjQueryŃāŚŃā®Ńé░ŃéżŃā│ŃĆé
 Ķ©ŁńĮ«ŃéżŃāĪŃā╝ŃéĖ
<!DOCTYPE html PUBLIC "-//W3C//DTD XHTML 1.0 Transitional//EN" "http://www.w3.org/TR/xhtml1/DTD/xhtml1-transitional.dtd">
<html xmlns="http://www.w3.org/1999/xhtml" xml:lang="ja" lang="ja">
<head>
<meta http-equiv="Content-Type" content="text/html; charset=utf-8" />
<meta http-equiv="Content-Language" content="ja" />
<meta http-equiv="Content-Script-Type" content="text/javascript" />
<meta http-equiv="Content-Style-Type" content="text/css" />
<meta http-equiv="imagetoolbar" content="no" />
<title>jQuery: jqPuzzle | Ķ©ŁńĮ«ŃéĄŃā│ŃāŚŃā½</title>
<link rel="stylesheet" type="text/css" href="/content/lib/global.css" />
<!-- JS -->
<script src="https://ajax.googleapis.com/ajax/libs/jquery/1.2.6/jquery.min.js"></script>
<script type="text/javascript" src="/content/lib/jquery/jquery.jqpuzzle.min.js"></script>
<script type="text/javascript">
$(function(){
$('.sample').jqShuffle();
});
</script>
<!-- CSS -->
<link rel="stylesheet" type="text/css" href="/content/lib/jquery/jquery.jqpuzzle.css" />
<style type="text/css">
.sample { margin:0 auto; padding:0; text-align:center; list-style:none; }
</style>
</head>
<body>
<div id="wrap">
<h1><a href='http://www.2meter3.de/jqPuzzle/'>jqPuzzle - Cusomizable Sliding Puzzles with jQuery</a> | Ķ©ŁńĮ«ŃéĄŃā│ŃāŚŃā½</h1>
<!-- CODE -->
<img id="heli" src="/content/img/pic1.png" alt="Isla Tabarca, Spain" class="jqPuzzle" />
<!-- / CODE -->
</div>
</body>
</html>
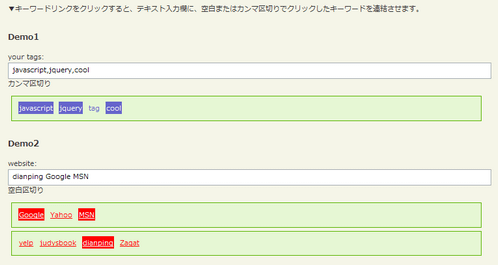
jQuery jTagging plugin
Ńé┐Ńé░Ńü«ÕģźÕŖøŃéÆń░ĪÕŹśŃü½ŃüÖŃéŗ
2009/2/28
jQuery Plugin -- jTagging
Ńé┐Ńé░Ńü«ÕģźÕŖøŃéÆń░ĪÕŹśŃü½ŃüÖŃéŗĶ╗ĮķćÅŃü«jQuery pluginŃĆé
ŃéŁŃā╝Ńā»Ńā╝ŃāēŃā¬Ńā│Ńé»ŃéÆŃé»Ńā¬ŃāāŃé»ŃüÖŃéŗŃü©µīćÕ«ÜŃüŚŃü¤Õī║ÕłćŃéŖµ¢ćÕŁŚ’╝łń®║ńÖĮŃüŠŃü¤Ńü»Ńé½Ńā│Ńā×Ńü¬Ńü®’╝ēŃü¦ŃĆüŃé»Ńā¬ŃāāŃé»ŃüŚŃü¤ŃéŁŃā╝Ńā»Ńā╝ŃāēŃéÆķĆŻńĄÉŃüŚŃü”1ŃüżŃü«µ¢ćÕŁŚÕłŚŃü½ŃüŚŃĆüŃāåŃéŁŃé╣ŃāłÕģźÕŖøµ¼äŃü½ĶĪ©ńż║ŃüŚŃüŠŃüÖŃĆé Ńé»Ńā¬ŃāāŃé»ŃüŚŃü¤ŃéŁŃā╝Ńā»Ńā╝ŃāēŃü»ŃāÅŃéżŃā®ŃéżŃāłĶĪ©ńż║ŃüĢŃéīŃüŠŃüÖŃĆé ÕåŹÕ║”Ńé»Ńā¬ŃāāŃé»ŃüÖŃéŗŃü©ŃĆüķĆŻńĄÉŃüŚŃü¤µ¢ćÕŁŚÕłŚŃüŗŃéēŃĆüŃüØŃü«ŃéŁŃā╝Ńā»Ńā╝ŃāēŃéÆÕēŖķÖżŃüÖŃéŗŃüōŃü©ŃüīŃü¦ŃüŹŃüŠŃüÖŃĆé
 Ķ©ŁńĮ«ŃéżŃāĪŃā╝ŃéĖ
<!DOCTYPE html PUBLIC "-//W3C//DTD XHTML 1.0 Transitional//EN" "http://www.w3.org/TR/xhtml1/DTD/xhtml1-transitional.dtd">
<html xmlns="http://www.w3.org/1999/xhtml" xml:lang="ja" lang="ja">
<head>
<meta http-equiv="Content-Type" content="text/html; charset=utf-8" />
<meta http-equiv="Content-Language" content="ja" />
<meta http-equiv="Content-Script-Type" content="text/javascript" />
<meta http-equiv="Content-Style-Type" content="text/css" />
<meta http-equiv="imagetoolbar" content="no" />
<title>jQuery Plugin -- jTagging | Ķ©ŁńĮ«ŃéĄŃā│ŃāŚŃā½</title>
<link rel="stylesheet" type="text/css" href="/content/lib/global.css" />
<!-- JS -->
<script type="text/javascript" src="http://ajax.googleapis.com/ajax/libs/jquery/1.3.2/jquery.min.js"></script>
<script type="text/javascript" src="/content/lib/jquery/jQuery.jTagging.js"></script>
<script type="text/javascript">
$(function() {
$("#TagText1").jTagging($("#TagDiv1"), ",");
var tagDivList = new Array($("#TagDiv3"), $("#TagDiv4"));
var normalClass = { padding: "2px 1px 0 1px", textDecoration: "underline", color: "#f00", backgroundColor: "" };
var selectedClass = { padding: "2px 1px 0 1px", textDecoration: "underline", color: "#fff", backgroundColor: "#f00" };
var normalHoverClass = { padding: "2px 1px 0 1px", textDecoration: "none", color: "#fff", backgroundColor: "#00f" };
$("#TagText2").jTagging(tagDivList, " ", normalClass, selectedClass, normalHoverClass);
});
</script>
<!-- CSS -->
<style type="text/css">
div.box { border:1px solid #5ab500;margin:5px;padding:10px;background-color:#e6f7d4; }
</style>
</head>
<body>
<div id="wrap">
<h1><a href='http://www.alcoholwang.cn/jquery/jTagging.htm'>jQuery Plugin -- jTagging</a> | Ķ©ŁńĮ«ŃéĄŃā│ŃāŚŃā½</h1>
<p>Ō¢╝ŃéŁŃā╝Ńā»Ńā╝ŃāēŃā¬Ńā│Ńé»ŃéÆŃé»Ńā¬ŃāāŃé»ŃüÖŃéŗŃü©ŃĆüŃāåŃéŁŃé╣ŃāłÕģźÕŖøµ¼äŃü½ŃĆüń®║ńÖĮŃüŠŃü¤Ńü»Ńé½Ńā│Ńā×Õī║ÕłćŃéŖŃü¦Ńé»Ńā¬ŃāāŃé»ŃüŚŃü¤ŃéŁŃā╝Ńā»Ńā╝ŃāēŃéÆķĆŻńĄÉŃüĢŃüøŃüŠŃüÖŃĆé</p>
<!-- CODE -->
<h2>õŠŗ1</h2>
<p>your tags: <input id="TagText1" size="65"> Ńé½Ńā│Ńā×Õī║ÕłćŃéŖ</p>
<div id="TagDiv1" class="box"><a href="#" onclick="return false;">javascript</a> <a href="#" onclick="return false;">jquery</a> <a href="#" onclick="return false;">tag</a> <a href="#" onclick="return false;">cool</a></div>
<h2>õŠŗ2</h2>
<p>website: <input type="text" id="TagText2" size="65" value="dianping"/> ń®║ńÖĮÕī║ÕłćŃéŖ</p>
<div id="TagDiv3" class="box"><a href="#" onclick="return false;">Google</a> <a href="#" onclick="return false;">Yahoo</a> <a href="#" onclick="return false;">MSN</a></div>
<div id="TagDiv4" class="box"><a href="#" onclick="return false;">yelp</a> <a href="#" onclick="return false;">judysbook</a> <a href="#" onclick="return false;">dianping</a> <a href="#" onclick="return false;">Zagat</a></div>
<!-- CODE / -->
</div>
</body>
</html>
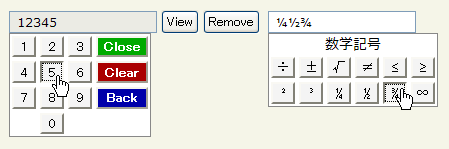
jQuery Keypad
ŃāØŃāāŃāŚŃéóŃāāŃāŚŃüÖŃéŗŃéŁŃā╝Ńā£Ńā╝Ńāē
2009/7/11
jQuery Keypad
ŃāåŃéŁŃé╣ŃāłŃāĢŃéŻŃā╝Ńā½ŃāēŃüĖŃü«ÕģźÕŖøŃéÆŃāØŃāāŃāŚŃéóŃāāŃāŚŃéŁŃā╝Ńā£Ńā╝ŃāēŃüŗŃéēĶĪīŃüłŃéŗŃéłŃüåŃü½ŃüÖŃéŗjQueryŃāŚŃā®Ńé░ŃéżŃā│ŃĆé
ŃāåŃéŁŃé╣ŃāłŃāĢŃéŻŃā╝Ńā½ŃāēŃéÆŃé»Ńā¬ŃāāŃé»ŃüÖŃéŗŃü©ŃĆüŃéŁŃā╝Ńā£Ńā╝ŃāēŃüīŃāØŃāāŃāŚŃéóŃāāŃāŚŃüĢŃéīŃĆüŃé»Ńā¬ŃāāŃé»ŃüŚŃü¤ŃéŁŃā╝ŃüīŃāåŃéŁŃé╣ŃāłŃāĢŃéŻŃā╝Ńā½ŃāēŃü½ÕģźÕŖøŃüĢŃéīŃüŠŃüÖŃĆé ÕģźÕŖøÕåģÕ«╣Ńü«Ńé»Ńā¬ŃéóŃé䵳╗ŃüÖµ®¤ĶāĮŃééŃüżŃüäŃü”ŃüäŃüŠŃüÖŃĆé ŃéŁŃā╝Ńā£Ńā╝ŃāēŃü«ķģŹÕłŚŃéÆŃā®Ńā│ŃāĆŃāĀŃü½ŃüŚŃü¤ŃéŖŃĆüŃéŁŃā╝Ńā£Ńā╝ŃāēĶĪ©ńż║Ńü«Ńé╣Ńé┐ŃéżŃā½ŃéÆCSSŃü¦Ńé½Ńé╣Ńé┐Ńā×ŃéżŃé║ŃüÖŃéŗŃüōŃü©ŃééŃü¦ŃüŹŃüŠŃüÖŃĆé Ńé«Ńā¬ŃéĘŃāŻµ¢ćÕŁŚŃéäŃéĘŃā│Ńā£Ńā½Ńā×Ńā╝Ńé»ŃĆüµĢ░ÕŁ”Ķ©śÕÅĘŃü¬Ńü®Ńü«ńē╣µ«Ŗµ¢ćÕŁŚŃéÆŃā”Ńā╝ŃéČŃā╝Ńü½ÕģźÕŖøŃüŚŃü”ŃééŃéēŃüåÕ┐ģĶ”üŃüīŃüéŃéŗÕĀ┤ÕÉłŃü¬Ńü®Ńü½ÕĮ╣ń½ŗŃüĪŃüØŃüåŃü¦ŃüÖŃĆé
 Ķ©ŁńĮ«ŃéżŃāĪŃā╝ŃéĖ
<!DOCTYPE html PUBLIC "-//W3C//DTD XHTML 1.0 Transitional//EN" "http://www.w3.org/TR/xhtml1/DTD/xhtml1-transitional.dtd">
<html xmlns="http://www.w3.org/1999/xhtml" xml:lang="ja" lang="ja">
<head>
<meta http-equiv="Content-Type" content="text/html; charset=utf-8" />
<meta http-equiv="Content-Language" content="ja" />
<meta http-equiv="Content-Script-Type" content="text/javascript" />
<meta http-equiv="Content-Style-Type" content="text/css" />
<meta http-equiv="imagetoolbar" content="no" />
<title>jQuery Keypad | Ķ©ŁńĮ«ŃéĄŃā│ŃāŚŃā½</title>
<link rel="stylesheet" type="text/css" href="/content/lib/global.css" />
<!-- JS -->
<script type="text/javascript" src="http://ajax.googleapis.com/ajax/libs/jquery/1.3.2/jquery.min.js"></script>
<script type="text/javascript" src="/content/lib/jquery/jquery_keypad/jquery.keypad.js"></script>
<!-- CSS -->
<link rel="stylesheet" type="text/css" href="/content/lib/jquery/jquery_keypad/jquery.keypad.css" />
</head>
<body>
<div id="wrap">
<h1><a href='http://keith-wood.name/keypad.html'>jQuery Keypad</a> | Ķ©ŁńĮ«ŃéĄŃā│ŃāŚŃā½</h1>
<p>Ō¢╝ŃāåŃéŁŃé╣ŃāłŃāĢŃéŻŃā╝Ńā½ŃāēŃéÆŃé»Ńā¬ŃāāŃé»ŃüÖŃéŗŃü©ŃĆüŃéŁŃā╝Ńā£Ńā╝ŃāēŃüīŃāØŃāāŃāŚŃéóŃé”ŃāłŃüŚŃüŠŃüÖŃĆé</p>
<!-- CODE -->
<h1>Basic</h1>
<p>
<input type="text" id="defaultKeypad" />
<button type="button" id="viewKeypad">View</button>
<button type="button" id="removeKeypad">Remove</button>
</p>
<script type="text/javascript">
$(function() {
$('#defaultKeypad').keypad();
$('#viewKeypad').click(function() {
alert('ńÅŠÕ£©Ńü«ÕģźÕŖøÕĆż: ' + $('#defaultKeypad').val());
});
$('#removeKeypad').toggle(function() {
$(this).text('Re-attach');
$('#defaultKeypad').keypad('destroy');
},
function() {
$(this).text('Remove');
$('#defaultKeypad').keypad();
}
);
});
</script>
<h2>Qwerty keypad</h2>
<p><input type="text" id="qwertyKeypad" /></p>
<script type="text/javascript">
$(function(){
var qwertyLayout = [
$.keypad.qwertyAlphabetic[0] + $.keypad.CLOSE,
$.keypad.HALF_SPACE + $.keypad.qwertyAlphabetic[1] +
$.keypad.HALF_SPACE + $.keypad.CLEAR,
$.keypad.SPACE + $.keypad.qwertyAlphabetic[2] +
$.keypad.SHIFT + $.keypad.BACK
];
$('#qwertyKeypad').keypad({keypadOnly: false, layout: qwertyLayout});
});
</script>
<h2>µĢ░ÕĆżŃéŁŃā╝Ńā£Ńā╝Ńāē</h2>
<p> <input type="text" id="alphaKeypad" /></p>
<script type="text/javascript">
$(function(){
$('#alphaKeypad').keypad({
keypadOnly: false,
layout: [
'abcdefghij' + $.keypad.CLOSE, 'klmnopqrst' + $.keypad.CLEAR,
'uvwxyz' + $.keypad.SPACE + $.keypad.SPACE + $.keypad.SHIFT + $.keypad.BACK
]
});
});
</script>
<h2>ŃāĢŃā½ŃéŁŃā╝Ńā£Ńā╝Ńāē</h2>
<p><input type="text" id="fullKeypad" /></p>
<script type="text/javascript">
$(function(){
$('#fullKeypad').keypad({
keypadOnly: false,
layout: $.keypad.qwertyLayout
});
});
</script>
<h2>ńē╣µ«Ŗµ¢ćÕŁŚ</h2>
<h3>Ńé«Ńā¬ŃéĘŃāŻµ¢ćÕŁŚ</h3>
<p><input type="text" id="greekKeypad" /></p>
<script type="text/javascript">
$(function(){
$('#greekKeypad').keypad({keypadOnly: false,
layout: ['╬▒╬▓╬│╬┤╬Ą╬Č', '╬Ę╬Ė╬╣╬║╬╗╬╝', '╬Į╬Š╬┐ŽĆŽüŽā', 'ŽäŽģŽåŽćŽłŽē'],
prompt: 'Ńé«Ńā¬ŃéĘŃāŻµ¢ćÕŁŚ'
});
});
</script>
<h3>µĢ░ÕŁ”Ķ©śÕÅĘ</h3>
<p><input type="text" id="mathKeypad" /></p>
<script type="text/javascript">
$(function(){
$('#mathKeypad').keypad({
keypadOnly: false,
layout: ['├Ę┬▒ŌłÜŌēĀŌēżŌēź', '┬▓┬│┬╝┬Į┬ŠŌł×'],
prompt: 'µĢ░ÕŁ”Ķ©śÕÅĘ'
});
});
</script>
<h3>ŃüØŃü«õ╗¢Ńü«ŃéĘŃā│Ńā£Ńā½</h3>
<p><input type="text" id="otherKeypad" /></p>
<script type="text/javascript">
$(function(){
$('#otherKeypad').keypad({
keypadOnly: false,
layout: ['┬®┬«ŌäóŌäĀ', 'Ōé¼┬Ż┬ź┬ó'], prompt: 'Other symbols'
});
});
</script>
<!-- CODE / -->
</div>
</body>
</html>
jQuery PhotoShoot Plugin
ÕåÖń£¤µÆ«ÕĮ▒ŃéÆŃüŚŃü”ŃüäŃéŗŃéłŃüåŃü½µīćÕ«Üń»äÕø▓Ńü«ńö╗ÕāÅŃéÆÕłćŃéŖÕć║ŃüŚ
2010/2/10
jQuery PhotoShoot Plugin
’╝╗ńö╗ÕāÅ’╝Įviewfinder.png
’╝╗Ńé½Ńā╝ŃéĮŃā½’╝Įblank.curŃĆüblank_google_chrome.cur
Ńé½ŃāĪŃā®Ńü«ŃāĢŃéĪŃéżŃā│ŃāĆŃā╝ŃéÆķÖżŃüäŃü”ÕåÖń£¤ŃéƵƫÕĮ▒ŃüÖŃéŗŃéłŃüåŃü½ŃĆüµīćÕ«Üń»äÕø▓Ńü«ńö╗ÕāÅŃéÆŃé»Ńā¬ŃāāŃ黵ōŹõĮ£Ńü¦ÕłćŃéŖÕć║ŃüŚĶĪ©ńż║ŃüÖŃéŗjQueryŃāŚŃā®Ńé░ŃéżŃā│ŃĆé CSSŃü¦Ńé¬Ńā¬ŃéĖŃāŖŃā½Ńé½Ńā╝ŃéĮŃā½ŃéƵīćÕ«ÜŃüŚŃü”ŃüŖŃéŖŃĆüŃé»Ńā¬ŃāāŃ黵ÖéŃü½Ńü»ńö╗ÕāÅŃü½ŃāĢŃā®ŃāāŃéĘŃāźÕŖ╣µ×£ŃüīŃüżŃüŹŃüŠŃüÖŃĆé
 Ķ©ŁńĮ«ŃéżŃāĪŃā╝ŃéĖ
<!DOCTYPE html PUBLIC "-//W3C//DTD XHTML 1.0 Transitional//EN" "http://www.w3.org/TR/xhtml1/DTD/xhtml1-transitional.dtd">
<html xmlns="http://www.w3.org/1999/xhtml" xml:lang="ja" lang="ja">
<head>
<meta http-equiv="Content-Type" content="text/html; charset=utf-8" />
<meta http-equiv="Content-Language" content="ja" />
<meta http-equiv="Content-Script-Type" content="text/javascript" />
<meta http-equiv="Content-Style-Type" content="text/css" />
<meta http-equiv="imagetoolbar" content="no" />
<title>Displaying source code with Ajax | Ķ©ŁńĮ«ŃéĄŃā│ŃāŚŃā½</title>
<link rel="stylesheet" type="text/css" href="/content/lib/global.css" />
<!-- JS -->
<script type="text/javascript" src="http://ajax.googleapis.com/ajax/libs/jquery/1.3.2/jquery.min.js"></script>
<script type="text/javascript" src="/content/lib/jquery/photoShoot/jquery.photoShoot-1.0.js"></script>
<script type="text/javascript">
$(function() {
/* This code is executed after the DOM has been completely loaded */
// Assigning the jQuery object to a variable for speed:
var main = $('#main');
// Setting the width of the photoshoot area to
// 1024 px or the width of the document - whichever is smallest:
main.width(Math.min(1024,$(document).width()));
// Creating an array with four possible backgrounds and their sizes:
var pics = new Array(
{ url:'http://farm4.static.flickr.com/3639/3664935712_94ca67b18b_b.jpg', size:{x:1024,y:576}},
{ url:'http://farm4.static.flickr.com/3220/3664935670_b94968ccbc_b.jpg', size:{x:1024,y:576}},
{ url:'http://farm4.static.flickr.com/3394/3664935528_16fff63afc_b.jpg', size:{x:1024,y:576}}
);
// Choosing a random picture to be passed to the PhotoShoot jQuery plug-in:
var bg = pics[parseInt(Math.random()*3)];
// Creating an options object (try tweeking the variables):
var opts = {
image : bg.url,
onClick : shoot,
opacity : 0.8,
blurLevel : 4
}
// Converting the #main div to a photoShoot stage:
main.photoShoot(opts);
// Adding the album holder to the stage:
$('<div class="album">').html('<div class="slide" />').appendTo(main);
// Our own shoot function (it is passed as onClick to the options array above):
function shoot(position){
// This function is called by the plug-in when the button is pressed
// Setting the overlay's div to white will create the illusion of a camera flash:
main.find('.overlay').css('background-color','white');
// The flash will last for 100 milliseconds (a tenth of the second):
setTimeout(function(){main.find('.overlay').css('background-color','')},100);
// Creating a new shot image:
var newShot = $('<div class="shot">').width(150).height(100);
newShot.append( $('<img src="'+bg.url+'" width="'+(bg.size.x/2)+'" height="'+(bg.size.y/2)+'" />').css('margin',-position.top*0.5+'px 0 0 -'+position.left*0.5+'px') );
// Removing the fourth shot (the count starts from 0):
$('.shot').eq(3).remove();
// Adding the newly created shot to the album div, but moved 160px to the right.
// We start an animation to slide it in view:
newShot.css('margin-right',-160).prependTo('.album .slide').animate({marginRight:0},'slow');
}
});
</script>
<!-- CSS -->
<style type="text/css">
#main{
/* This div is converted to a photoShoot stage by the Photo Shoot plug-in */
margin:0;
width:1024px; height:576px;
position:relative;
overflow:hidden;
}
.shot{
/* These contain a scaled down version of the background image: */
border:3px solid #fcfcfc;
float:right;
position:relative;
margin-left:10px;
overflow:hidden;
/* Adding a CSS3 shadow below the shots: */
-moz-box-shadow:0 0 2px black;
-webkit-box-shadow:0 0 2px black;
box-shadow:0 0 2px black;
}
.shot img{
display:block;
}
.album{
/* This div holds the shots */
bottom:50px; right:20px;
overflow:hidden;
position:absolute;
width:490px; height:110px;
}
.album .slide {
/* The slide div is contained in album */
width:700px; height:110px;
position:relative;
left:-210px;
}
/* Ńé½Ńā╝ŃéĮŃā½ */
.container{
overflow:hidden;
cursor:url("/content/lib/jquery/photoShoot/blank.cur"),default;
position:relative;
}
.container.googleChrome{
cursor: url("/content/lib/jquery/photoShoot/blank_google_chrome.cur"),default;
}
.overlay{
position:absolute;
top:0; left:0;
width:100%; height:100%;
background:black;
}
.viewFinder{
position:absolute;
top:0; left:0;
}
.blur{
position:absolute;
top:0; left:0;
}
</style>
</head>
<body>
<div id="wrap">
<h1>Ķ©ŁńĮ«ŃéĄŃā│ŃāŚŃā½</h1>
<p>ŃĆÉÕÅéńģ¦ŃĆæ<a href='http://tutorialzine.com/2010/02/jquery-photoshoot-plugin/'>jQuery PhotoShoot Plugin</a></p>
<!-- CODE -->
<div id="main"></div>
<!-- / CODE -->
</div>
</body>
</html>
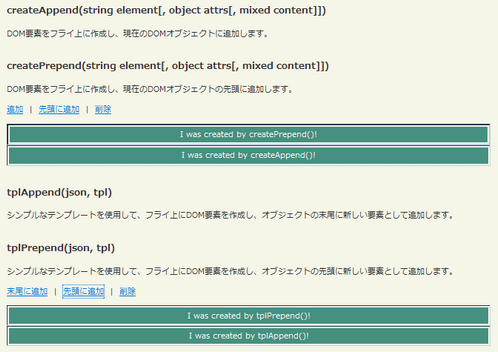
jQuery Plugin FlyDOM
ÕŗĢńÜäŃé│Ńā│ŃāåŃā│ŃāäŃéÆŃüÖŃü░ŃéäŃüÅń░ĪÕŹśŃü½õĮ£µłÉ
2009/3/1
jQuery Plugin FlyDOM
ÕŗĢńÜäŃé│Ńā│ŃāåŃā│ŃāäŃéÆŃüÖŃü░ŃéäŃüÅń░ĪÕŹśŃü½õĮ£µłÉŃü¦ŃüŹŃéŗjQueryŃāŚŃā®Ńé░ŃéżŃā│ŃĆé
µīćÕ«ÜŃüŚŃü¤Ķ”üń┤ĀŃü«ÕģłķĀŁŃüéŃéŗŃüäŃü»µ£½Õ░ŠŃü½ŃĆüńö¤µłÉŃüŚŃü¤Ķ”üń┤ĀŃéÆĶ┐ĮÕŖĀŃüÖŃéŗŃüōŃü©ŃüīŃü¦ŃüŹŃüŠŃüÖŃĆé JSONÕĮóÕ╝ÅŃü«ŃāćŃā╝Ńé┐ŃéÆŃāåŃā│ŃāŚŃā¼Ńā╝ŃāłŃü©ŃüŚŃü”µīćÕ«ÜŃüÖŃéŗŃüōŃü©ŃééŃü¦ŃüŹŃüŠŃüÖŃĆé
 Ķ©ŁńĮ«ŃéżŃāĪŃā╝ŃéĖ
<!DOCTYPE html PUBLIC "-//W3C//DTD XHTML 1.0 Transitional//EN" "http://www.w3.org/TR/xhtml1/DTD/xhtml1-transitional.dtd">
<html xmlns="http://www.w3.org/1999/xhtml" xml:lang="ja" lang="ja">
<head>
<meta http-equiv="Content-Type" content="text/html; charset=utf-8" />
<meta http-equiv="Content-Language" content="ja" />
<meta http-equiv="Content-Script-Type" content="text/javascript" />
<meta http-equiv="Content-Style-Type" content="text/css" />
<meta http-equiv="imagetoolbar" content="no" />
<title>jQuery Plugin FlyDOM | Ķ©ŁńĮ«ŃéĄŃā│ŃāŚŃā½</title>
<link rel="stylesheet" type="text/css" href="/content/lib/global.css" />
<!-- JS -->
<script type="text/javascript" src="/content/lib/jquery/jquery-1.2.1.min.js"></script>
<script type="text/javascript" src="/content/lib/jquery/jquery.flydom-3.1.1.js"></script>
<script type="text/javascript">
$(function() {
// Create our remove me link actions
$('a[rel^="clean"]').each(function() {
var pairs = $(this).attr('rel').split('-');
$(this).click(function() {
$('#' + pairs[1] + ' table').remove();
return false;
});
});
});
</script>
<!-- CSS -->
<style type="text/css">
.example { border: 1px solid #336699; padding: 8px; background-color: #F2F4FC; width: 700px; overflow: auto; }
.exampleRow { background-color: #46907F; }
</style>
</head>
<body>
<div id="wrap">
<h1><a href='http://flydom.socianet.com/'>jQuery Plugin FlyDOM</a> | Ķ©ŁńĮ«ŃéĄŃā│ŃāŚŃā½</h1>
<!-- CODE -->
<h2>createAppend(string element[, object attrs[, mixed content]])</h2>
<p>
DOMĶ”üń┤ĀŃéÆŃāĢŃā®ŃéżõĖŖŃü½õĮ£µłÉŃüŚŃĆüńÅŠÕ£©Ńü«DOMŃé¬Ńā¢ŃéĖŃé¦Ńé»ŃāłŃü½Ķ┐ĮÕŖĀŃüŚŃüŠŃüÖŃĆé
</p>
<h2>createPrepend(string element[, object attrs[, mixed content]])</h2>
<p>
DOMĶ”üń┤ĀŃéÆŃāĢŃā®ŃéżõĖŖŃü½õĮ£µłÉŃüŚŃĆüńÅŠÕ£©Ńü«DOMŃé¬Ńā¢ŃéĖŃé¦Ńé»ŃāłŃü«ÕģłķĀŁŃü½Ķ┐ĮÕŖĀŃüŚŃüŠŃüÖŃĆé
</p>
<p>
<a id="tryme-exampleCA" href="#">Ķ┐ĮÕŖĀ</a>
|
<a id="tryme-exampleCP" href="#">ÕģłķĀŁŃü½Ķ┐ĮÕŖĀ</a>
|
<a rel="clean-exampleCA" href="#">ÕēŖķÖż</a></p>
</p>
<div id="exampleCA"></div>
<script type="text/javascript">
$(function(){
$("#tryme-exampleCA").click(function(){
$('#exampleCA').createAppend(
'table', { width: '718px', style: 'border: 2px inset #336699;' }, [
'tr', { className: 'exampleRow' }, [
'td', { align: 'center', style: 'color: white;' }, 'I was created by createAppend()!'
]
]
);
});
$("#tryme-exampleCP").click(function(){
$('#exampleCA').createPrepend(
'table', { width: '718px', style: { 'borderWidth': 2, 'borderStyle': 'inset', 'border-color': '#336699' } }, [
'tr', { className: 'exampleRow' }, [
'td', { align: 'center', style: 'color: white;' }, 'I was created by createPrepend()!'
]
]
);
});
});
</script>
<h2>tplAppend(json, tpl)</h2>
<p>
ŃéĘŃā│ŃāŚŃā½Ńü¬ŃāåŃā│ŃāŚŃā¼Ńā╝ŃāłŃéÆõĮ┐ńö©ŃüŚŃü”ŃĆüŃāĢŃā®ŃéżõĖŖŃü½DOMĶ”üń┤ĀŃéÆõĮ£µłÉŃüŚŃĆüŃé¬Ńā¢ŃéĖŃé¦Ńé»ŃāłŃü«µ£½Õ░ŠŃü½µ¢░ŃüŚŃüäĶ”üń┤ĀŃü©ŃüŚŃü”Ķ┐ĮÕŖĀŃüŚŃüŠŃüÖŃĆé
</p>
<h2>tplPrepend(json, tpl)</h2>
<p>
ŃéĘŃā│ŃāŚŃā½Ńü¬ŃāåŃā│ŃāŚŃā¼Ńā╝ŃāłŃéÆõĮ┐ńö©ŃüŚŃü”ŃĆüŃāĢŃā®ŃéżõĖŖŃü½DOMĶ”üń┤ĀŃéÆõĮ£µłÉŃüŚŃĆüŃé¬Ńā¢ŃéĖŃé¦Ńé»ŃāłŃü«ÕģłķĀŁŃü½µ¢░ŃüŚŃüäĶ”üń┤ĀŃü©ŃüŚŃü”Ķ┐ĮÕŖĀŃüŚŃüŠŃüÖŃĆé
</p>
<p>
<a id="tryme-exampleTA" href="javascript:void(0)">µ£½Õ░ŠŃü½Ķ┐ĮÕŖĀ</a>
|
<a id="tryme-exampleTP" href="javascript:void(0)">ÕģłķĀŁŃü½Ķ┐ĮÕŖĀ</a>
|
<a rel="clean-exampleTA" href="javascript:void(0)">ÕēŖķÖż</a></p>
</p>
<div id="exampleTA"></div>
<script type="text/javascript">
$(function(){
$("#tryme-exampleTA").click(function(){
var json = { text: 'I was created by tplAppend()!' };
var tpl = function() {
return [
'table', { width: '718px', style: 'border: 2px inset #336699;' }, [
'tr', { className: 'exampleRow' }, [
'td', { align: 'center', style: 'color: white;' }, this.text
]
]
];
};
$('#exampleTA').tplAppend(json, tpl);
});
$("#tryme-exampleTP").click(function(){
var json = { text: 'I was created by tplPrepend()!' };
var tpl = function() {
return [
'table', { width: '718px', style: 'border: 2px inset #336699;' }, [
'tr', { className: 'exampleRow' }, [
'td', { align: 'center', style: 'color: white;' }, this.text
]
]
];
};
$('#exampleTA').tplPrepend(json, tpl);
});
});
</script>
<!-- CODE / -->
</div>
</body>
</html>
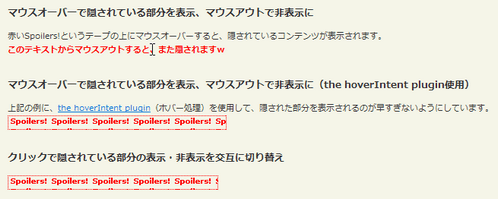
jQuery Spoilers plugin
Ńā×ŃāāŃāüŃüŚŃü¤Ķ”üń┤ĀŃü«ÕåģÕ«╣ŃéÆŃéƵīćÕ«ÜŃüŚŃü¤Ķ”üń┤ĀŃü¦Ńā®ŃāāŃāŚ
2009/2/28
jQuery Spoilers plugin
ŃāåŃéŁŃé╣ŃāłŃü¬Ńü®ŃĆüŃāÜŃā╝ŃéĖõĖŖŃü«Ńé│Ńā│ŃāåŃā│ŃāäŃü«õĖĆķā©ŃéÆŃāåŃā╝ŃāŚŃü¦ķÜĀŃüŚŃü¤ŃéłŃüåŃü½Ķ”ŗŃüøŃéŗjQueryŃāŚŃā®Ńé░ŃéżŃā│ŃĆé
ŃāÜŃā╝ŃéĖŃéÆĶĪ©ńż║ŃüŚŃü¤Ńü©ŃüŹŃü½ŃĆüµīćÕ«ÜŃüŚŃü¤Ķ”üń┤ĀŃéÆŃĆī !ŃĆŹŃü©ŃüäŃüåĶĄżŃüäŃāåŃéŁŃé╣Ńāłńö╗ÕāÅŃü¦ŃāåŃā╝ŃāŚŃü«ŃéłŃüåŃü½ķÜĀŃüŚŃüŠŃüÖŃĆé
ŃüØŃü«ĶĄżŃüäŃāåŃéŁŃé╣ŃāłŃü½Ńā×Ńé”Ńé╣Ńé¬Ńā╝ŃāÉŃā╝ŃüÖŃéŗŃü©ķÜĀŃüĢŃéīŃü”ŃüäŃü¤Ķ”üń┤ĀŃüīĶĪ©ńż║ŃüĢŃéīŃüŠŃüÖŃĆé
!ŃĆŹŃü©ŃüäŃüåĶĄżŃüäŃāåŃéŁŃé╣Ńāłńö╗ÕāÅŃü¦ŃāåŃā╝ŃāŚŃü«ŃéłŃüåŃü½ķÜĀŃüŚŃüŠŃüÖŃĆé
ŃüØŃü«ĶĄżŃüäŃāåŃéŁŃé╣ŃāłŃü½Ńā×Ńé”Ńé╣Ńé¬Ńā╝ŃāÉŃā╝ŃüÖŃéŗŃü©ķÜĀŃüĢŃéīŃü”ŃüäŃü¤Ķ”üń┤ĀŃüīĶĪ©ńż║ŃüĢŃéīŃüŠŃüÖŃĆé
 Ķ©ŁńĮ«ŃéżŃāĪŃā╝ŃéĖ
<!DOCTYPE html PUBLIC "-//W3C//DTD XHTML 1.0 Transitional//EN" "http://www.w3.org/TR/xhtml1/DTD/xhtml1-transitional.dtd">
<html xmlns="http://www.w3.org/1999/xhtml" xml:lang="ja" lang="ja">
<head>
<meta http-equiv="Content-Type" content="text/html; charset=utf-8" />
<meta http-equiv="Content-Language" content="ja" />
<meta http-equiv="Content-Script-Type" content="text/javascript" />
<meta http-equiv="Content-Style-Type" content="text/css" />
<meta http-equiv="imagetoolbar" content="no" />
<title>jQuery Spoilers plugin | Ķ©ŁńĮ«ŃéĄŃā│ŃāŚŃā½</title>
<link rel="stylesheet" type="text/css" href="/content/lib/global.css" />
<!-- JS -->
<script type="text/javascript" src="http://ajax.googleapis.com/ajax/libs/jquery/1.3.2/jquery.min.js"></script>
<script type="text/javascript" src="/content/lib/jquery/jquery.hoverIntent.js"></script>
<script type="text/javascript" src="/content/lib/jquery/sgbeal-spoilers.jquery.js"></script>
<script type="text/javascript">
$(function(){
// On-hover spoiler:
$('.jqSpoiler').initSpoilers();
// On-hover spoiler using hoverIntent plugin:
$('.jqSpoilerIntent').initSpoilers({method:'hoverIntent'}).addClass('jqSpoiler');
// Clickable spoiler:
$('.jqSpoilerClick').initSpoilers({method:'click'}).addClass('jqSpoiler');
});
</script>
<!-- CSS -->
<style type="text/css">
.jqSpoiler { background:transparent url(/content/img/ajax/bg_spoilers.png) repeat 0 0; border:1px dotted red; font-weight:bold; color:red; line-height:2; }
.jqSpoiler span { visibility:hidden; }
.jqSpoiler.reveal { background-image:none; border:none; }
.jqSpoiler.reveal span { visibility:visible; }
</style>
</head>
<body>
<div id="wrap">
<h1><a href='http://wanderinghorse.net/computing/javascript/jquery/spoilers/demo.html'>jQuery Spoilers plugin</a> | Ķ©ŁńĮ«ŃéĄŃā│ŃāŚŃā½</h1>
<!-- CODE -->
<h2>Ńā×Ńé”Ńé╣Ńé¬Ńā╝ŃāÉŃā╝Ńü¦ķÜĀŃüĢŃéīŃü”ŃüäŃéŗķā©ÕłåŃéÆĶĪ©ńż║ŃĆüŃā×Ńé”Ńé╣ŃéóŃé”ŃāłŃü¦ķØ×ĶĪ©ńż║Ńü½</h2>
<p>
ĶĄżŃüäSpoilers!Ńü©ŃüäŃüåŃāåŃā╝ŃāŚŃü«õĖŖŃü½Ńā×Ńé”Ńé╣Ńé¬Ńā╝ŃāÉŃā╝ŃüÖŃéŗŃü©ŃĆüķÜĀŃüĢŃéīŃü”ŃüäŃéŗŃé│Ńā│ŃāåŃā│ŃāäŃüīĶĪ©ńż║ŃüĢŃéīŃüŠŃüÖŃĆé<br>
<span class='jqSpoiler'><span>ŃüōŃü«ŃāåŃéŁŃé╣ŃāłŃüŗŃéēŃā×Ńé”Ńé╣ŃéóŃé”ŃāłŃüÖŃéŗŃü©ŃĆüŃüŠŃü¤ķÜĀŃüĢŃéīŃüŠŃüÖ’ĮŚ</span></span>
</p>
<h2>Ńā×Ńé”Ńé╣Ńé¬Ńā╝ŃāÉŃā╝Ńü¦ķÜĀŃüĢŃéīŃü”ŃüäŃéŗķā©ÕłåŃéÆĶĪ©ńż║ŃĆüŃā×Ńé”Ńé╣ŃéóŃé”ŃāłŃü¦ķØ×ĶĪ©ńż║Ńü½’╝łthe hoverIntent pluginõĮ┐ńö©’╝ē</h2>
<p>
õĖŖĶ©śŃü«õŠŗŃü½ŃĆü<a href='http://cherne.net/brian/resources/jquery.hoverIntent.html'>the hoverIntent plugin</a>’╝łŃāøŃāÉŃā╝Õć”ńÉå’╝ēŃéÆõĮ┐ńö©ŃüŚŃü”ŃĆüķÜĀŃüĢŃéīŃü¤ķā©ÕłåŃéÆĶĪ©ńż║ŃüĢŃéīŃéŗŃü«ŃüīµŚ®ŃüÖŃüÄŃü¬ŃüäŃéłŃüåŃü½ŃüŚŃü”ŃüäŃüŠŃüÖŃĆé<br>
<span class='jqSpoilerIntent'><span>ŃüōŃü«ŃāåŃéŁŃé╣ŃāłŃüŗŃéēŃā×Ńé”Ńé╣ŃéóŃé”ŃāłŃüÖŃéŗŃü©ŃĆüŃüŠŃü¤ķÜĀŃüĢŃéīŃüŠŃüÖ’ĮŚ</span></span>
</p>
<h2>Ńé»Ńā¬ŃāāŃé»Ńü¦ķÜĀŃüĢŃéīŃü”ŃüäŃéŗķā©ÕłåŃü«ĶĪ©ńż║Ńā╗ķØ×ĶĪ©ńż║ŃéÆõ║żõ║ÆŃü½ÕłćŃéŖµø┐Ńüł</h2>
<p>
<span class='jqSpoilerClick'><span>ŃüōŃü«ŃāåŃéŁŃé╣ŃāłŃü»ŃĆüÕåŹÕ║”Ńé»Ńā¬ŃāāŃé»ŃüÖŃéŗŃü©ŃüŠŃü¤ķÜĀŃüĢŃéīŃüŠŃüÖ’ĮŚ</span></span>
</p>
<!-- / CODE -->
</div>
</body>
</html>
jquery.autoscale.js
Ńé”ŃéŻŃā│ŃāēŃé”ŃéĄŃéżŃé║Ńü½ÕÉłŃéÅŃüøŃü”ńö╗ÕāÅŃéÆŃā¬ŃéĄŃéżŃé║
unknown
jquery.autoscale.js
Ńé”ŃéŻŃā│ŃāēŃé”ŃéĄŃéżŃé║Ńü½ÕÉłŃéÅŃüøŃü”ńö╗ÕāÅŃéÆŃā¬ŃéĄŃéżŃé║ŃüÖŃéŗjQueryŃāŚŃā®Ńé░ŃéżŃā│ŃĆé
 Ķ©ŁńĮ«ŃéżŃāĪŃā╝ŃéĖ
<!DOCTYPE html PUBLIC "-//W3C//DTD XHTML 1.0 Transitional//EN" "http://www.w3.org/TR/xhtml1/DTD/xhtml1-transitional.dtd">
<html xmlns="http://www.w3.org/1999/xhtml" xml:lang="ja" lang="ja">
<head>
<meta http-equiv="Content-Type" content="text/html; charset=utf-8" />
<meta http-equiv="Content-Language" content="ja" />
<meta http-equiv="Content-Script-Type" content="text/javascript" />
<meta http-equiv="Content-Style-Type" content="text/css" />
<meta http-equiv="imagetoolbar" content="no" />
<title>jquery.autoscale.js | Ķ©ŁńĮ«ŃéĄŃā│ŃāŚŃā½</title>
<link rel="stylesheet" type="text/css" href="/content/lib/global.css" />
<!-- JS -->
<script src="https://ajax.googleapis.com/ajax/libs/jquery/1.2.6/jquery.min.js"></script>
<script type="text/javascript" src="/content/lib/jquery/jquery.autoscale.js"></script>
<script type="text/javascript">
$(function(){
$(window).autoscale('.autoscale');
});
</script>
<!-- CSS -->
<style type="text/css">
body { margin:20px 0; text-align:center; }
h1 { text-align:left; margin-left:10px;}
</style>
</head>
<body>
<div id="wrap">
<h1><a href='http://jquery.autoscale.js.googlepages.com/autoscale1.html'>jquery.autoscale.js</a> | Ķ©ŁńĮ«ŃéĄŃā│ŃāŚŃā½</h1>
<!-- CODE -->
<img src="/content/img/ajax/cross-fading_disjointed_image_rollover.png" alt="ńö╗ÕāÅ" class="autoscale" />
<!-- / CODE -->
</div>
</body>
</html>
jquery.biggerlink
µīćÕ«ÜŃüŚŃü¤Ķ”üń┤ĀÕģ©õĮōŃéÆŃā¬Ńā│Ńé»ÕÅ»ĶāĮŃü¬ķĀśÕ¤¤Ńü½ŃüÖŃéŗ
2009/2/24
jquery.biggerlink 2
µīćÕ«ÜŃüŚŃü¤Ķ”üń┤ĀÕģ©õĮōŃéÆŃā¬Ńā│Ńé»ÕÅ»ĶāĮŃü¬ķĀśÕ¤¤ŃüÖŃéŗjQueryŃāŚŃā®Ńé░ŃéżŃā│ŃĆé
Ńā¬Ńā│Ńé»ŃüÖŃéŗķĀśÕ¤¤ŃüīÕż¦ŃüŹŃüÅŃü¬ŃéŗŃüōŃü©Ńü¦ŃĆüŃé»Ńā¬ŃāāŃé»ŃüŚŃéäŃüÖŃüÅŃü¬ŃéŖŃüŠŃüÖŃĆé
 Ķ©ŁńĮ«ŃéżŃāĪŃā╝ŃéĖ
<!DOCTYPE html PUBLIC "-//W3C//DTD XHTML 1.0 Transitional//EN" "http://www.w3.org/TR/xhtml1/DTD/xhtml1-transitional.dtd">
<html xmlns="http://www.w3.org/1999/xhtml" xml:lang="ja" lang="ja">
<head>
<meta http-equiv="Content-Type" content="text/html; charset=utf-8" />
<meta http-equiv="Content-Language" content="ja" />
<meta http-equiv="Content-Script-Type" content="text/javascript" />
<meta http-equiv="Content-Style-Type" content="text/css" />
<meta http-equiv="imagetoolbar" content="no" />
<title>jquery.biggerlink 2 | Ķ©ŁńĮ«ŃéĄŃā│ŃāŚŃā½</title>
<link rel="stylesheet" type="text/css" href="/content/lib/global.css" />
<!-- JS -->
<script type="text/javascript" src="http://ajax.googleapis.com/ajax/libs/jquery/1.3.2/jquery.min.js"></script>
<script type="text/javascript" src="/content/lib/jquery/jquery.biggerlink.js"></script>
<script type="text/javascript">
$(function(){
$('#links li').biggerlink();
});
</script>
<!-- CSS -->
<style type="text/css">
.bl-hot {
border:solid 1px #ccc;
zoom:1; /* Should be IE only */
background-color:#fff;
}
.bl-hover {
border-color:#aaf;
cursor:pointer;
background-color:#cdF;
}
.bl-hover a:link {
color:#CC3333;
}
.bl-hover a:visited {
color:#CC3333;
}
#links {
float:left;
width:100%;
clear:both;
margin:0;
padding:0;
margin-bottom:2em;
}
#links li.bl-hot {
width:30%;
float:left;
padding:0 1%;
margin:0;
margin-right:-1px;
display:inline;
text-indent:0;
list-style-type:none;
min-height:14em;
}
#links li:before {
content:'';
}
#links h3 {
margin:.5em 0;
font-size:1.4em;
}
</style>
</head>
<body>
<div id="wrap">
<h1><a href='http://www.ollicle.com/eg/jquery/biggerlink2/'>jquery.biggerlink 2</a> | Ķ©ŁńĮ«ŃéĄŃā│ŃāŚŃā½</h1>
<p>Ō¢╝liĶ”üń┤ĀÕģ©õĮōŃéÆŃā¬Ńā│Ńé»Õ»ŠĶ▒ĪŃü½ŃüŚŃü”ŃĆüŃé»Ńā¬ŃāāŃé»ŃüŚŃéäŃüÖŃüÅŃüŚŃü”ŃüäŃüŠŃüÖŃĆé</p>
<!-- CODE -->
<ul id="links">
<li>
<h3><a href="http://phpjavascriptroom.com/?t=php">PHP</a></h3>
<p>Windows OS Ńü½ PHPŃü©ApacheŃéĄŃā╝ŃāÉŃā╝Ńü«ŃéżŃā│Ńé╣ŃāłŃā╝Ńā½ ’Į× php.iniŃü«Ķ©ŁÕ«ÜŃüŠŃü¦ŃĆü ŃāæŃéĮŃé│Ńā│Ńü¦PHPŃéÆõĮ┐ŃüłŃéŗŃéłŃüåŃü½Ńü¬ŃéŗŃüŠŃü¦Ńü«µēŗķĀåŃéÆÕø│Ķ¦ŻŃĆé .htaccessŃü«µīćիܵ¢╣µ│ĢŃĆüõĮ┐ńö©ķĀ╗Õ║”Ńü«ķ½śŃüäPHPķ¢óµĢ░ŃéÆŃéĄŃā│ŃāŚŃā½õ╗śŃüŹŃü¦Ķ¦ŻĶ¬¼ŃĆé TipsŃü¦Ńü»Õ«¤ńö©ńÜäŃü¬Ķć¬õĮ£ķ¢óµĢ░ŃéÆń┤╣õ╗ŗŃĆé</p>
</li>
<li>
<h3><a href="http://phpjavascriptroom.com/?t=strm">ķ¤│ÕŻ░Ńā╗ÕŗĢńö╗ķģŹõ┐Ī</a></h3>
<p>Windows Media PlayerŃĆüRealPlayerŃĆüQuickTimeŃĆüFlashPlayerŃü«WebŃāÜŃā╝ŃéĖÕ¤ŗŃéüĶŠ╝Ńü┐Ńü½ŃéłŃéŗŃé╣ŃāłŃā¬Ńā╝ŃāĀķģŹõ┐Īµ¢╣µ│ĢŃéÆÕø│Ńā╗ŃéĄŃā│ŃāŚŃā½Ńé╣Ńé»Ńā¬ŃāŚŃāłõ╗śŃü¦Ķ¦ŻĶ¬¼ŃĆé ĶĪ©ńż║ŃüÖŃéŗŃé│Ńā│ŃāłŃāŁŃā╝Ńā½Ńü«Ńé½Ńé╣Ńé┐Ńā×ŃéżŃé║µ¢╣µ│ĢŃéäŃāĪŃé┐ŃāĢŃéĪŃéżŃā½õĮ£µłÉŃééŃĆé</p></li>
<li>
<h3><a href="http://phpjavascriptroom.com/?t=js">JavaScript</a></h3>
<p>JavaScriptŃü«Õ¤║µ£¼’Į×Õ«¤ńö©ńÜäŃü¬ķ¢óµĢ░ŃüŠŃü¦ŃéĄŃā│ŃāŚŃā½õ╗śŃüŹŃü¦Ķ¦ŻĶ¬¼ŃĆé ŃāŁŃā╝Ńā½Ńé¬Ńā╝ŃāÉŃā╝ŃĆüŃé”ŃéŻŃā│ŃāēŃ锵ōŹõĮ£ŃĆüķĆŻÕŗĢŃāŚŃā½ŃāĆŃé”Ńā│ŃĆüÕģźÕŖøŃāüŃé¦ŃāāŃé»’╝łµŁŻĶ”ÅĶĪ©ńÅŠÕɽŃéĆ’╝ēŃü¬Ńü®ŃĆü ŃéĄŃéżŃāłÕłČõĮ£Ńü½õĮ┐ŃüłŃéŗÕ«¤ńö©ńÜäŃü¬Ńé╣Ńé»Ńā¬ŃāŚŃāłŃéÆń┤╣õ╗ŗŃĆéŃé│ŃāöŃāÜŃü¦õĮ┐ŃüłŃüŠŃüÖŃĆé JavaScriptŃü¦DOM’╝łDocument Object Model’╝ēŃü«ŃāĪŃéĮŃāāŃāēŃā╗ŃāŚŃāŁŃāæŃāåŃéŻŃéÆõĮ┐ŃüŻŃü”ŃāÜŃā╝ŃéĖõĖŖŃü«ŃāÄŃā╝ŃāēŃü½ŃéóŃé»Ńé╗Ńé╣ŃüÖŃéŗŃéĄŃā│ŃāŚŃā½ŃééĶ┐ĮÕŖĀŃüŚŃüŠŃüŚŃü¤ŃĆé</p>
</li>
</ul>
<!-- / CODE -->
</div>
</body>
</html>
Link Wrapper - jQuery plugin for long URL
ķĢĘŃüäURLŃéƵŖśŃéŖĶ┐öŃüÖ
unknown
jquery.linkwrapper.js
ķĢĘŃüäURLŃéƵŖśŃéŖĶ┐öŃüÖjQueryŃāŚŃā®Ńé░ŃéżŃā│ŃĆé
<!DOCTYPE html PUBLIC "-//W3C//DTD XHTML 1.0 Transitional//EN" "http://www.w3.org/TR/xhtml1/DTD/xhtml1-transitional.dtd">
<html xmlns="http://www.w3.org/1999/xhtml" xml:lang="ja" lang="ja">
<head>
<meta http-equiv="Content-Type" content="text/html; charset=utf-8" />
<meta http-equiv="Content-Language" content="ja" />
<meta http-equiv="Content-Script-Type" content="text/javascript" />
<meta http-equiv="Content-Style-Type" content="text/css" />
<meta http-equiv="imagetoolbar" content="no" />
<title>jquery.linkwrapper.js | Ķ©ŁńĮ«ŃéĄŃā│ŃāŚŃā½</title>
<link rel="stylesheet" type="text/css" href="/content/lib/global.css" />
<!-- JS -->
<script src="https://ajax.googleapis.com/ajax/libs/jquery/1.2.6/jquery.min.js"></script>
<script type="text/javascript" src="/content/lib/jquery/jquery.linkwrapper-1.0.3.js"></script>
<script type="text/javascript">
$(function() {
$('a.wbr').linkwrapper().css('color', '#f00');
});
</script>
<!-- CSS -->
<style type="text/css">
#wrap { width:300px; }
#wrap p { border:1px solid #ccc; padding:20px; }
</style>
</head>
<body>
<div id="wrap">
<h1><a href='http://cl.pocari.org/2008-02-03-1.html'>jquery.linkwrapper.js</a> | Ķ©ŁńĮ«ŃéĄŃā│ŃāŚŃā½</h1>
<!-- CODE -->
<h2>µŖśŃéŖĶ┐öŃüŚŃü¬ŃüŚ</h2>
<p><a href="http://localhost/test/pj_roomer/index.php?t=ajax&p=jquery_plugin#a_basic">http://localhost/test/pj_roomer/index.php?t=ajax&p=jquery_plugin#a_basic</a></p>
<h2>µŖśŃéŖĶ┐öŃüŚŃüéŃéŖ’╝łŃāŚŃā®Ńé░ŃéżŃā│õĮ┐ńö©’╝ē</h2>
<p><a href="http://localhost/test/pj_roomer/index.php?t=ajax&p=jquery_plugin#a_basic" class="wbr">http://localhost/test/pj_roomer/index.php?t=ajax&p=jquery_plugin#a_basic</a></p>
<!-- / CODE -->
</div>
</body>
</html>
Making an Expanding Code Box
Ńé│Ńā╝ŃāēŃā£ŃāāŃé»Ńé╣ŃüŗŃéēŃāåŃéŁŃé╣ŃāłŃüīŃüéŃüĄŃéīŃéŗÕĀ┤ÕÉłŃü½Õ║āŃüÆŃü”ĶĪ©ńż║
2010/2/7
Making an Expanding Code Box
jQueryŃéÆõĮ┐ńö©ŃüŚŃü”ŃĆühoverŃéżŃāÖŃā│ŃāłŃüīńÖ║ńö¤ŃüŚŃü¤µÖéŃü½õ╝ĖńĖ«ŃüĢŃüøŃéŗµ¢╣µ│ĢŃüīµÄ▓Ķ╝ēŃüĢŃéīŃü”ŃüäŃüŠŃüÖŃĆé
preĶ”üń┤ĀŃü½Ķ©śĶ┐░ŃüŚŃü¤Ńé╣Ńé»Ńā¬ŃāŚŃāłŃé│Ńā╝ŃāēŃüī1ĶĪīŃü½ÕÅÄŃüŠŃéēŃü¬ŃüäÕĀ┤ÕÉłŃĆüŃā£ŃāāŃé»Ńé╣Ńü«Õ╣ģŃüīÕø║Õ«ÜŃüĀŃü©µŖśŃéŖĶ┐öŃüĢŃéīŃüÜŃü½ÕłćŃéīŃü”ŃüŚŃüŠŃüåŃü©µÖéŃüīŃüéŃéŖŃüŠŃüÖŃĆé CSSŃü¦ŃĆīoverflow:autoŃĆŹŃéƵīćÕ«ÜŃüŚŃü”µ©¬Ńé╣Ńé»ŃāŁŃā╝Ńā½ŃāÉŃā╝Ńü¦Ķ”ŗŃüøŃéŗŃü«ŃüīõĖĆĶł¼ńÜäŃü¦ŃüÖŃüīŃĆüŃüōŃüōŃü½µÄ▓Ķ╝ēŃüĢŃéīŃü”ŃüäŃéŗŃéłŃüåŃü½ŃĆüŃā£ŃāāŃé»Ńé╣Ńü½Ńā×Ńé”Ńé╣Ńé¬Ńā╝ŃāÉŃā╝ŃüÖŃéŗŃü©Ńā£ŃāāŃé»Ńé╣Ńü«Õ╣ģŃéÆÕ║āŃüÆŃü”ĶĪ©ńż║ŃüŚŃĆüŃā×Ńé”Ńé╣ŃéóŃé”ŃāłŃü¦ÕģāŃü«Õ╣ģŃü½µł╗ŃüÖŃü©ŃüäŃüåŃéóŃāŗŃāĪŃā╝ŃéĘŃā¦Ńā│Ńü¦Ķ”ŗŃüøŃéŗŃü«ŃééķØóńÖĮŃüäŃü¦ŃüÖŃüŁŃĆé
<!DOCTYPE html PUBLIC "-//W3C//DTD XHTML 1.0 Transitional//EN" "http://www.w3.org/TR/xhtml1/DTD/xhtml1-transitional.dtd">
<html xmlns="http://www.w3.org/1999/xhtml" xml:lang="ja" lang="ja">
<head>
<meta http-equiv="Content-Type" content="text/html; charset=utf-8" />
<meta http-equiv="Content-Language" content="ja" />
<meta http-equiv="Content-Script-Type" content="text/javascript" />
<meta http-equiv="Content-Style-Type" content="text/css" />
<meta http-equiv="imagetoolbar" content="no" />
<title>Ķ©ŁńĮ«ŃéĄŃā│ŃāŚŃā½</title>
<link rel="stylesheet" type="text/css" href="/content/lib/global.css" />
<!-- JS -->
<script src="https://ajax.googleapis.com/ajax/libs/jquery/1.3.2/jquery.min.js"></script>
<script type="text/javascript" src="/content/lib/jquery/piroBox.1_2.js"></script>
<script type="text/javascript">
$(function(){
$("pre.codebox").hover(function() {
var codeInnerWidth = $("code", this).width() + 10;
if (codeInnerWidth > 563) {
$(this)
.stop(true, false)
.css({
zIndex: "100",
position: "relative"
})
.animate({
width: codeInnerWidth + "px"
});
}
}, function() {
$(this).stop(true, false).animate({
width:563
});
});
});
</script>
<!-- CSS -->
<link rel="stylesheet" type="text/css" href="/content/img/ajax/jquery/css_pirobox/white/style.css" />
<style type="text/css">
pre.codebox {
padding: 10px;
border: 2px solid #c94a29;
overflow: hidden;
margin: 0 0 15px 0;
width: 563px;
font-family: Courier, Monospace;
}
</style>
</head>
<body>
<div id="wrap">
<h1>Ķ©ŁńĮ«ŃéĄŃā│ŃāŚŃā½</h1>
<p>ŃĆÉÕÅéńģ¦ŃĆæ<a href='http://digwp.com/2009/07/making-an-expanding-code-box/'>Making an Expanding Code Box</a></p>
<!-- CODE -->
<pre class="codebox"><code>This is a really long line of code that is even longer than the world super-cala-frag-alistic-espee-ala-dosis</code></pre>
<!-- / CODE -->
</body>
</html>
Smart Columns w/ CSS & jQuery
Ńé”ŃéŻŃā│ŃāēŃé”ŃéĄŃéżŃé║Ńü½ÕÉłŃéÅŃüøŃü”Ńé½Ńā®ŃāĀŃéƵĢ┤ÕłŚ
2009/6/16
Smart Columns with CSS & jQuery
Ńé½Ńā®ŃāĀŃéÆŃé”ŃéŻŃā│ŃāēŃé”ŃéĄŃéżŃé║Ńü½ÕÉłŃéÅŃüøŃü”µĢ┤ÕłŚŃüĢŃüøŃéŗjQueryŃāŚŃā®Ńé░ŃéżŃā│ŃĆé ÕÉäŃé½Ńā®ŃāĀŃü»liĶ”üń┤ĀŃü½Ńü¬ŃüŻŃü”ŃüŖŃéŖŃĆüŃé”ŃéŻŃā│ŃāēŃé”ŃéÆŃā¬ŃéĄŃéżŃé║ŃüŚŃü¤µÖéŃü½ŃĆüŃé”ŃéŻŃā│ŃāēŃé”Õ╣ģŃü½Ńü┤ŃüŻŃü¤ŃéŖŃé½Ńā®ŃāĀŃüīÕÅÄŃüŠŃéŗŃéłŃüåŃü½1ÕłŚŃü½ķģŹńĮ«ŃüÖŃéŗŃé½Ńā®ŃāĀŃü«µĢ░ŃéäÕ╣ģŃéÆĶ¬┐µĢ┤ŃüŚŃüŠŃüÖŃĆé
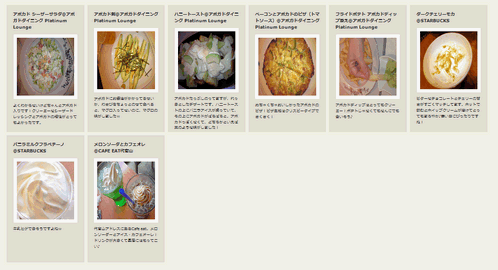 Ķ©ŁńĮ«ŃéżŃāĪŃā╝ŃéĖ
<!DOCTYPE html PUBLIC "-//W3C//DTD XHTML 1.0 Transitional//EN" "http://www.w3.org/TR/xhtml1/DTD/xhtml1-transitional.dtd">
<html xmlns="http://www.w3.org/1999/xhtml" xml:lang="ja" lang="ja">
<head>
<meta http-equiv="Content-Type" content="text/html; charset=utf-8" />
<meta http-equiv="Content-Language" content="ja" />
<meta http-equiv="Content-Script-Type" content="text/javascript" />
<meta http-equiv="Content-Style-Type" content="text/css" />
<meta http-equiv="imagetoolbar" content="no" />
<title>Smart Columns with CSS & jQuery | Ķ©ŁńĮ«ŃéĄŃā│ŃāŚŃā½</title>
<link rel="stylesheet" type="text/css" href="/content/lib/global.css" />
<!-- JS -->
<script src="https://ajax.googleapis.com/ajax/libs/jquery/1.2.6/jquery.min.js"></script>
<script type="text/javascript">
function smartColumns() { //Create a function that calculates the smart columns
//Reset column size to a 100% once view port has been adjusted
$("ul.column").css({ 'width' : "100%"});
var colWrap = $("ul.column").width(); //Get the width of row
var colNum = Math.floor(colWrap / 240); //Find how many columns of 240px can fit per row / then round it down to a whole number
var colFixed = Math.floor(colWrap / colNum); //Get the width of the row and divide it by the number of columns it can fit / then round it down to a whole number. This value will be the exact width of the re-adjusted column
$("ul.column").css({ 'width' : colWrap}); //Set exact width of row in pixels instead of using % - Prevents cross-browser bugs that appear in certain view port resolutions.
$("ul.column li").css({ 'width' : colFixed}); //Set exact width of the re-adjusted column
}
$(window).resize(function () { //Each time the viewport is adjusted/resized, execute the function
smartColumns();
});
$(function(){
smartColumns();
});
</script>
<!-- CSS -->
<style type="text/css">
ul.column{
width: 100%;
padding: 0;
margin: 10px 0;
list-style: none;
}
ul.column li {
float: left;
width: 240px; /*Set default width*/
padding: 0;
margin: 5px 0;
display: inline;
}
.block {
height: 355px;
font-size: 1em;
margin-right: 10px; /*Creates the 10px gap between each column*/
padding: 20px;
background: #e3e1d5;
}
.block h3 {
margin:0 0 10px 0; padding:0;
font-size: 1.1em;
}
.block img {
/*Flexible image size with border*/
width: 89%; /*Took 1% off of the width to prevent IE6 bug*/
padding: 5%;
background:#fff;
margin: 0 auto;
display: block;
-ms-interpolation-mode: bicubic; /*prevents image pixelation for IE 6/7 */
}
</style>
</head>
<body>
<div id="wrap">
<h1><a href='http://www.sohtanaka.com/web-design/smart-columns-w-css-jquery/'>Smart Columns with CSS & jQuery</a> | Ķ©ŁńĮ«ŃéĄŃā│ŃāŚŃā½</h1>
<p>Ō¢╝Ńé”ŃéŻŃā│ŃāēŃé”ŃéÆŃā¬ŃéĄŃéżŃé║ŃüÖŃéŗŃü©ŃĆüŃé”ŃéŻŃā│ŃāēŃé”ŃéĄŃéżŃé║Ńü½Ńü┤ŃüŻŃü¤ŃéŖŃāĢŃéŻŃāāŃāłŃüÖŃéŗŃéłŃüåŃü½Ńé½Ńā®ŃāĀŃüīµĢ┤ÕłŚŃüŚŃüŠŃüÖŃĆé</p>
<!-- CODE -->
<div class="cf">
<ul class="column">
<!--Repeating list item-->
<li>
<div class="block">
<h3>ŃéóŃā£Ńé½Ńāē ŃéĘŃā╝ŃéČŃā╝ŃéĄŃā®ŃāĆ@ŃéóŃā£Ńé¼ŃāēŃāĆŃéżŃāŗŃā│Ńé░ Platinum Lounge</h3>
<p><a href="http://www.flickr.com/photos/22559849@N06/3274514408/" title="ŃéóŃā£Ńé½Ńāē ŃéĘŃā╝ŃéČŃā╝ŃéĄŃā®ŃāĆ@ŃéóŃā£Ńé¼ŃāēŃāĆŃéżŃāŗŃā│Ńé░ Platinum Lounge by php_javascript_room, on Flickr"><img src="http://farm4.static.flickr.com/3514/3274514408_1800118ded_m.jpg" width="240" height="180" alt="ŃéóŃā£Ńé½Ńāē ŃéĘŃā╝ŃéČŃā╝ŃéĄŃā®ŃāĆ@ŃéóŃā£Ńé¼ŃāēŃāĆŃéżŃāŗŃā│Ńé░ Platinum Lounge" /></a></p>
<p>ŃéłŃüÅŃéÅŃüŗŃéēŃü¬ŃüäŃüæŃü®ŃüĪŃéāŃéōŃü©ŃéóŃā£Ńé¼ŃāēÕģźŃéŖŃü¦ŃüÖ’╝üŃé»Ńā¬Ńā╝Ńā¤Ńā╝Ńü¬ŃéĘŃā╝ŃéČŃā╝ŃāēŃā¼ŃāāŃéĘŃā│Ńé░Ńü©ŃéóŃā£Ńé¼ŃāēŃü«ńøĖµĆ¦ŃüīŃü©ŃüŻŃü”ŃééŃéłŃüŗŃüŻŃü¤Ńü¦ŃüÖŃĆé</p>
</div>
</li>
<li>
<div class="block">
<h3>ŃéóŃā£Ńé½ŃāēÕł║@ŃéóŃā£Ńé¼ŃāēŃāĆŃéżŃāŗŃā│Ńé░ Platinum Lounge</h3>
<p><a href="http://www.flickr.com/photos/22559849@N06/3273696567/" title="ŃéóŃā£Ńé½ŃāēÕł║@ŃéóŃā£Ńé¼ŃāēŃāĆŃéżŃāŗŃā│Ńé░ Platinum Lounge by php_javascript_room, on Flickr"><img src="http://farm4.static.flickr.com/3509/3273696567_ebf4ed4381_m.jpg" width="240" height="180" alt="ŃéóŃā£Ńé½ŃāēÕł║@ŃéóŃā£Ńé¼ŃāēŃāĆŃéżŃāŗŃā│Ńé░ Platinum Lounge" /></a></p>
<p>ŃéóŃā£Ńé¼ŃāēŃü½ŃüŖķåżµ▓╣ŃüīŃüŗŃüŗŃüŻŃü”ŃéŗŃüøŃüäŃüŗŃĆüŃéÅŃüĢŃü│ŃéÆŃüĪŃéćŃüŻŃü©Ńü«ŃüøŃü”ķŻ¤Ńü╣ŃéŗŃü©ŃĆüŃā×Ńé░ŃāŁÕģźŃüŻŃü”Ńü¬ŃüäŃü«Ńü½ŃĆüŃā×Ńé░ŃāŁŃü«Õæ│ŃüīŃüŚŃüŠŃüŚŃü¤’ĮŚ</p>
</div>
</li>
<li>
<div class="block">
<h3>ŃāÅŃāŗŃā╝ŃāłŃā╝Ńé╣Ńāł@ŃéóŃā£Ńé¼ŃāēŃāĆŃéżŃāŗŃā│Ńé░ Platinum Lounge</h3>
<p><a href="http://www.flickr.com/photos/22559849@N06/3273696493/" title="ŃāÅŃāŗŃā╝ŃāłŃā╝Ńé╣Ńāł@ŃéóŃā£Ńé¼ŃāēŃāĆŃéżŃāŗŃā│Ńé░ Platinum Lounge by php_javascript_room, on Flickr"><img src="http://farm4.static.flickr.com/3316/3273696493_570fdd0ee5_m.jpg" width="240" height="180" alt="ŃāÅŃāŗŃā╝ŃāłŃā╝Ńé╣Ńāł@ŃéóŃā£Ńé¼ŃāēŃāĆŃéżŃāŗŃā│Ńé░ Platinum Lounge" /></a></p>
<p>ŃéóŃā£Ńé½ŃāēŃü¤ŃüŻŃüĘŃüŚŃü«ŃüŻŃü”ŃüŠŃüÖŃüīŃĆüŃéīŃüŻŃüŹŃü©ŃüŚŃü¤ŃāćŃéČŃā╝ŃāłŃü¦ŃüÖŃĆéŃāÅŃāŗŃā╝ŃāłŃā╝Ńé╣ŃāłŃü«õĖŖŃü½ŃāÉŃāŗŃā®ŃéóŃéżŃé╣Ńüīõ╣ŚŃüŻŃü”ŃüäŃü”ŃĆüŃüØŃü«õĖŖŃü½ŃéóŃā£Ńé¼ŃāēŃüīŃü▒ŃéēŃü▒ŃéēŃü©ŃĆéŃéóŃā£Ńé½ŃāēŃüŻŃüĮŃüÅŃü¬ŃüÅŃü”ŃĆüŃü®ŃüĪŃéēŃüŗŃü©ŃüäŃüłŃü░µĀŚŃü«ŃéłŃüåŃü¬Õæ│ŃüīŃüŚŃüŠŃüŚŃü¤’╝ü</p>
</div>
</li>
<li>
<div class="block">
<h3>ŃāÖŃā╝Ńé│Ńā│Ńü©ŃéóŃā£Ńé½ŃāēŃü«ŃāöŃéČ’╝łŃāłŃā×ŃāłŃéĮŃā╝Ńé╣’╝ē@ŃéóŃā£Ńé¼ŃāēŃāĆŃéżŃāŗŃā│Ńé░ Platinum Lounge</h3>
<p><a href="http://www.flickr.com/photos/22559849@N06/3273696469/" title="ŃāÖŃā╝Ńé│Ńā│Ńü©ŃéóŃā£Ńé½ŃāēŃü«ŃāöŃéČ’╝łŃāłŃā×ŃāłŃéĮŃā╝Ńé╣’╝ē@ŃéóŃā£Ńé¼ŃāēŃāĆŃéżŃāŗŃā│Ńé░ Platinum Lounge by php_javascript_room, on Flickr"><img src="http://farm4.static.flickr.com/3427/3273696469_aa2aaf5e89_m.jpg" width="240" height="180" alt="ŃāÖŃā╝Ńé│Ńā│Ńü©ŃéóŃā£Ńé½ŃāēŃü«ŃāöŃéČ’╝łŃāłŃā×ŃāłŃéĮŃā╝Ńé╣’╝ē@ŃéóŃā£Ńé¼ŃāēŃāĆŃéżŃāŗŃā│Ńé░ Platinum Lounge" /></a></p>
<p>ŃéüŃüĪŃéāŃüÅŃüĪŃéāŃüŖŃüäŃüŚŃüŗŃüŻŃü¤ŃéóŃā£Ńé½ŃāēŃü«ŃāöŃéČ’╝üŃāöŃéČńö¤Õ£░Ńü»Ńé»Ńā¬Ńé╣ŃāöŃā╝Ńé┐ŃéżŃāŚŃü¦ŃüĢŃüÅŃüĢŃüÅ’╝ü</p>
</div>
</li>
<li>
<div class="block">
<h3>ŃāĢŃā®ŃéżŃāēŃāØŃāåŃāł ŃéóŃā£Ńé½ŃāēŃāćŃéŻŃāāŃāŚµĘ╗Ńüł@ŃéóŃā£Ńé¼ŃāēŃāĆŃéżŃāŗŃā│Ńé░ Platinum Lounge</h3>
<p><a href="http://www.flickr.com/photos/22559849@N06/3273696401/" title="ŃāĢŃā®ŃéżŃāēŃāØŃāåŃāł ŃéóŃā£Ńé½ŃāēŃāćŃéŻŃāāŃāŚµĘ╗Ńüł@ŃéóŃā£Ńé¼ŃāēŃāĆŃéżŃāŗŃā│Ńé░ Platinum Lounge by php_javascript_room, on Flickr"><img src="http://farm4.static.flickr.com/3324/3273696401_f4ea6c7677_m.jpg" width="240" height="180" alt="ŃāĢŃā®ŃéżŃāēŃāØŃāåŃāł ŃéóŃā£Ńé½ŃāēŃāćŃéŻŃāāŃāŚµĘ╗Ńüł@ŃéóŃā£Ńé¼ŃāēŃāĆŃéżŃāŗŃā│Ńé░ Platinum Lounge" /></a></p>
<p>ŃéóŃā£Ńé½ŃāēŃāćŃéŻŃāāŃāŚŃü»Ńü©ŃüŻŃü”ŃééŃé»Ńā¬Ńā╝Ńā¤Ńā╝’╝üŃāØŃāåŃāłŃüśŃéāŃü¬ŃüÅŃü”ŃééŃü¬ŃéōŃü½Ńü¦ŃééÕÉłŃüäŃüØŃüåŌÖ¬</p>
</div>
</li>
<li>
<div class="block">
<h3>ŃāĆŃā╝Ńé»ŃāüŃé¦Ńā¬Ńā╝ŃāóŃé½@STARBUCKS</h3>
<p><a href="http://www.flickr.com/photos/22559849@N06/3055162547/" title="ŃāĆŃā╝Ńé»ŃāüŃé¦Ńā¬Ńā╝ŃāóŃé½@STARBUCKS by php_javascript_room, on Flickr"><img src="http://farm4.static.flickr.com/3023/3055162547_cde4e8921e_m.jpg" width="240" height="180" alt="ŃāĆŃā╝Ńé»ŃāüŃé¦Ńā¬Ńā╝ŃāóŃé½@STARBUCKS" /></a></p>
<p>ŃāōŃé┐Ńā╝Ńü¬ŃāüŃā¦Ńé│Ńā¼Ńā╝ŃāłŃü©ŃāüŃé¦Ńā¬Ńā╝Ńü«ńöśŃüĢŃüīŃüÖŃüöŃüÅŃā×ŃāāŃāüŃüŚŃü”ŃüŠŃüÖŃĆéŃāøŃāāŃāłŃü¦ķŻ▓ŃéĆŃü©ŃāøŃéżŃāāŃāŚŃé»Ńā¬Ńā╝ŃāĀŃüīµ║ČŃüæŃü”Ńü©ŃüŻŃü”ŃééŃüŠŃéŹŃéäŃüŗŌÖ¬Õ»ÆŃü䵌źŃü½Ńü┤ŃüŻŃü¤ŃéŖŃü¦ŃüÖŃüŁ’╝ü</p>
</div>
</li>
<li>
<div class="block">
<h3>ŃāÉŃāŗŃā®Ńā¤Ńā½Ńé»ŃāĢŃā®ŃāÜŃāüŃā╝ŃāÄ@STARBUCKS</h3>
<p><a href="http://www.flickr.com/photos/22559849@N06/3104684709/" title="ŃāÉŃāŗŃā®Ńā¤Ńā½Ńé»ŃāĢŃā®ŃāÜŃāüŃā╝ŃāÄ@STARBUCKS by php_javascript_room, on Flickr"><img src="http://farm4.static.flickr.com/3113/3104684709_6911f58648_m.jpg" width="240" height="180" alt="ŃāÉŃāŗŃā®Ńā¤Ńā½Ńé»ŃāĢŃā®ŃāÜŃāüŃā╝ŃāÄ@STARBUCKS" /></a></p>
<p>ńēøõ╣│ŃāÆŃé▓Ńü¦ŃüŹŃüØŃüåŃü¦ŃüÖŃéłŃüŁ’ĮŚ</p>
</div>
</li>
<li>
<div class="block">
<h3>ŃāĪŃāŁŃā│ŃéĮŃā╝ŃāĆŃü©Ńé½ŃāĢŃé¦Ńé¬Ńā¼@CAFE EATõ╗ŻÕ«śÕ▒▒</h3>
<p><a href="http://www.flickr.com/photos/22559849@N06/2973352946/" title="ŃāĪŃāŁŃā│ŃéĮŃā╝ŃāĆŃü©Ńé½ŃāĢŃé¦Ńé¬Ńā¼@CAFE EATõ╗ŻÕ«śÕ▒▒ by php_javascript_room, on Flickr"><img src="http://farm4.static.flickr.com/3174/2973352946_d3589b717e_m.jpg" width="240" height="180" alt="ŃāĪŃāŁŃā│ŃéĮŃā╝ŃāĆŃü©Ńé½ŃāĢŃé¦Ńé¬Ńā¼@CAFE EATõ╗ŻÕ«śÕ▒▒" /></a></p>
<p>õ╗ŻÕ«śÕ▒▒ŃéóŃāēŃā¼Ńé╣Ńü½ŃüéŃéŗCafe eatŃĆéŃāĪŃāŁŃā│ŃéĮŃā╝ŃāĆŃā╝Ńü©ŃéóŃéżŃé╣Ńā╗Ńé½ŃāĢŃé¦Ńé¬Ńā╝Ńā¼’╝üŃāēŃā¬Ńā│Ńé»ŃüīÕż¦ŃüŹŃüÅŃü”ķĢĘÕ▒ģŃü½Ńü»ŃééŃüŻŃü”ŃüōŃüäŌÖ¬</p>
</div>
</li>
<!--end repeating list item-->
</ul>
</div>
<!-- / CODE -->
</div>
</body>
</html>
Text Resizing With jQuery
ŃāåŃéŁŃé╣ŃāłŃü«Ńā¬ŃéĄŃéżŃé║
2009/6/6
Text Resizing With jQuery
WebŃāÜŃā╝ŃéĖŃü«ŃāåŃéŁŃé╣ŃāłŃéĄŃéżŃé║’╝łŃāĢŃé®Ńā│ŃāłŃéĄŃéżŃé║’╝ēŃéÆĶ©¬ÕĢÅĶĆģŃüīÕżēµø┤Ńü¦ŃüŹŃéŗŃéłŃüåŃü½ŃĆüjQueryŃéÆõĮ┐ńö©ŃüŚŃü”ŃāĢŃé®Ńā│ŃāłŃéĄŃéżŃé║ŃéÆŃé»Ńā¬ŃāāŃ黵ōŹõĮ£Ńü¦ń░ĪÕŹśŃü½Õżēµø┤ŃüÖŃéŗµ¢╣µ│ĢŃüīµÄ▓Ķ╝ēŃüĢŃéīŃü”ŃüäŃüŠŃüÖŃĆé
CSSŃü«font-sizeŃāŚŃāŁŃāæŃāåŃéŻŃü¦ŃĆüŃĆīpxŃĆŹŃéäŃĆīptŃĆŹŃü¦Õø║Õ«ÜŃéĄŃéżŃé║ŃéƵīćÕ«ÜŃüŚŃü”ŃüäŃéŗÕĀ┤ÕÉłŃü»Õżēµø┤Ńü¦ŃüŹŃüŠŃüøŃéōŃüīŃĆüŃĆīemŃĆŹŃéäŃĆī%ŃĆŹŃü¬Ńü®ńøĖÕ»ŠŃéĄŃéżŃé║µīćÕ«ÜŃüŚŃü”ŃüäŃéŗÕĀ┤ÕÉłŃü»ŃĆüńÅŠÕ£©Ńü«ŃāĢŃé®Ńā│ŃāłŃéĄŃéżŃé║ŃüŗŃéēńøĖÕ»ŠńÜäŃü½Õż¦ŃüŹŃüÅŃüŚŃü¤ŃéŖÕ░ÅŃüĢŃüÅŃüÖŃéŗŃüōŃü©ŃüīŃü¦ŃüŹŃüŠŃüÖŃĆé
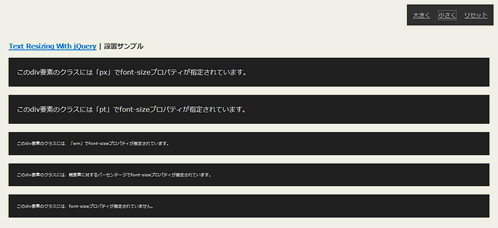 Ķ©ŁńĮ«ŃéżŃāĪŃā╝ŃéĖ
<!DOCTYPE html PUBLIC "-//W3C//DTD XHTML 1.0 Transitional//EN" "http://www.w3.org/TR/xhtml1/DTD/xhtml1-transitional.dtd">
<html xmlns="http://www.w3.org/1999/xhtml" xml:lang="ja" lang="ja">
<head>
<meta http-equiv="Content-Type" content="text/html; charset=utf-8" />
<meta http-equiv="Content-Language" content="ja" />
<meta http-equiv="Content-Script-Type" content="text/javascript" />
<meta http-equiv="Content-Style-Type" content="text/css" />
<meta http-equiv="imagetoolbar" content="no" />
<title>Text Resizing With jQuery | Ķ©ŁńĮ«ŃéĄŃā│ŃāŚŃā½</title>
<link rel="stylesheet" type="text/css" href="/content/lib/global.css" />
<!-- JS -->
<script type="text/javascript" src="/content/lib/jquery/jquery-1.2.1.min.js"></script>
<script type="text/javascript" src="/content/lib/jquery/jquery.flydom-3.1.1.js"></script>
<script type="text/javascript">
$(function() {
// ŃāĢŃé®Ńā│ŃāłŃéĄŃéżŃé║ŃéÆŃā¬Ńé╗ŃāāŃāł
var originalFontSize = $('html').css('font-size');
$(".resetFont").click(function(){
$('html').css('font-size', originalFontSize);
});
// ŃāĢŃé®Ńā│ŃāłŃéĄŃéżŃé║ŃéÆÕż¦ŃüŹŃüÅ
$(".increaseFont").click(function(){
var currentFontSize = $('html').css('font-size');
var currentFontSizeNum = parseFloat(currentFontSize, 10);
var newFontSize = currentFontSizeNum*1.2;
$('html').css('font-size', newFontSize);
return false;
});
// ŃāĢŃé®Ńā│ŃāłŃéĄŃéżŃé║ŃéÆÕ░ÅŃüĢŃüÅ
$(".decreaseFont").click(function(){
var currentFontSize = $('html').css('font-size');
var currentFontSizeNum = parseFloat(currentFontSize, 10);
var newFontSize = currentFontSizeNum*0.8;
$('html').css('font-size', newFontSize);
return false;
});
});
</script>
<!-- CSS -->
<style type="text/css">
* {
font-size:100%;
}
body {
font-size:100%;
}
.pixels {
font-size:16px;
line-height:30px;
margin-bottom:20px;
padding:20px;
background-color:#222;
color:#fff;
}
.point {
font-size:12pt;
line-height:30px;
margin-bottom:20px;
padding:20px;
color:#fff;
background-color:#222;
}
.em {
font-size:1em;
margin-bottom:20px;
padding:20px;
color:#fff;
background-color:#222;
}
.percentage {
font-size:100%;
margin-bottom:20px;
padding:20px;
color:#fff;
background-color:#222;
}
.undefined {
margin-bottom:20px;
padding:20px;
color:#fff;
background-color:#222;
}
#changeFont {
position:absolute;
top:10px;
right:10px;
background-color:#333;
padding:5px;
}
.increaseFont,
.decreaseFont,
.resetFont {
color:#ccc;
font-size:14px;
float:left;
margin:10px;
}
</style>
</head>
<body>
<div id="wrap">
<h1><a href='http://www.shopdev.co.uk/blog/text-resizing-with-jquery/'>Text Resizing With jQuery</a> | Ķ©ŁńĮ«ŃéĄŃā│ŃāŚŃā½</h1>
<!-- CODE -->
<div class="pixels">ŃüōŃü«divĶ”üń┤ĀŃü«Ńé»Ńā®Ńé╣Ńü½Ńü»ŃĆīpxŃĆŹŃü¦font-sizeŃāŚŃāŁŃāæŃāåŃéŻŃüīµīćÕ«ÜŃüĢŃéīŃü”ŃüäŃüŠŃüÖŃĆé</div>
<div class="point">ŃüōŃü«divĶ”üń┤ĀŃü«Ńé»Ńā®Ńé╣Ńü½Ńü»ŃĆīptŃĆŹŃü¦font-sizeŃāŚŃāŁŃāæŃāåŃéŻŃüīµīćÕ«ÜŃüĢŃéīŃü”ŃüäŃüŠŃüÖŃĆé</div>
<div class="em">ŃüōŃü«divĶ”üń┤ĀŃü«Ńé»Ńā®Ńé╣Ńü½Ńü»ŃĆüŃĆīemŃĆŹŃü¦font-sizeŃāŚŃāŁŃāæŃāåŃéŻŃüīµīćÕ«ÜŃüĢŃéīŃü”ŃüäŃüŠŃüÖŃĆé</div>
<div class="percentage">
ŃüōŃü«divĶ”üń┤ĀŃü«Ńé»Ńā®Ńé╣Ńü½Ńü»ŃĆüĶ”¬Ķ”üń┤ĀŃü½Õ»ŠŃüÖŃéŗŃāæŃā╝Ńé╗Ńā│ŃāåŃā╝ŃéĖŃü¦font-sizeŃāŚŃāŁŃāæŃāåŃéŻŃüīµīćÕ«ÜŃüĢŃéīŃü”ŃüäŃüŠŃüÖŃĆé
</div>
<div class="undefined">
ŃüōŃü«divĶ”üń┤ĀŃü«Ńé»Ńā®Ńé╣Ńü½Ńü»ŃĆüfont-sizeŃāŚŃāŁŃāæŃāåŃéŻŃüīµīćÕ«ÜŃüĢŃéīŃü”ŃüäŃüŠŃüøŃéōŃĆé
</div>
<div id="changeFont">
<a href="#" class="increaseFont">Õż¦ŃüŹŃüÅ</a>
<a href="#" class="decreaseFont">Õ░ÅŃüĢŃüÅ</a>
<a href="#" class="resetFont">Ńā¬Ńé╗ŃāāŃāł</a>
</div><!-- #changeFont -->
<!-- CODE / -->
</div>
</body>
</html>
The jQuery Feed Menu
ŃāÜŃā╝ŃéĖŃü«ŃāĪŃé┐µāģÕĀ▒ŃüŗŃéēŃāĢŃéŻŃā╝ŃāēµāģÕĀ▒ŃéÆÕÅ¢ÕŠŚŃüŚŃü”ŃāĢŃéŻŃā╝ŃāēõĖĆŃāĪŃāŗŃāźŃā╝ŃéÆŃéóŃéżŃé│Ńā│ĶĪ©ńż║
unknown
The jQuery Feed Menu
’╝╗CSS’╝Įfeed_menu.cssŃĆüfeed_menu_ie.css
ŃāÜŃā╝ŃéĖŃü«metaµāģÕĀ▒ŃüŗŃéēRSSŃĆüAtomŃü¬Ńü®Ńü«ŃāĢŃéŻŃā╝ŃāēµāģÕĀ▒ŃéÆÕÅ¢ÕŠŚŃüŚŃü”ŃāĢŃéŻŃā╝ŃāēŃāĪŃāŗŃāźŃā╝ŃéÆŃéóŃéżŃé│Ńā│ĶĪ©ńż║ŃüÖŃéŗŃā®ŃéżŃā¢Ńā®Ńā¬ŃĆé ŃéóŃéżŃé│Ńā│ŃéÆŃé»Ńā¬ŃāāŃé»ŃüÖŃéŗŃü©ŃĆüÕÅ¢ÕŠŚŃüŚŃü¤ŃāĢŃéŻŃā╝ŃāēŃāĪŃāŗŃāźŃā╝ŃüīĶĪ©ńż║ŃüĢŃéīŃüŠŃüÖŃĆé AtomÕĮóÕ╝ÅŃü«ŃāĢŃéŻŃā╝ŃāēŃü«Ńü┐ŃĆüRSSÕĮóÕ╝ÅŃü«ŃāĢŃéŻŃā╝ŃāēŃü«Ńü┐ŃéÆĶĪ©ńż║ŃüÖŃéŗŃüōŃü©ŃééÕÅ»ĶāĮŃü¦ŃüÖŃĆé ŃüŠŃü¤µÜŚŃéüŃü«ĶāīµÖ»ńö©ŃĆüµśÄŃéŗŃéüŃü«ĶāīµÖ»ńö©Ńü«ŃāåŃā╝Ńā×Ńééńö©µäÅŃüĢŃéīŃü”ŃüäŃüŠŃüÖŃü«Ńü¦ŃĆüŃéĄŃéżŃāłŃü«ŃāćŃéČŃéżŃā│Ńü½ÕÉłŃéÅŃüøŃü”Ķ©ŁńĮ«ŃüÖŃéŗŃüōŃü©ŃüīŃü¦ŃüŹŃüŠŃüÖŃĆé
 Ķ©ŁńĮ«ŃéżŃāĪŃā╝ŃéĖ
<!DOCTYPE html PUBLIC "-//W3C//DTD XHTML 1.0 Transitional//EN" "http://www.w3.org/TR/xhtml1/DTD/xhtml1-transitional.dtd">
<html xmlns="http://www.w3.org/1999/xhtml" xml:lang="ja" lang="ja">
<head>
<meta http-equiv="Content-Type" content="text/html; charset=utf-8" />
<meta http-equiv="Content-Language" content="ja" />
<meta http-equiv="Content-Script-Type" content="text/javascript" />
<meta http-equiv="Content-Style-Type" content="text/css" />
<meta http-equiv="imagetoolbar" content="no" />
<title>The jQuery Feed Menu | Ķ©ŁńĮ«ŃéĄŃā│ŃāŚŃā½</title>
<link rel="alternate" type="application/rss+xml" title="RSS 1.0 (RDF)" href="http://phpjavascriptroom.com/index.rdf" />
<link rel="alternate" type="application/rss+xml" title="RSS 2.0 (XML)" href="http://phpjavascriptroom.com/index.xml" />
<script src="https://ajax.googleapis.com/ajax/libs/jquery/1.2.6/jquery.min.js"></script>
<script type="text/javascript" src="/content/lib/jquery_feed_menu/feed_menu.js"></script>
<link rel="stylesheet" type="text/css" href="/content/lib/global.css" />
<link rel="stylesheet" type="text/css" href="/content/lib/jquery_feed_menu/feed_menu.css" />
<!--[if lte IE 7]>
<link rel="stylesheet" type="text/css" href="/content/lib/jquery_feed_menu/feed_menu_ie.css" />
<![endif]-->
<script type="text/javascript">
$ = jQuery;
</script>
</head>
<body>
<div id="wrap">
<h1><a href='http://www.komodomedia.com/blog/2008/10/jquery-feed-menus/'>The jQuery Feed Menu</a> | Ķ©ŁńĮ«ŃéĄŃā│ŃāŚŃā½</h1>
<span id="jquery_feed_menu_example_1"></span>
<script type="text/javascript">
//<![CDATA[
var fm = new FeedMenu();fm.write('#jquery_feed_menu_example_1');
//]]>
</script>
<h2>RSS Feeds</h2>
RSS Feeds: <span id="jquery_feed_menu_example_3"></span>
<script type="text/javascript">
//<![CDATA[
var fm3 = new FeedMenu('link'+String.fromCharCode(91) +'type*=rss'+String.fromCharCode(93));
fm3.write('#jquery_feed_menu_example_3');
//]]>
</script>
<h2>ŃāåŃā╝Ńā×Ńé»Ńā®Ńé╣</h2>
<span id="jquery_feed_menu_example_8"></span>
<script type="text/javascript">
//<![CDATA[
var fm8= new FeedMenu();
fm8.write('#jquery_feed_menu_example_8');
//]]>
</script>
<span id="jquery_feed_menu_example_4"></span>
<script type="text/javascript">
//<![CDATA[
var fm4 = new FeedMenu(null,'wood');
fm4.write('#jquery_feed_menu_example_4');
//]]>
</script>
<span id="jquery_feed_menu_example_5"></span>
<script type="text/javascript">
//<![CDATA[
var fm5 = new FeedMenu(null,'azure');
fm5.write('#jquery_feed_menu_example_5');
//]]>
</script>
<br><br>
<span style="background:#111;padding:1em 0.5em;margin-right:0.5em;" class="jquery_feed_menu_example_6"></span>
<span style="background:#666600;padding:1em 0.5em;margin-right:0.5em;" class="jquery_feed_menu_example_6"></span>
<span style="background:#663300;padding:1em 0.5em;margin-right:0.5em;" class="jquery_feed_menu_example_6"></span>
Transparent on Dark (for dark backgrounds)
<script type="text/javascript">
//<![CDATA[
var fm6 = new FeedMenu(null,'trans_on_dark');
fm6.write('.jquery_feed_menu_example_6');
//]]>
</script>
<br><br><br>
<span style="background:#DDD;padding:1em 0.5em;margin-right:0.5em;" class="jquery_feed_menu_example_7"></span>
<span style="background:#33FFFF;padding:1em 0.5em;margin-right:0.5em;" class="jquery_feed_menu_example_7"></span>
<span style="background:#FFCCFF;padding:1em 0.5em;margin-right:0.5em;" class="jquery_feed_menu_example_7"></span>
Transparent on Light (for light backgrounds)
<script type="text/javascript">
//<![CDATA[
var fm7= new FeedMenu(null,'trans_on_light');
fm7.write('.jquery_feed_menu_example_7');
//]]>
</script>
<br><br>
<h2>Õż¢ķā©ŃéĄŃéżŃāłŃü¬Ńü®ŃĆüõ╗╗µäÅŃü«RSSŃéÆŃāĢŃéŻŃā╝ŃāēŃāĪŃāŗŃāźŃā╝Ńü½ĶĪ©ńż║</h2>
<span id="jquery_feed_menu_example_9"></span>
<script type="text/javascript">//<![CDATA[
var oCustomLinks = [
{
title:'RSS Feed',
href:"http://phpjavascriptroom.com/index.xml"
},
{
title:'Subscribe with Bloglines',
href:"http://www.bloglines.com/sub/http://feeds.feedburner.com/komodomedia"
},
{
title:'Subscribe with Google Reader',
href:"http://www.google.com/reader/view/feed/http://feeds.feedburner.com/komodomedia"
}
];
var fm9 = new FeedMenu(oCustomLinks);
fm9.write('#jquery_feed_menu_example_9');
//]]>
</script>
</div>
</body>
</html>
Unobtrusive IFrame with jQuery
Ńā¬Ńā│Ńé»ŃéÆŃéżŃā│Ńā®ŃéżŃā│ŃāĢŃā¼Ńā╝ŃāĀŃü½ÕżēµÅø
unknown
Unobtrusive IFrame with jQuery’╝łķģŹÕĖāńĄéõ║å’╝ē
µīćÕ«ÜŃüŚŃü¤µØĪõ╗ČŃü½Ńā×ŃāāŃāüŃüŚŃü¤aĶ”üń┤ĀŃéÆiframeŃü½ÕżēµÅøŃüÖŃéŗjQueryŃāŚŃā®Ńé░ŃéżŃā│ŃĆé
aĶ”üń┤ĀŃü«hrefÕ▒׵ƦŃü½µīćÕ«ÜŃüŚŃü¤Ńā¬Ńā│Ńé»ÕģłŃéÆŃéżŃā│Ńā®ŃéżŃā│ŃāĢŃā¼Ńā╝ŃāĀÕåģŃü½ĶĪ©ńż║ŃüŚŃüŠŃüÖŃĆé ŃāĢŃā¼Ńā╝ŃāĀŃü«Õ╣ģŃĆüķ½śŃüĢŃĆüŃé╣Ńé»ŃāŁŃā╝Ńā½Ńü«µ£ēńäĪŃĆüŃāĢŃā¼Ńā╝ŃāĀŃā£Ńā╝ŃāĆŃā╝ŃĆüŃāĢŃā¼Ńā╝ŃāĀŃü«õĖŖõĖŗÕĘ”ÕÅ│ŃéÆŃé¬ŃāŚŃéĘŃā¦Ńā│Ńü¦µīćÕ«ÜŃüÖŃéŗŃüōŃü©ŃüīŃü¦ŃüŹŃüŠŃüÖŃĆé ń£üńĢźŃüŚŃü¤ÕĀ┤ÕÉłŃü»ŃüéŃéēŃüŗŃüśŃéüÕ«ÜńŠ®ŃüĢŃéīŃü”ŃüäŃéŗŃāćŃāĢŃé®Ńā½ŃāłÕĆżŃüīķü®ńö©ŃüĢŃéīŃüŠŃüÖŃĆé
Ńé¬ŃāŚŃéĘŃā¦Ńā│Ńü»ŃĆüaĶ”üń┤ĀŃü«classÕ▒׵ƦŃü½Ńé¬ŃāŚŃéĘŃā¦Ńā│ÕÉŹ:µĢ░ÕĆżŃüŠŃü¤Ńü»µ¢ćÕŁŚÕłŚŃü«ÕĮóÕ╝ÅŃü¦µīćÕ«ÜŃüŚŃüŠŃüÖŃĆé
ĶżćµĢ░µīćÕ«ÜŃüÖŃéŗÕĀ┤ÕÉłŃü»ŃĆüÕŹŖĶ¦ÆŃé╣ŃāÜŃā╝Ńé╣Õī║ÕłćŃéŖŃü¦µīćÕ«ÜŃüŚŃüŠŃüÖŃĆé
õŠŗŃüłŃü░ŃĆüŃāĢŃā¼Ńā╝ŃāĀŃü«Õ╣ģ’╝Ü450pxŃĆüŃāĢŃā¼Ńā╝ŃāĀŃü«Õ╣ģ’╝Ü300pxŃĆüŃé╣Ńé»ŃāŁŃā╝Ńā½Ńü¬ŃüŚŃü½ŃüŚŃü¤ŃüäÕĀ┤ÕÉłŃü»ŃĆü<a class='iframe w:450 h300 sc:no'></a>Ńü«ŃéłŃüåŃü½µīćÕ«ÜŃüŚŃüŠŃüÖŃĆé
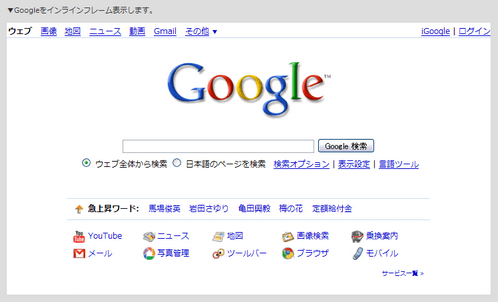 Ķ©ŁńĮ«ŃéżŃāĪŃā╝ŃéĖ
<!DOCTYPE html PUBLIC "-//W3C//DTD XHTML 1.0 Transitional//EN" "http://www.w3.org/TR/xhtml1/DTD/xhtml1-transitional.dtd">
<html xmlns="http://www.w3.org/1999/xhtml" xml:lang="ja" lang="ja">
<head>
<meta http-equiv="Content-Type" content="text/html; charset=utf-8" />
<meta http-equiv="Content-Language" content="ja" />
<meta http-equiv="Content-Script-Type" content="text/javascript" />
<meta http-equiv="Content-Style-Type" content="text/css" />
<meta http-equiv="imagetoolbar" content="no" />
<title>Unobtrusive IFrame with jQuery | Ķ©ŁńĮ«ŃéĄŃā│ŃāŚŃā½</title>
<link rel="stylesheet" type="text/css" href="/content/lib/global.css" />
<!-- JS -->
<script src="https://ajax.googleapis.com/ajax/libs/jquery/1.2.6/jquery.min.js"></script>
<script type="text/javascript" src="/content/lib/jquery/jquery_iframe.js"></script>
<script type="text/javascript">
$(function(){
$('a.iframe').iframe();
});
</script>
<!-- CSS -->
<style type="text/css">
body { background:#ddd; }
</style>
</head>
<body>
<div id="wrap">
<h1><a href='http://33rockers.com/2006/12/05/unobtrusive-iframe-with-jquery/'>Unobtrusive IFrame with jQuery</a> | Ķ©ŁńĮ«ŃéĄŃā│ŃāŚŃā½</h1>
<p>Ō¢╝GoogleŃéÆŃéżŃā│Ńā®ŃéżŃā│ŃāĢŃā¼Ńā╝ŃāĀĶĪ©ńż║ŃüŚŃüŠŃüÖŃĆé</p>
<!-- CODE -->
<a href="http://www.google.co.jp/" class="iframe w:800 h:450 sc:no">Google</a>
<!-- / CODE -->
</div>
</body>
</html>
ŃāŁŃā╝Ńā½Ńé¬Ńā╝ŃāÉŃā╝
ŃāŁŃā╝Ńā½Ńé¬Ńā╝ŃāÉŃā╝
unknown
- Easy Image Rollover Script With jQuery
ń░ĪÕŹśŃü¬ńö╗ÕāÅŃü«ŃāŁŃā╝Ńā½Ńé¬Ńā╝ŃāÉŃā╝ - jQueryRollover v1.0
ńö╗ÕāÅ’╝łimgĶ”üń┤Ā’╝ēŃü©ńö╗ÕāÅŃā£Ńé┐Ńā│’╝łinput type=ŌĆØimageŌĆØ’╝ēŃü«ŃāŁŃā╝Ńā½Ńé¬Ńā╝ŃāÉŃā╝
Internal Links with Favicon using jQuery
jQueryŃéÆõĮ┐ńö©ŃüŚŃü”ŃĆüń░ĪÕŹśŃü½ńö╗ÕāÅŃü«ŃāŁŃā╝Ńā½Ńé¬Ńā╝ŃāÉŃā╝ŃéÆĶĪīŃüåµ¢╣µ│ĢŃüīµÄ▓Ķ╝ēŃüĢŃéīŃü”ŃüäŃüŠŃüÖŃĆé
ŃāŁŃā╝Ńā½Ńé¬Ńā╝ŃāÉŃā╝ŃüÖŃéŗńö╗ÕāÅ’╝łimgĶ”üń┤Ā’╝ēŃüŠŃü¤Ńü»ńö╗ÕāÅŃā£Ńé┐Ńā│’╝łinput type="image"’╝ēŃü½ŃĆīroŃĆŹŃé»Ńā®Ńé╣ŃéƵīćÕ«ÜŃüŚŃüŠŃüÖŃĆé Ńā×Ńé”Ńé╣Ńé¬Ńā╝ŃāÉŃā╝µÖéŃü½ŃĆüŃüØŃü«Ķ”üń┤ĀŃü«srcÕ▒׵ƦŃéÆÕÅ¢ÕŠŚŃüŚŃĆüµŁŻĶ”ÅĶĪ©ńÅŠŃéÆõĮ┐ńö©ŃüŚŃü”ńö╗ÕāÅŃü«ŃāĢŃéĪŃéżŃā½ÕÉŹ’╝ŗŃĆī_oŃĆŹŃü«ńö╗ÕāÅŃéÆŃāŁŃā╝Ńā½Ńé¬Ńā╝ŃāÉŃā╝ńö╗ÕāÅŃü©ŃüŚŃü”ĶĪ©ńż║ŃüÖŃéŗõ╗ĢńĄäŃü┐Ńü½Ńü¬ŃüŻŃü”ŃüäŃüŠŃüÖŃĆé
<!DOCTYPE html PUBLIC "-//W3C//DTD XHTML 1.0 Transitional//EN" "http://www.w3.org/TR/xhtml1/DTD/xhtml1-transitional.dtd">
<html xmlns="http://www.w3.org/1999/xhtml" xml:lang="ja" lang="ja">
<head>
<meta http-equiv="Content-Type" content="text/html; charset=utf-8" />
<meta http-equiv="Content-Language" content="ja" />
<meta http-equiv="Content-Script-Type" content="text/javascript" />
<meta http-equiv="Content-Style-Type" content="text/css" />
<meta http-equiv="imagetoolbar" content="no" />
<title>Easy Image Rollover Script With jQuery | Ķ©ŁńĮ«ŃéĄŃā│ŃāŚŃā½</title>
<link rel="stylesheet" type="text/css" href="/content/lib/global.css" />
<!-- JS -->
<script src="https://ajax.googleapis.com/ajax/libs/jquery/1.3.2/jquery.min.js"></script>
<script type="text/javascript">
$(function(){
PEPS.rollover.init();
});
PEPS = {};
PEPS.rollover={
init:function(){
this.preload();
$(".ro").hover(
function(){ $(this).attr( 'src', PEPS.rollover.newimage($(this).attr('src')) ); },
function(){ $(this).attr( 'src', PEPS.rollover.oldimage($(this).attr('src')) ); }
);
},
preload:function(){
$(window).bind('load', function(){
$('.ro').each( function( key, elm ) { $('<img>').attr( 'src', PEPS.rollover.newimage( $(this).attr('src') ) ); });
});
},
newimage:function(src){
return src.substring( 0, src.search(/(\.[a-z]+)$/) ) + '_o' + src.match(/(\.[a-z]+)$/)[0];
},
oldimage:function(src){
return src.replace(/_o\./, '.');
}
};
</script>
</head>
<body>
<div id="wrap">
<h1><a href='http://peps.ca/blog/easy-image-rollover-script-with-jquery/'>Easy Image Rollover Script With jQuery</a> | Ķ©ŁńĮ«ŃéżŃéĄŃā│ŃāŚŃā½</h1>
<!-- CODE -->
<h2>imgĶ”üń┤ĀŃü«ŃāŁŃā╝Ńā½Ńé¬Ńā╝ŃāÉŃā╝</h2>
<p><img src="/content/img/ajax/btn.gif" class="ro" /></p>
<h2>ńö╗ÕāÅŃā£Ńé┐Ńā│’╝ł<nput type="image" />’╝ēŃü«ŃāŁŃā╝Ńā½Ńé¬Ńā╝ŃāÉŃā╝</h2>
<p><input type="image" src="/content/img/ajax/btn.gif" class="ro" /></p>
<!-- / CODE -->
</div>
</body>
</html>
jQueryRollover
ńö╗ÕāÅ’╝łimgĶ”üń┤Ā’╝ēŃü©ńö╗ÕāÅŃā£Ńé┐Ńā│’╝łinput type='image'’╝ēŃü«ŃāŁŃā╝Ńā½Ńé¬Ńā╝ŃāÉŃā╝ŃéÆń░ĪÕŹśŃü½Õ«¤ĶŻģŃü¦ŃüŹŃéŗjQueryŃāŚŃā®Ńé░ŃéżŃā│ŃĆé
ŃāŁŃā╝Ńā½Ńé¬Ńā╝ŃāÉŃā╝µÖéŃü«ńö╗ÕāÅŃü«ŃāĢŃéĪŃéżŃā½ÕÉŹŃü«µ£½Õ░ŠŃü½ńē╣Õ«ÜŃü«µ¢ćÕŁŚ(ŃāćŃāĢŃé®Ńā½ŃāłŃü»ŃĆī_onŃĆŹ’╝ēŃéÆõ╗śŃüæŃéŗŃā½Ńā╝Ńā½ŃüīŃüéŃéŖŃüŠŃüÖŃĆé
ŃüØŃéīõ╗źÕż¢Ńü½Õżēµø┤ŃüŚŃü¤ŃüäÕĀ┤ÕÉłŃü»ŃĆü$('div#nav a img').rollover('_over');Ńü«ŃéłŃüåŃü½ń¼¼1Õ╝ĢµĢ░Ńü½µīćÕ«ÜŃüŚŃüŠŃüÖŃĆé
ŃüŠŃü¤ŃĆüķĆÜÕĖĖµÖéŃü«ńö╗ÕāÅŃü©ŃāŁŃā╝Ńā½Ńé¬Ńā╝ŃāÉŃā╝µÖéŃü«ńö╗ÕāÅŃü»ÕÉīõĖĆŃāĢŃé®Ńā½ŃāĆÕåģŃü½ńĮ«ŃüäŃü”ŃüŖŃüÅÕ┐ģĶ”üŃüīŃüéŃéŖŃüŠŃüÖŃĆé
 Ķ©ŁńĮ«ŃéżŃāĪŃā╝ŃéĖ
<!DOCTYPE html PUBLIC "-//W3C//DTD XHTML 1.0 Transitional//EN" "http://www.w3.org/TR/xhtml1/DTD/xhtml1-transitional.dtd">
<html xmlns="http://www.w3.org/1999/xhtml" xml:lang="ja" lang="ja">
<head>
<meta http-equiv="Content-Type" content="text/html; charset=utf-8" />
<meta http-equiv="Content-Language" content="ja" />
<meta http-equiv="Content-Script-Type" content="text/javascript" />
<meta http-equiv="Content-Style-Type" content="text/css" />
<meta http-equiv="imagetoolbar" content="no" />
<title>jQueryRollover v1.0 | Ķ©ŁńĮ«ŃéĄŃā│ŃāŚŃā½</title>
<link rel="stylesheet" type="text/css" href="/content/lib/global.css" />
<!-- JS -->
<script type="text/javascript" src="http://ajax.googleapis.com/ajax/libs/jquery/1.3.2/jquery.min.js"></script>
<script type="text/javascript" src="/content/lib/jquery/jquery.rollover.js"></script>
<script type="text/javascript">
$(function(){
/* ńö╗ÕāÅ’╝łimgĶ”üń┤Ā’╝ēŃü«ŃāŁŃā╝Ńā½Ńé¬Ńā╝ŃāÉŃā╝ */
$('div#nav a img').rollover('_o');
/* ńö╗ÕāÅŃā£Ńé┐Ńā│’╝łinput type="image"’╝ēŃü«ŃāŁŃā╝Ńā½Ńé¬Ńā╝ŃāÉŃā╝ */
$('form input:image').rollover('_o')
});
</script>
<!-- CSS -->
<style type="text/css">
</style>
</head>
<body>
<div id="wrap">
<h1><a href='http://rewish.org/javascript/jquery_rollover_plugin'>jQueryRollover v1.0</a> | Ķ©ŁńĮ«ŃéĄŃā│ŃāŚŃā½</h1>
<!-- CODE -->
<h2>ńö╗ÕāÅ’╝łimgĶ”üń┤Ā’╝ēŃü«ŃāŁŃā╝Ńā½Ńé¬Ńā╝ŃāÉŃā╝</h2>
<div id="nav">
<a href="#"><img src="/content/img/ajax/btn.gif" alt="Button" /></a>
</div>
<h2>ńö╗ÕāÅŃā£Ńé┐Ńā│’╝łinput type="image"’╝ēŃü«ŃāŁŃā╝Ńā½Ńé¬Ńā╝ŃāÉŃā╝</h2>
<form>
<input type="image" src="/content/img/ajax/btn.gif" alt="Button" /></a>
</form>
<!-- / CODE -->
</div>
</body>
</html>
µīćÕ«ÜŃüŚŃü¤Ķ”üń┤ĀŃüĀŃüæŃéÆÕŹ░ÕłĘ
2009/4/12
µīćÕ«ÜŃüŚŃü¤Ķ”üń┤ĀŃüĀŃüæŃéÆÕŹ░ÕłĘŃüÖŃéŗjQueryŃāŚŃā®Ńé░ŃéżŃā│ŃĆé
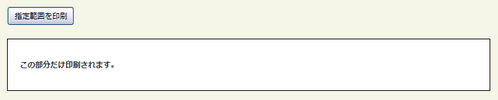 Ķ©ŁńĮ«ŃéżŃāĪŃā╝ŃéĖ
jPrint
<!DOCTYPE html PUBLIC "-//W3C//DTD XHTML 1.0 Transitional//EN" "http://www.w3.org/TR/xhtml1/DTD/xhtml1-transitional.dtd">
<html xmlns="http://www.w3.org/1999/xhtml" xml:lang="ja" lang="ja">
<head>
<meta http-equiv="Content-Type" content="text/html; charset=utf-8" />
<meta http-equiv="Content-Language" content="ja" />
<meta http-equiv="Content-Script-Type" content="text/javascript" />
<meta http-equiv="Content-Style-Type" content="text/css" />
<meta http-equiv="imagetoolbar" content="no" />
<title>jPrint | Ķ©ŁńĮ«ŃéĄŃā│ŃāŚŃā½</title>
<link rel="stylesheet" type="text/css" href="/content/lib/global.css" />
<!-- JS -->
<script type="text/javascript" src="http://ajax.googleapis.com/ajax/libs/jquery/1.3.2/jquery.min.js"></script>
<script type="text/javascript" src="/content/lib/jquery/jprint-1.0.js"></script>
<script type="text/javascript">
$(function(){
$('#btn_print').click(function(){
$("#printarea").jPrint();
});
});
</script>
<!-- CSS -->
<style type="text/css">
#printarea { margin:20px 0; padding:20px; border:2px solid #000; background-color:#fff; font-weight:bold; }
</style>
</head>
<body>
<div id="wrap">
<h1><a href='http://reinaldojunior.net/lab/jquery/jprint/'>jPrint</a> | Ķ©ŁńĮ«ŃéĄŃā│ŃāŚŃā½</h1>
<!-- CODE -->
<input type="button" id="btn_print" value="µīćÕ«Üń»äÕø▓ŃéÆÕŹ░ÕłĘ" />
<div id="printarea">
<p>ŃüōŃü«ķā©ÕłåŃüĀŃüæÕŹ░ÕłĘŃüĢŃéīŃüŠŃüÖŃĆé</p>
</div>
<!-- / CODE -->
</div>
</body>
</html>
jPrintArea
<!DOCTYPE html PUBLIC "-//W3C//DTD XHTML 1.0 Transitional//EN" "http://www.w3.org/TR/xhtml1/DTD/xhtml1-transitional.dtd">
<html xmlns="http://www.w3.org/1999/xhtml" xml:lang="ja" lang="ja">
<head>
<meta http-equiv="Content-Type" content="text/html; charset=utf-8" />
<meta http-equiv="Content-Language" content="ja" />
<meta http-equiv="Content-Script-Type" content="text/javascript" />
<meta http-equiv="Content-Style-Type" content="text/css" />
<meta http-equiv="imagetoolbar" content="no" />
<title>jPrintArea | Ķ©ŁńĮ«ŃéĄŃā│ŃāŚŃā½</title>
<link rel="stylesheet" type="text/css" href="/content/lib/global.css" />
<!-- JS -->
<script type="text/javascript" src="http://ajax.googleapis.com/ajax/libs/jquery/1.3.2/jquery.min.js"></script>
<script type="text/javascript" src="/content/lib/jquery/jquery.jPrintArea.js"></script>
<script type="text/javascript">
$(function(){
$('#btn_print').click(function(){
$.jPrintArea("#printarea");
});
});
</script>
<!-- CSS -->
<style type="text/css">
#printarea { margin:20px 0; padding:20px; border:2px solid #000; background-color:#fff; font-weight:bold; }
</style>
</head>
<body>
<div id="wrap">
<h1><a href='http://plugins.jquery.com/project/jPrintArea'>jPrintArea</a> | Ķ©ŁńĮ«ŃéĄŃā│ŃāŚŃā½</h1>
<!-- CODE -->
<input type="button" id="btn_print" value="µīćÕ«Üń»äÕø▓ŃéÆÕŹ░ÕłĘ" />
<div id="printarea">
<p>ŃüōŃü«ķā©ÕłåŃüĀŃüæÕŹ░ÕłĘŃüĢŃéīŃüŠŃüÖŃĆé</p>
</div>
<!-- / CODE -->
</div>
</body>
</html>
PrintArea
<!DOCTYPE html PUBLIC "-//W3C//DTD XHTML 1.0 Transitional//EN" "http://www.w3.org/TR/xhtml1/DTD/xhtml1-transitional.dtd">
<html xmlns="http://www.w3.org/1999/xhtml" xml:lang="ja" lang="ja">
<head>
<meta http-equiv="Content-Type" content="text/html; charset=utf-8" />
<meta http-equiv="Content-Language" content="ja" />
<meta http-equiv="Content-Script-Type" content="text/javascript" />
<meta http-equiv="Content-Style-Type" content="text/css" />
<meta http-equiv="imagetoolbar" content="no" />
<title>PrintArea | Ķ©ŁńĮ«ŃéĄŃā│ŃāŚŃā½</title>
<link rel="stylesheet" type="text/css" href="/content/lib/global.css" />
<!-- JS -->
<script type="text/javascript" src="http://ajax.googleapis.com/ajax/libs/jquery/1.3.2/jquery.min.js"></script>
<script type="text/javascript" src="/content/lib/jquery/jquery.PrintArea.js"></script>
<script type="text/javascript">
$(function(){
$('#btn_print').click(function(){
$("#printarea").printArea();
});
});
</script>
<!-- CSS -->
<style type="text/css">
#printarea { margin:20px 0; padding:20px; border:2px solid #000; background-color:#fff; font-weight:bold; }
</style>
</head>
<body>
<div id="wrap">
<h1><a href='http://plugins.jquery.com/project/PrintArea'>PrintArea</a> | Ķ©ŁńĮ«ŃéĄŃā│ŃāŚŃā½</h1>
<!-- CODE -->
<input type="button" id="btn_print" value="µīćÕ«Üń»äÕø▓ŃéÆÕŹ░ÕłĘ" />
<div id="printarea">
<p>ŃüōŃü«ķā©ÕłåŃüĀŃüæÕŹ░ÕłĘŃüĢŃéīŃüŠŃüÖŃĆé</p>
</div>
<!-- / CODE -->
</div>
</body>
</html>